
Dakota 4WD V6-3.9L VIN X (1997)
Constant Velocity Joint Boot: Service and Repair
Removal and Installation
REMOVAL
1. Remove axle driveshaft from vehicle.
2. Remove outer C/V joint.
3. Remove outer C/V joint small clamp and remove boot.
4. Remove inner C/V joint boot clamps and remove boot.
NOTE: The lubricant amounts included with replacement boots are different for inner and outer C/V joints. Apply only the specified lubricant amount
to each C/V joint.
INSTALLATION
1. Clean the C/V joints and shaft of all old grease and foreign matter.
2. Slide the inner C/V joint boot up the shaft and insert the lip located within the small-diameter end of the boot into the shaft groove.
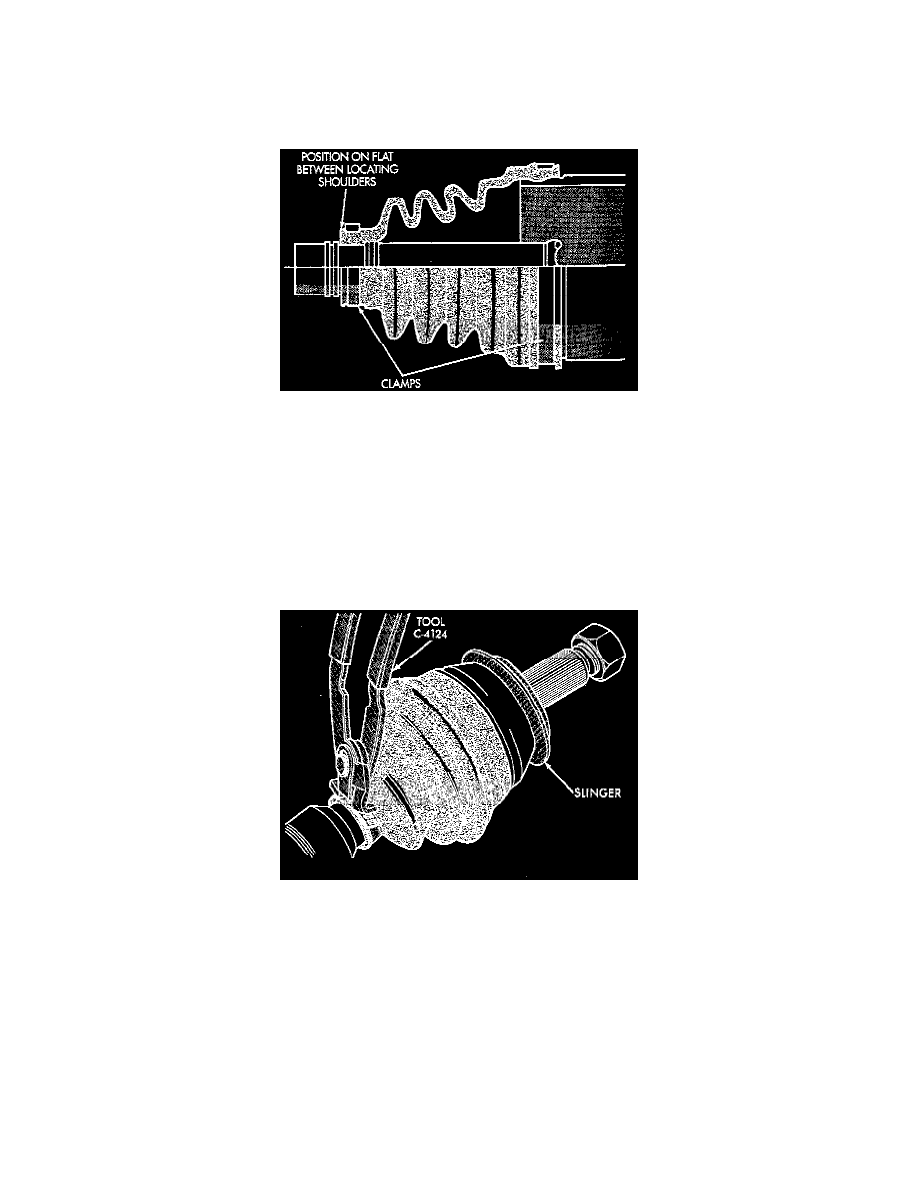
3. Retain the small-diameter of the boot on the shaft with a ladder-type clamp in the boot groove. Verify that the boot and lip are properly positioned
on the intermediate shaft. Position the clamp locating tabs in the slots and tighten the clamp.
4. Compress the clamp bridge with Remover/Installer C-4124, or equivalent. Squeeze the tool handles to complete the tightening of the clamp. Care
must be exercised when using the tool to avoid cutting through the clamp bridge or damaging the boot.
5. Position the large-diameter end of the boot or the C/V joint housing.
6. After the inner joint boot small clamp is installed, the inboard hub must be set to a service build length.
a. Compress the inner hub down the connector shaft.
b. Use a small blunt drift between the large end and the boot seal to relieve the pressure.