
Dakota 4WD V8-4.7L VIN N (2000)
Turn Signal Flasher: Service and Repair
WARNING: ON VEHICLES EQUIPPED WITH AIR-BAGS, REFER TO AIRBAGS AND SEAT BELTS/AIRBAGS BEFORE
ATTEMPTING ANY STEERING WHEEL, STEERING COLUMN, OR INSTRUMENT PANEL COMPONENT DIAGNOSIS OR SERVICE.
FAILURE TO TAKE THE PROPER PRECAUTIONS COULD RESULT IN ACCIDENTAL AIR-BAG DEPLOYMENT AND POSSIBLE
PERSONAL INJURY.
REMOVAL
1. Disconnect and isolate the battery negative cable.
2. Remove the steering column opening cover from the instrument panel. Refer to Steering Column Opening Cover in the Removal and Installation
for the procedures.
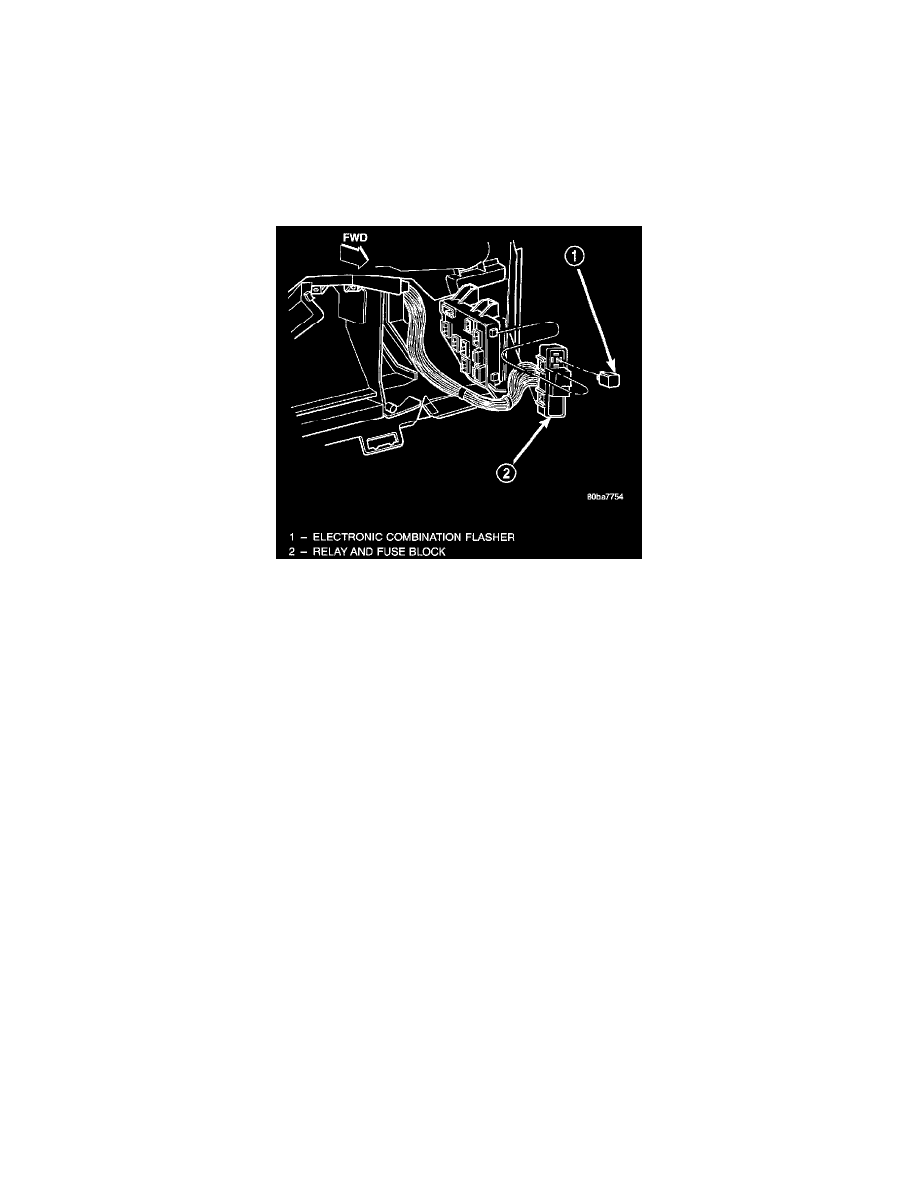
Combination Flasher Remove/Install
3. Reach through the outboard side of the steering column opening in the instrument panel to access the relay and fuse block on the back of the
junction block.
4. Remove the combination flasher from the relay and fuse block.
INSTALLATION
1. Refer to Fuse/Fuse Block in the Wiring Diagrams for proper combination flasher location.
2. Position the combination flasher in the proper receptacle in the relay and fuse block.
3. Align the combination flasher terminals with the terminal cavities in the relay and fuse block receptacle.
4. Push in firmly on the combination flasher until the terminals are fully seated in the terminal cavities in the relay and fuse block receptacle.
5. Install the steering column opening cover onto the instrument panel. Refer to Steering Column Opening Cover in the Removal and Installation for
the procedures.
6. Reconnect the battery negative cable.