
Diplomat L6-225 3.7L VIN H 1-bbl (1983)
Low Pressure Sensor / Switch: Testing and Inspection
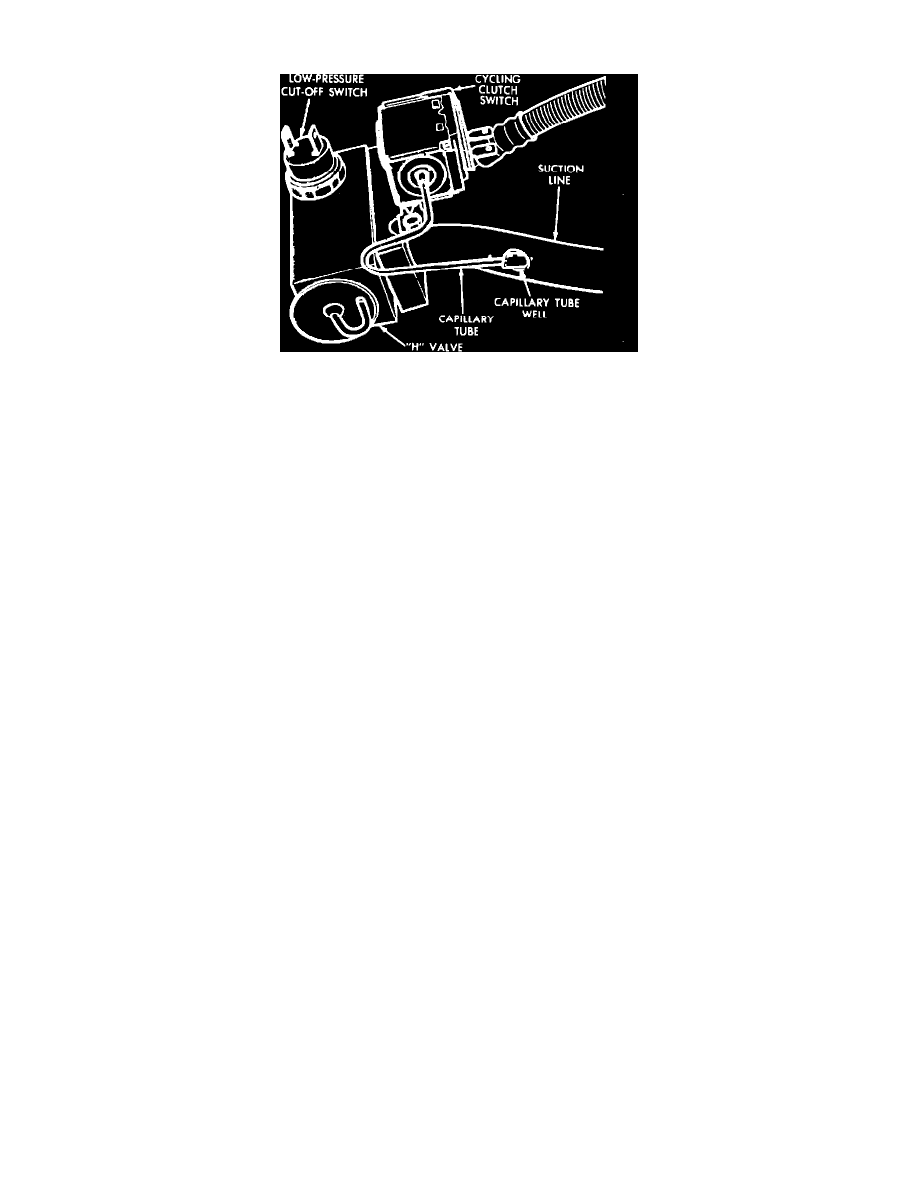
Fig. 27 H-valve assembly. Typical
The Low Pressure Cut-Out Switch is located on the H-valve and is wired in series with the compressor clutch. When refrigerant pressure drops below
control point of switch, power to clutch is shut off. Switch is a sealed, factory calibrated unit. If found defective, it must be replaced.
1.
Remove rubber boot from cut-off switch and connect a jumper wire between connector lead terminals.
2. Press A/C button, switch ignition on and listen for compressor clutch engagement.
3. If clutch does not engage, the cycling clutch switch, wiring or fuse may be faulty. Check clutch and circuit.
4. If clutch engages, connect manifold gauge set and note evaporator suction pressure. At any pressure above 18 PSIG, (41 PSIG for front wheel
drive van W/V6-181/3.0L engine) switch must actuate clutch. If evaporator suction pressure is below 25 PSIG, (46 PSIG for front wheel drive van
W/V6-181/3.0L engine) refrigerant system is low on charge or empty and must be leak tested and recharged.
5. Remove jumper wire and reinstall switch connector. Repeat step 2. If clutch does not engage, discharge system, replace switch and recharge
system.