
Durango 2WD V6-3.7L (2009)
Catalytic Converter: Service and Repair
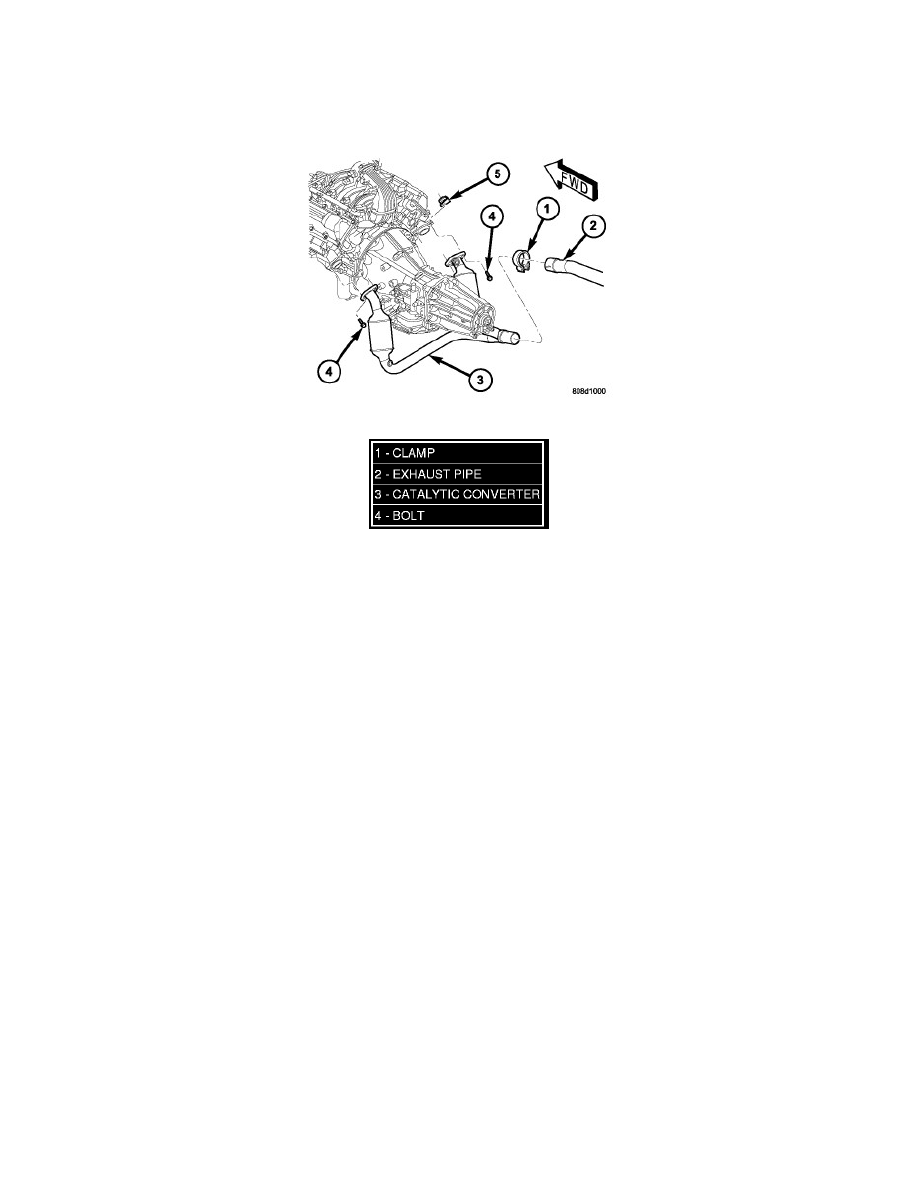
Catalytic Converter - Installation
3.7L/4.7L ENGINE
NOTE: The band clamps are not reusable. After removal, they must be replaced with new one.
1. Make sure the catalytic converter assembly (3) is free of burrs.
2. Insert the catalytic converter assembly (3) into the exhaust pipe (2).
3. Make sure the alignment tang is fully seated in the alignment slot.
4. Position the catalytic converter assembly (3) to the exhaust manifold and install the flange nuts (5) and bolts (4). Hand tighten at this time.
5. If other sections of the exhaust system where loosened in removal, refer to that information for the tightening procedures.
6. At the catalytic converter-to-extension pipe connection, install the new clamp (1) and nuts. Hand tighten at this time.
7. Make sure the catalytic converter assembly (3) is correctly positioned and the properly aligned. The minimum clearance between components is
25mm (1 inch). Make sure that the muffler isolators are not stretched. The measurement between the insulator rods is approximately 42mm (1.65
in.). Make the necessary adjustments, if necessary.
8. Tighten the exhaust manifold flange bolts to 33 Nm (25 ft. lbs.)
9. Tighten the clamp nuts to 61 Nm (45 ft. lbs.).
10. Lower the vehicle.
11. Start the engine, inspect for exhaust leaks. Repair exhaust leaks as necessary.