
Trunk and Liftgate Motor Replacement for Durango 2WD V8 (2001)
Trunk / Liftgate Motor: Service and Repair
REMOVAL
1. Disconnect and isolate the battery negative cable.
2. Remove the trim panel from the inner liftgate panel. (Refer to DECKLID/HATCH/LIFTGATE/TAILGATE/TRIM PANEL - REMOVAL).
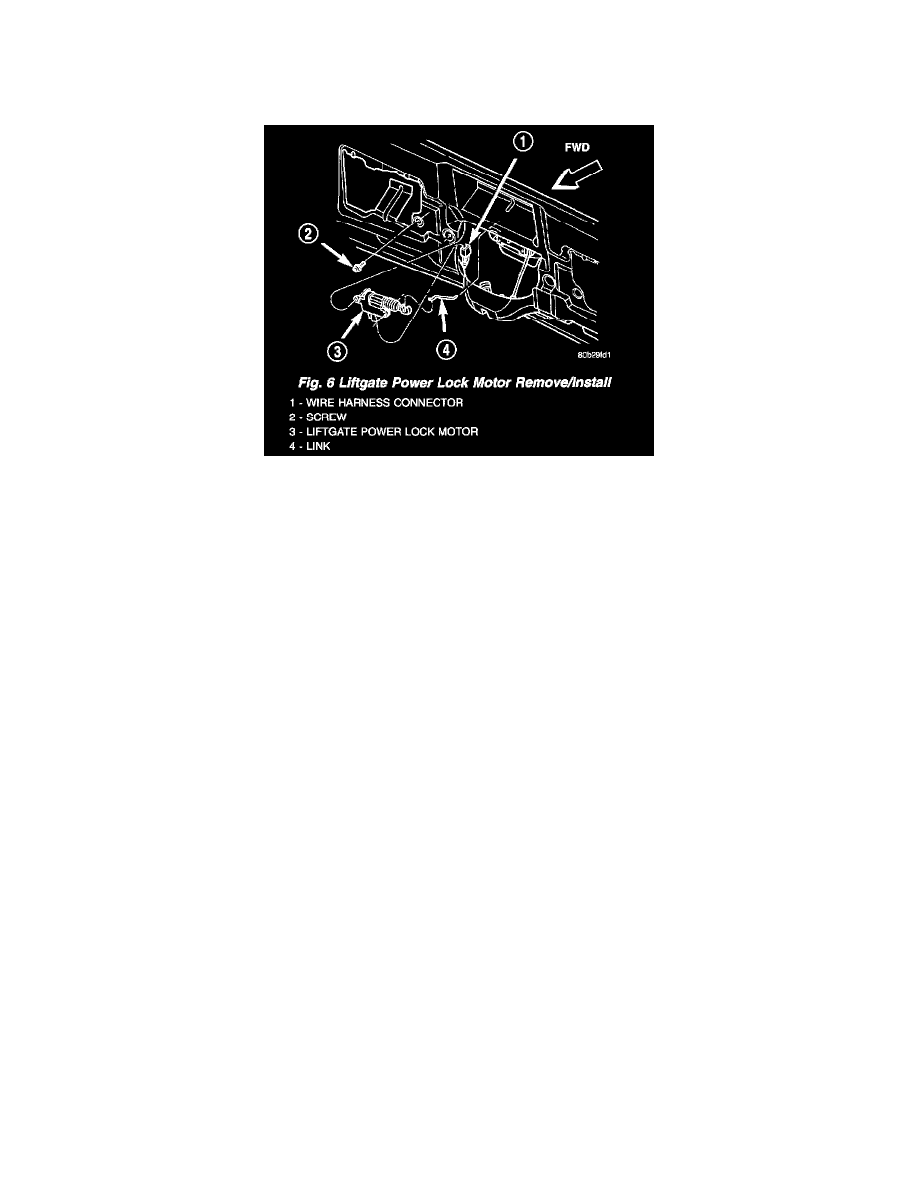
Fig. 6 Liftgate Power Lock Motor Remove/Install
3. Remove the two screws that secure the power lock motor to the liftgate inner panel.
4. Pull the power lock motor out through the access hole in the liftgate inner panel far enough to access and disconnect the liftgate power lock motor
pigtail wire connector from the liftgate wire harness connector.
5. Lower the power lock motor far enough to access and disengage the link from the liftgate latch link clip.
6. Remove the power lock motor from the liftgate.
INSTALLATION
1. Position the liftgate power lock motor into the liftgate through the access hole in the liftgate inner panel.
2. Insert the liftgate power lock motor link into the liftgate latch link clip and snap the clip over the link.
3. Reconnect the liftgate power lock motor pigtail wire connector to the liftgate wire harness connector.
4. Position the liftgate power lock motor to the liftgate inner panel.
5. Install and tighten the two screws that secure the power lock motor to the liftgate inner panel. Tighten the screws to 3 Nm (30 in. lbs.).
6. Reinstall the trim panel onto the liftgate inner panel. (Refer to DECKLID/HATCH/LIFTGATE/TAILGATE/TRIM PANEL - INSTALLATION).
7. Reconnect the battery negative cable.