
Durango 2WD V8-5.2L VIN Y (1999)
Console: Procedures
Overhead Console Replacement
REMOVAL
Overhead Console
1. Disconnect and isolate the battery negative cable.
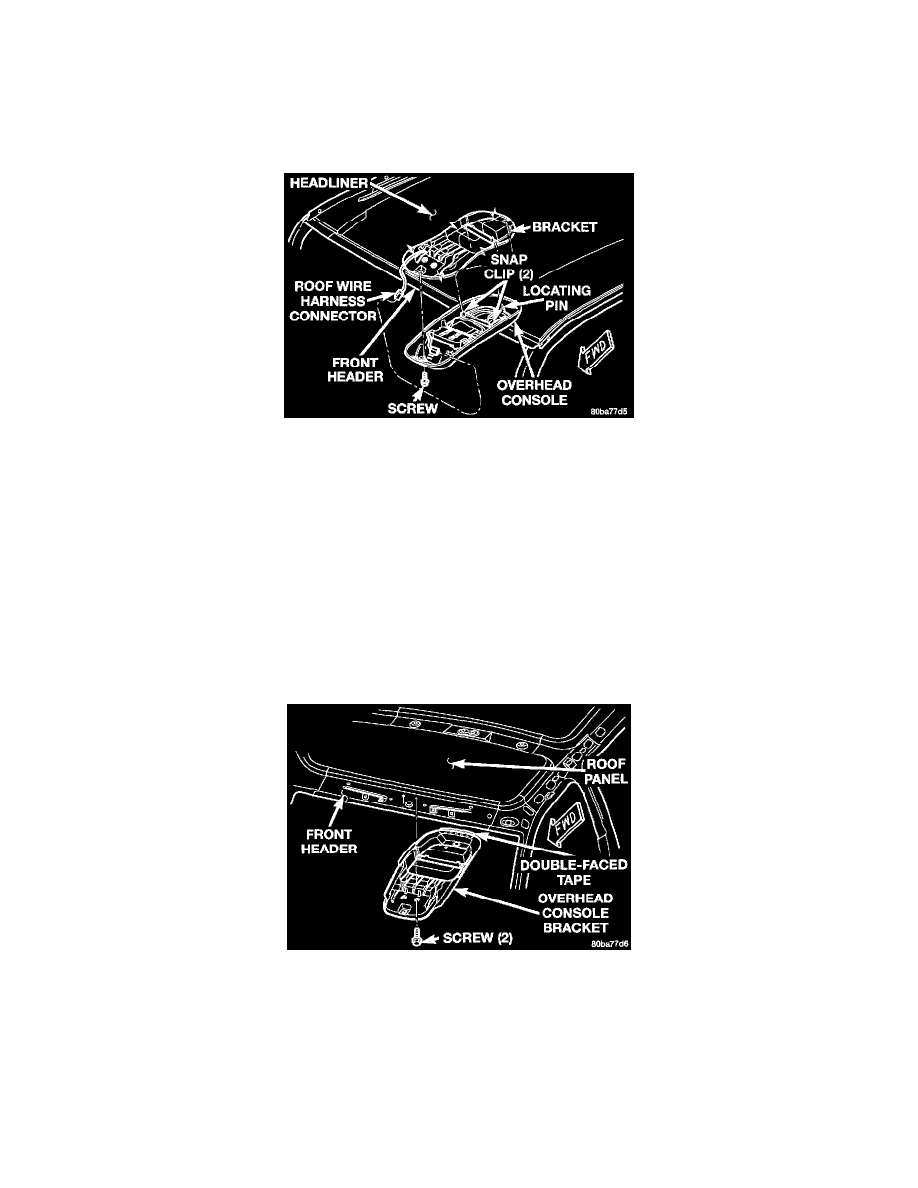
Overhead Console Remove/Install
2. Remove the screw that secures the front of the overhead console to the front of the overhead console bracket.
3. Insert the fingertips of both hands between the headliner and the sides of the overhead console housing in the area between the garage door opener
storage bin and the sunglasses storage bin.
4. Pull downward on the sides of the overhead console housing firmly and evenly to disengage the two snap clips that secure the rear of the unit from
their receptacles in the overhead console bracket.
5. Lower the overhead console from the headliner far enough to access the wire harness connector.
6. Disconnect the roof wire harness connector from the overhead console wire harness connector.
7. Remove the overhead console from the headliner.
Overhead Console Bracket
1. Disconnect and isolate the battery negative cable.
2. Remove the overhead console from the overhead console bracket. Refer to Overhead Console/Service and Repair for the procedures.
3. Remove the headliner from the roof panel.
Overhead Console Bracket Remove/Install
4. Remove the two screws that secure the front of the overhead console bracket to the roof front header.
5. Using a sharp utility knife, cut through the double-faced tape that secures the rear flange of the overhead console bracket to the roof panel.
6. Remove the overhead console bracket from the roof panel.
INSTALLATION
Overhead Console
1. Position the overhead console near the mounting location on the headliner.
2. Reconnect the roof wire harness connector to the overhead console wire harness connector.