
Durango 4WD V8-4.7L VIN P Flex Fuel (2007)
11. Disconnect the rear suction line and liquid line from the rear evaporator line tapping plate and remove and discard the O-ring seals.
12. Install plugs in, or tape over the opened refrigerant lines and tapping plate ports.
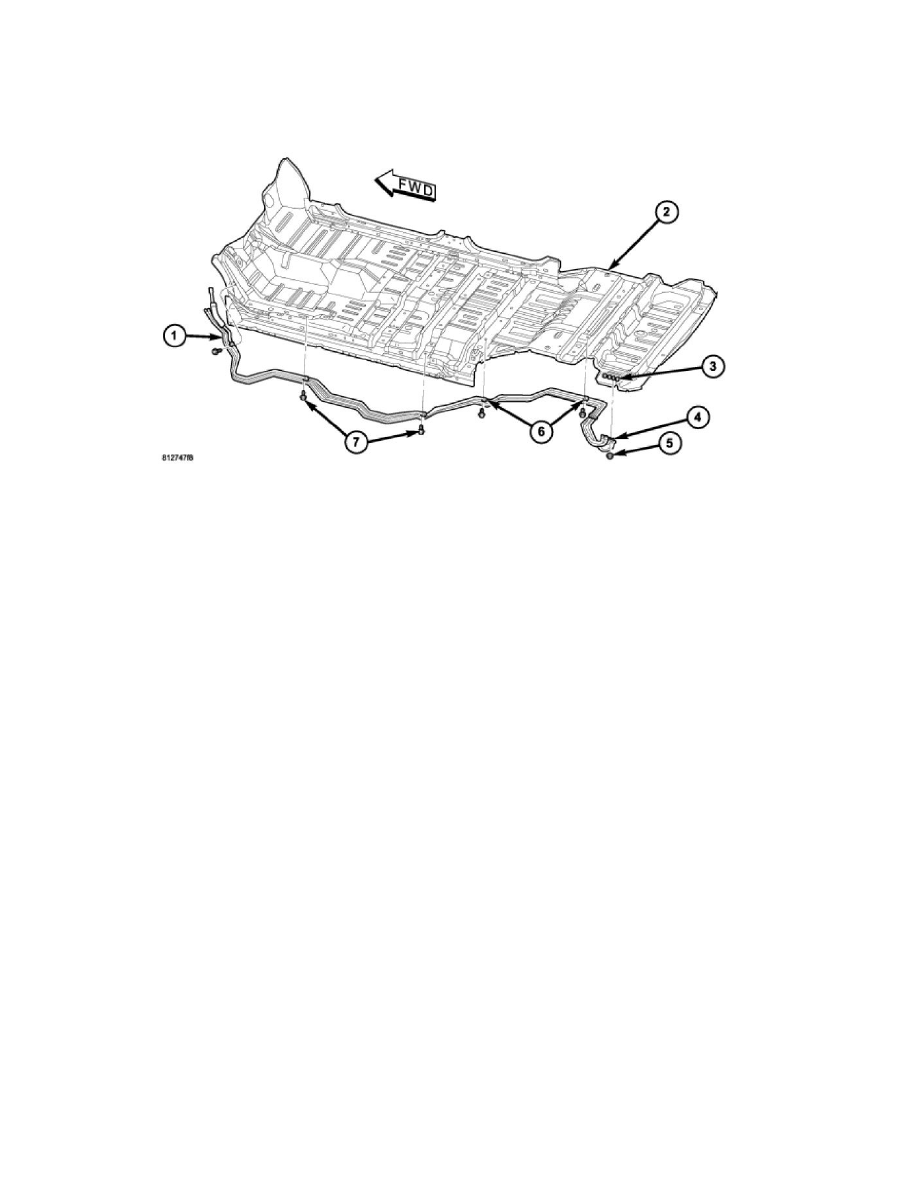
13. Disconnect the rear heater hoses (5) from the rear heater core tubes that extend through the rear floor panel behind the right rear wheel housing.
14. Remove all body mount bolts on the passenger side of the vehicle and loosen the body mount bolts on the drivers side.
15. Place a jackstand at the front and rear of the vehicle on the passenger side so that the stands will safely support the body.
16. Remove the five screws (7) that secure the underbody lines (1) to the vehicle underbody (2).
17. Carefully lower the hoist until the right side of the body (supported by the stands) is approximately 76-101 mm (3-4 in.) above the frame. This
will gain access to remove the underbody line assembly.
18. Remove the underbody line assembly from the underneath of the vehicle body.
Installation
INSTALLATION
CAUTION: Be certain to adjust the refrigerant oil level when servicing the A/C refrigerant system. Failure to properly adjust the refrigerant
oil level will prevent the A/C system from operating as designed and can cause serious A/C compressor damage.
NOTE: When replacing multiple A/C system components, refer to the Refrigerant Oil Capacities chart to determine how much oil should be added to
the refrigerant system.
NOTE: Replacement of the refrigerant line O-ring seals and gaskets is required anytime a refrigerant line is opened. Failure to replace the rubber O-ring
seals and metal gaskets could result in a refrigerant system leak.