
Durango 4WD V8-5.9L VIN Z (1998)
Overhead Console Replacement
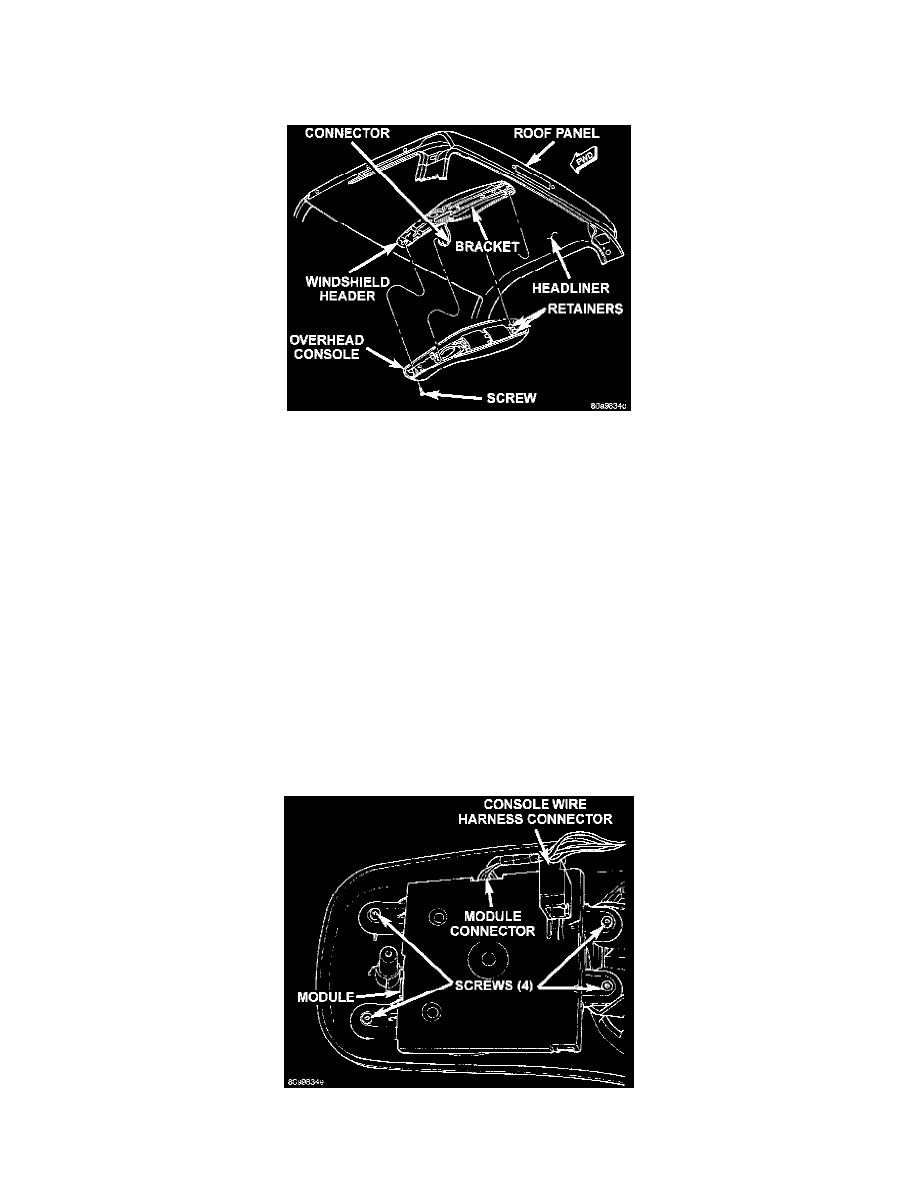
REMOVAL
1. Disconnect and isolate the battery negative cable.
Overhead Console Remove/Install - Typical
2. Remove the overhead console forward mounting screw, located ahead of the display module.
3. Using a trim stick or another suitable wide flat-bladed tool, gently pry between the rear sides of the console housing and the headliner to release
the two snap-clip retainers that secure the console to the rear of the mounting bracket.
4. Lower the overhead console far enough to access the wire harness connector, which is secured to the top of the trip computer, compass, and
thermometer display module.
5. Unplug the overhead console wire harness connector.
6. Remove the overhead console from the head-liner.
7. Reverse the removal procedures to install. Tighten the overhead console mounting screw to 2 N.m (17 in. lbs.).
Sunglasses Storage Bin Door
REMOVAL AND INSTALLATION
1. Open the sunglasses storage bin door.
2. Using a trim stick or another suitable wide flat-bladed tool, gently pry the door hinge pins from the retainers in the overhead console housing.
3. To install, hold the door in position in the opening of the overhead console and press the door hinge pins gently until they snap into place.
Trip Computer, Compass, and Thermometer Display Module
REMOVAL
1. Remove the overhead console from the headliner. See Body and Frame/Interior Trim/Overhead Console in the Replacement for the procedures.
Trip Computer, Compass, And Thermometer Display Module Remove/Install