
Durango 4WD V8-5.9L VIN Z (1998)
Piston: Service and Repair
Removal and Installation
REMOVAL
1. Remove the engine from the vehicle.
2. Remove the cylinder head.
3. Remove the oil pan.
4. Remove top ridge of cylinder bores with a reliable ridge reamer before removing pistons from cylinder block. Be sure to keep tops of pistons
covered during this operation.
5. Be sure the connecting rod and connecting rod cap are identified with the cylinder number. Remove connecting rod cap. Install connecting rod bolt
guide set on connecting rod bolts.
6. Pistons and connecting rods must be removed from top of cylinder block. When removing piston and connecting rod assemblies, rotate crankshaft
to center the connecting rod in the cylinder bore and at BDC. Be careful not to nick crankshaft journals.
7. After removal, install bearing cap on the mating rod.
INSTALLATION
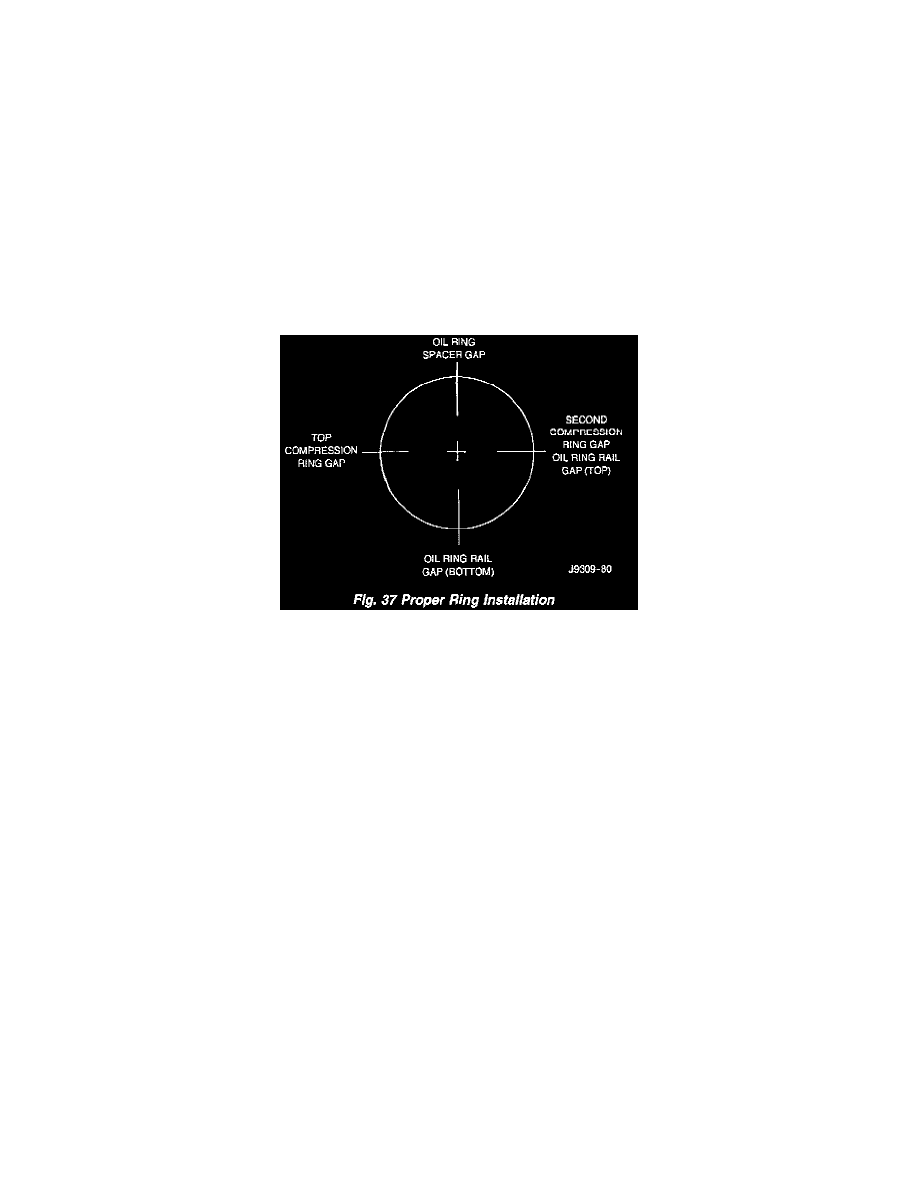
1. Be sure that compression ring gaps are staggered so that neither is in-line with oil ring rail gap.
Proper Ring Installation
2. Before installing the ring compressor, make sure the oil ring expander ends are butted and the rail gaps located properly.
3. Immerse the piston head and rings in clean engine oil. Slide Piston Ring Compressor Tool C-385 over the piston and tighten with the special
wrench (part of Tool C-385). Be sure position of rings does not change during this operation.
4. Install connecting rod bolt protectors on rod bolts, the long protector should be installed on the numbered side of the connecting rod.
5. Rotate crankshaft so that the connecting rod journal is on the center of the cylinder bore. Be sure connecting rod and cylinder bore number are the
same. Insert rod and piston into cylinder bore and guide rod over the crankshaft journal.
6. Tap the piston down in cylinder bore, using a hammer handle. At the same time, guide connecting rod into position on crankshaft journal.
7. The notch or groove on top of piston must be pointing toward front of engine. The larger chamfer of the connecting rod bore must be installed
toward crankshaft journal fillet.
8. Install rod caps. Be sure connecting rod, connecting rod cap and cylinder bore number are the same. Install nuts on cleaned and oiled rod bolts and
tighten nuts to 61 Nm (45 ft. lbs.) torque.
9. Install the oil pan.
10. Install the cylinder head.
11. Install the engine into the vehicle.