
Durango 4WD V8-5.9L VIN Z (1998)
WARNING: Because of high spring pressure, do not attempt to disassemble automatic tensioner. Unit is serviced as an assembly (except
for pulley).
8. Remove pulley bolt. Remove pulley from tensioner.
INSTALLATION
1. Install pulley and pulley bolt to tensioner. Tighten bolt to 61 Nm (45 ft. lbs.).
2. Install tensioner assembly to mounting bracket. An indexing tab is located on back of tensioner. Align this tab to slot in mounting bracket. Tighten
nut to 67 Nm (50 ft. lbs.).
3. Connect all wiring to ignition coil.
4. Install coil to coil bracket. If nuts and bolts are used to secure coil to coil bracket, tighten to 11 Nm (100 inch lbs.) torque. If coil mounting
bracket has been tapped for coil mounting bolts, tighten bolts to 5 Nm (50 inch lbs.) torque.
CAUTION: To prevent damage to coil case, coil mounting bolts must be torqued.
5. Position drive belt over all pulleys except idler pulley (located between generator and A/C compressor).
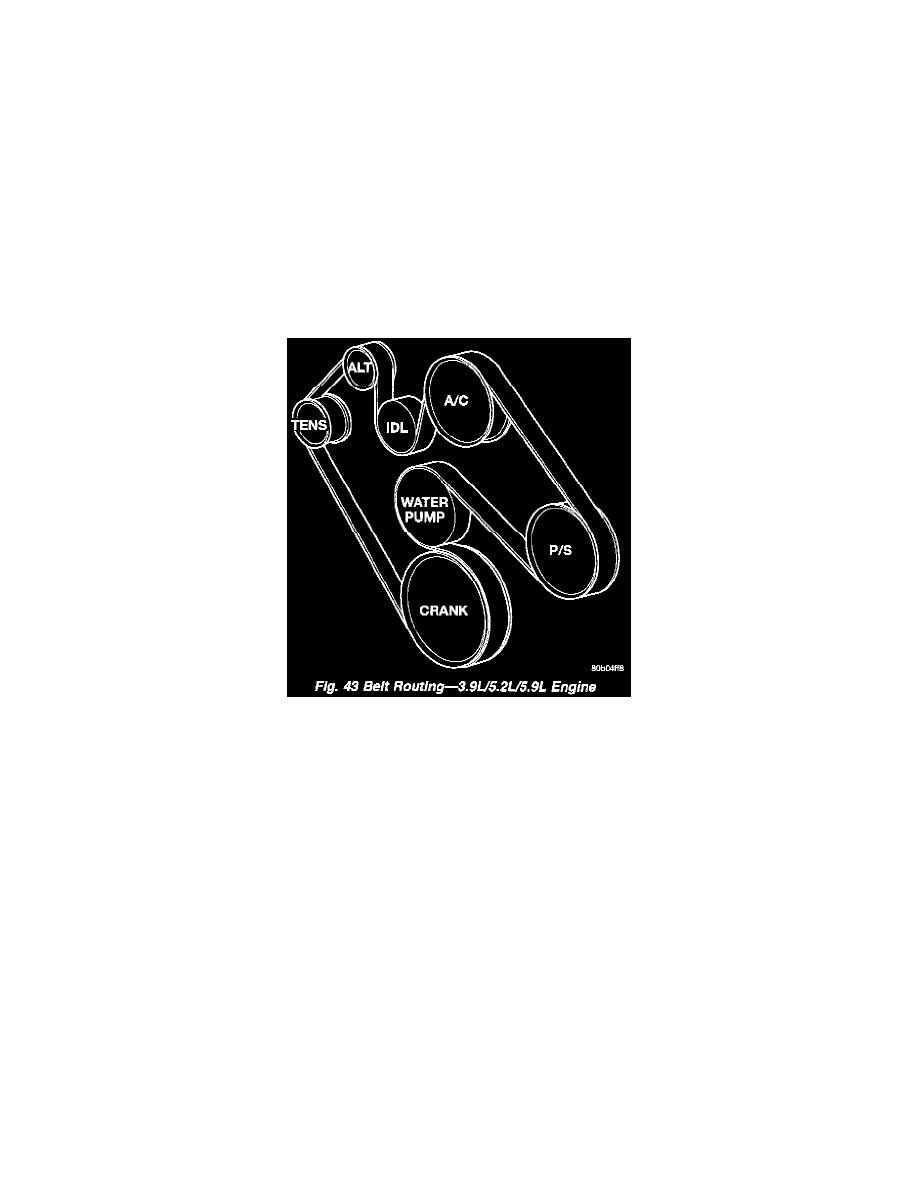
Belt Routing
CAUTION: When installing serpentine accessory drive belt, the belt must be routed correctly. If not' engine may overheat due to water pump
rotating in wrong direction. Refer to image for correct belt routing. The correct belt with correct length must be used.
6. Attach a socket/wrench to pulley mounting bolt of automatic tensioner.
7. Rotate socket/wrench clockwise. Place belt over idler pulley. Let tensioner rotate back into place. Remove wrench. Be sure belt is properly seated
on all pulleys.
8. Check belt indexing marks.