
Durango 4WD V8-5.9L VIN Z (1998)
Exhaust Manifold: Service and Repair
Removal and Installation
REMOVAL
1. Disconnect the battery negative cable.
2. Raise vehicle on hoist.
3. Remove the exhaust pipe to manifold nuts.
4. Lower the vehicle.
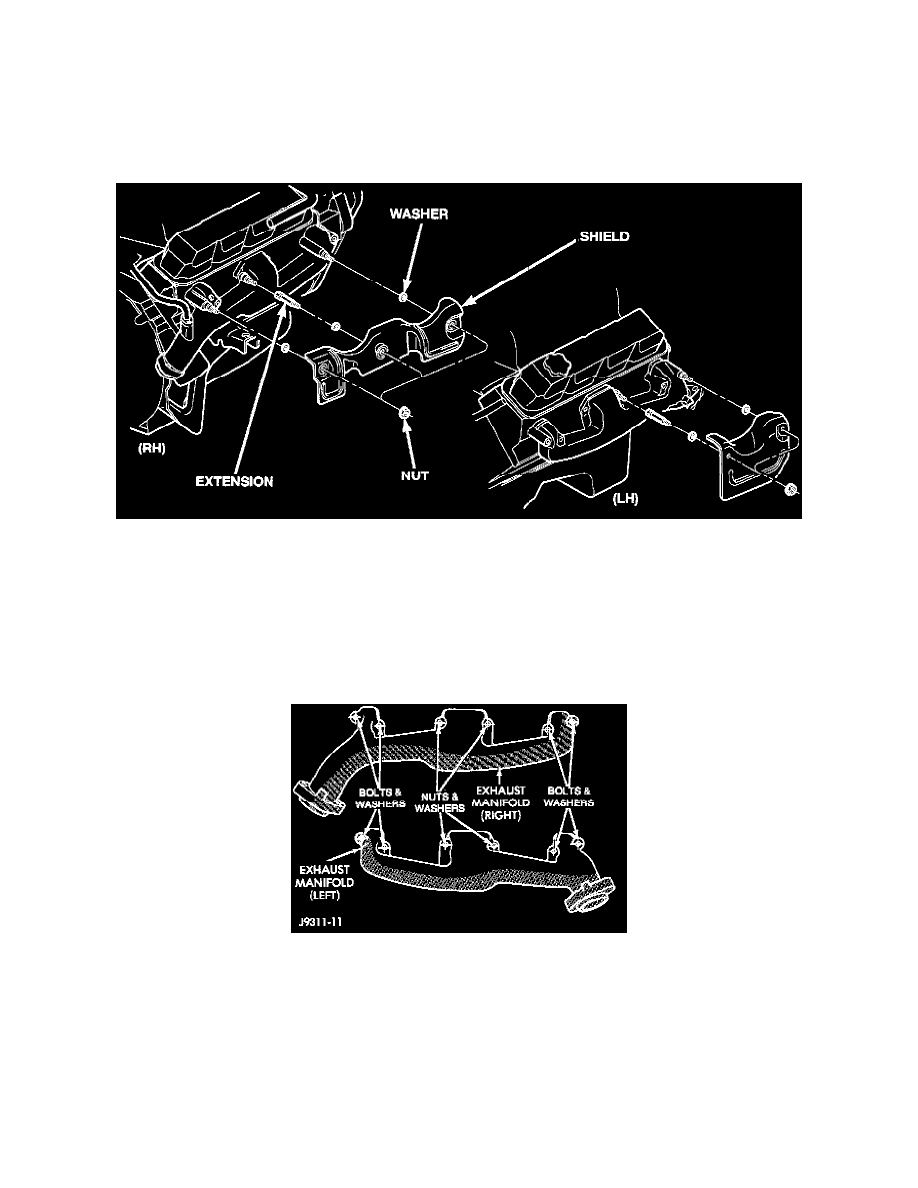
Exhaust Manifold Heat Shield(s)
5. Remove the manifold heat shield nuts, shield, washers and extensions.
6. Disconnect the EGR tube from the right side manifold. Remove bolts, nuts and washers attaching manifold to cylinder head.
7. Remove manifold from the cylinder head.
INSTALLATION
CAUTION: If the studs came out with the nuts when removing the exhaust manifold, install new studs.
Exhaust Manifold Installation
1. Position the exhaust manifolds on the two studs located on the cylinder head. Install conical washers and nuts on these studs.
2. Install new bolt and washer assemblies in the remaining holes. Start at the center arm and work outward. Tighten the bolts and nuts to 24 Nm (18
ft. lbs.) torque.
3. Install the manifold heat shield extensions and torque to 24 Nm (210 inch lbs.).
4. Install the washers, shields, and nuts and torque the nuts to 14 Nm (120 inch lbs.).
5. Raise the vehicle.
6. Assemble the exhaust pipe to the exhaust manifold and secure with bolts, nuts and washers. Tighten these nuts to 27 Nm (20 ft. lbs.) torque.
7. Lower the vehicle.
8. Connect the battery negative cable.