
Durango 4WD V8-5.9L VIN Z (1998)
6.
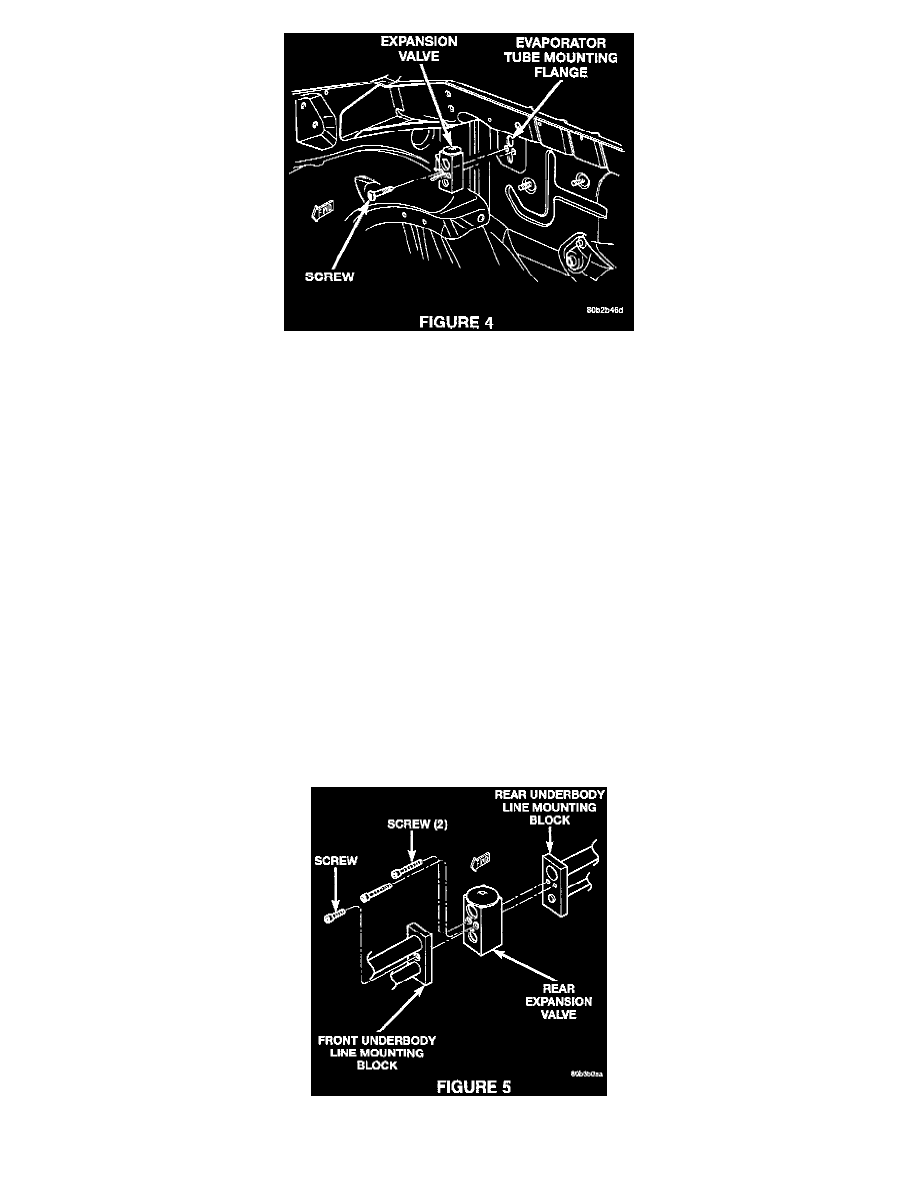
Remove the two screws that secure the expansion valve to the evaporator tube mounting flange (Figure 4).
7.
Remove the expansion valve from the evaporator tube mounting flange.
NOTE:
THE EVAPORATOR TUBE MOUNTING FLANGE SHOULD BE PLUGGED UNTIL THE NEW EXPANSION VALVE IS READY TO BE
INSTALLED.
8.
Remove the caps, then install the new expansion valve p/n 55055773AF onto the evaporator tube mounting flange and secure with two screws.
Tighten the mounting screws to 11.4 N.m (100 in. lbs.).
9.
Ensure that the capillary tube well is filled with the thermally-conductive grease removed earlier then, insert the thermistor probe capillary tube of
the electronic cycling clutch switch into the well.
10.
Install the electronic cycling clutch switch onto the expansion valve and secure it with a new fastener p/n 05015797AA.
11.
Plug the wire harness connector into the electronic cycling clutch switch.
12.
Remove the underbody refrigerant line. Refer to the 1999 Durango Service Manual (Publication No. 81-370-9116), page 24-43 for information
regarding Underbody Refrigerant Line removal procedures.
NOTE:
ALL REFRIGERANT OIL THAT IS DRAINED FROM THE UNDERBODY REFRIGERANT LINE OR THE LINES GOING TO THE REAR
OVERHEAD A/C EVAPORATOR MUST BE MEASURED TO ENSURE THAT THE APPROPRIATE AMOUNT OF OIL IS ADDED TO THE
SYSTEM AFTER ALL COMPONENTS HAVE BEEN ASSEMBLED.
13.
Disassemble the bolt from the forward section of the underbody refrigerant line assembly to the expansion valve (Figure 5). Install plugs in or tape
over the open refrigerant fittings.