
Durango 4WD V8-5.9L VIN Z (1998)
B-Pillar Refrigerant Lines Remove/Install
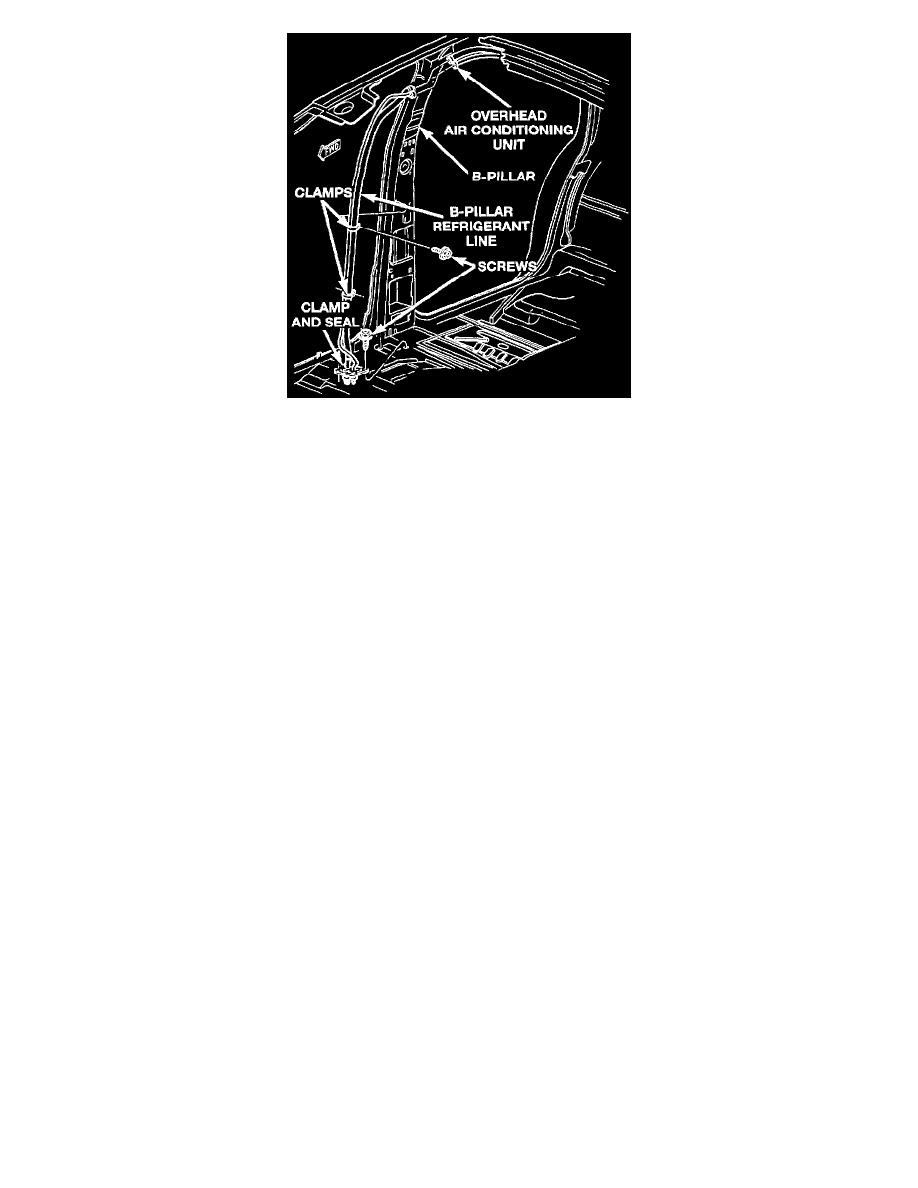
8. Remove the two screws that secure the B-pillar refrigerant line clamps to the B-pillar.
9. Remove the two screws that secure the B-pillar refrigerant line clamp and seal unit to the floor panel at the base of the B-pillar.
10. Tilt the top of the B-pillar refrigerant line unit towards the front of the vehicle far enough so that the lower end of the unit can be lifted out through
the hole in the floor panel.
11. Remove the B-pillar refrigerant line unit from the passenger compartment.
NOTE: If either the liquid line or the suction line Is removed from the B-pillar refrigerant line clamp and seal, the clamp and seal will be
damaged. Replace the clamp and seal with a new unit.
INSTALLATION
1. Position the B-pillar refrigerant line unit in the passenger compartment with the lower end of the lines inserted through the hole in the floor panel
at the base of the B-pillar, and the top end of the lines oriented towards the front of the vehicle.
2. Tilt the top of the B-pillar refrigerant line unit up into position near the rear overhead A/C unit.
3. Remove the tape or plugs from block fittings at the top of the B-pillar refrigerant line unit, and from the fittings on the rear overhead A/C unit.
Install the B-pillar refrigerant line block fittings over the one stud on the rear overhead A/C unit. Install the bolt holding the suction line, and
secure the connections with the mounting nuts. Tighten the mounting nuts to 11.3 N.m (100 in. lbs.).
4
Position the B-pillar refrigerant line clamp and seal over the hole in the floor panel and secure it with two screws. Tighten the mounting screws to
2.2 N.m (20 in. lbs.).
5. Position the two B-pillar refrigerant line clamps over the mounting holes in the inner B-pillar and secure each clamp with a screw. Tighten the
mounting screws to 2.2 N.m (20 in. lbs.).
6. Reinstall the headliner in the passenger compartment. Reinstall the lower B-pillar trim panel, upper trim panel, and seat belt bolt adjuster.
7. Raise and support the vehicle.
8. From under the vehicle, remove the tape or plugs from the refrigerant line fittings at the underbody and B-pillar liquid lines, and from the
underbody and B-pillar suction lines. Connect the underbody refrigerant lines to the B-pillar refrigerant lines. See Refrigerant Line Coupler in the
Replacement for the procedures.
9. Connect the battery negative cable.
10. Evacuate the refrigerant system. Refer to: Heating and Air Conditioning, Service and Repair, Refrigerant System Evacuate, Evacuating the
A/C System, See: Service and Repair/Refrigerant System Evacuate
11. Charge the refrigerant system. Refer to: Heating and Air Conditioning, Service and Repair, Refrigerant System Charge, A/C System
Charge, See: Service and Repair/Refrigerant System Charge