
Durango 4WD V8-5.9L VIN Z (1998)
Map Lamp: Service and Repair
REMOVAL
1. Disconnect and isolate the battery negative cable.
2. Remove the reading lamp bulb and lens from the overhead console. See Reading and Courtesy Lamp Bulb in the Replacement for the procedures.
3. Remove the overhead console from the headliner. See Overhead Console in the Replacement for the procedures.
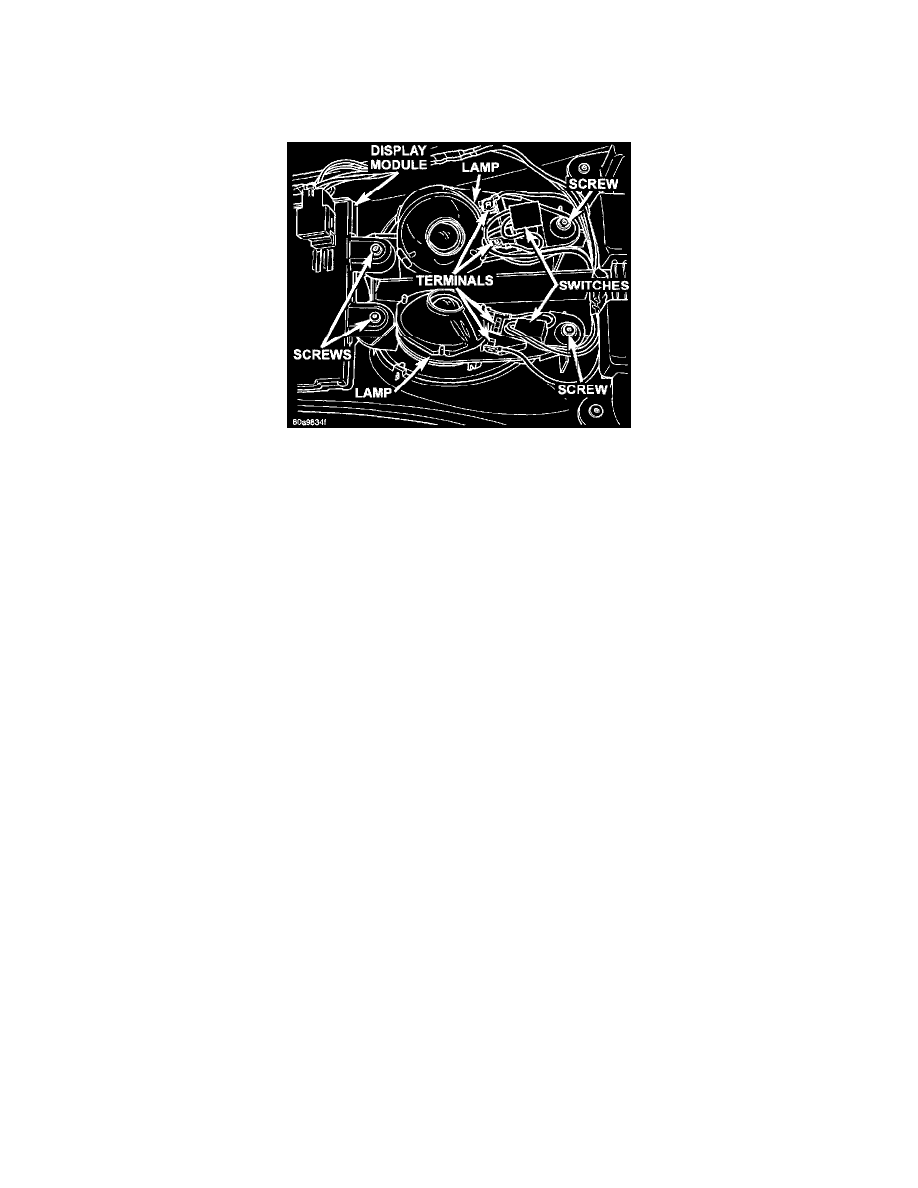
Reading And Courtesy Lamp Remove/Install
4. Unsnap the reading lamp switch by sliding it sideways out of the keyed switch plunger opening in the lamp housing.
5. Unplug the two wire harness spade terminal connectors from the lamp housing.
6. Remove the two rear display module screws, which also secure the front of the reading and courtesy lamps to the overhead console housing.
7. Remove the screw that secures the rear of the reading and courtesy lamp to the overhead console housing.
8. Remove the reading and courtesy lamp from the overhead console.
9. Reverse the removal procedures to install. Tighten the mounting screws to 2.2 N.m (20 in. lbs.).