
Durango 4WD V8-5.9L VIN Z (1998)
Starter Motor: Service and Repair
REMOVAL
1. Disconnect and isolate the battery negative cable.
2. Raise and support the vehicle.
3. If the vehicle is so equipped, remove the front axle skid plate and skid plate crossmember.
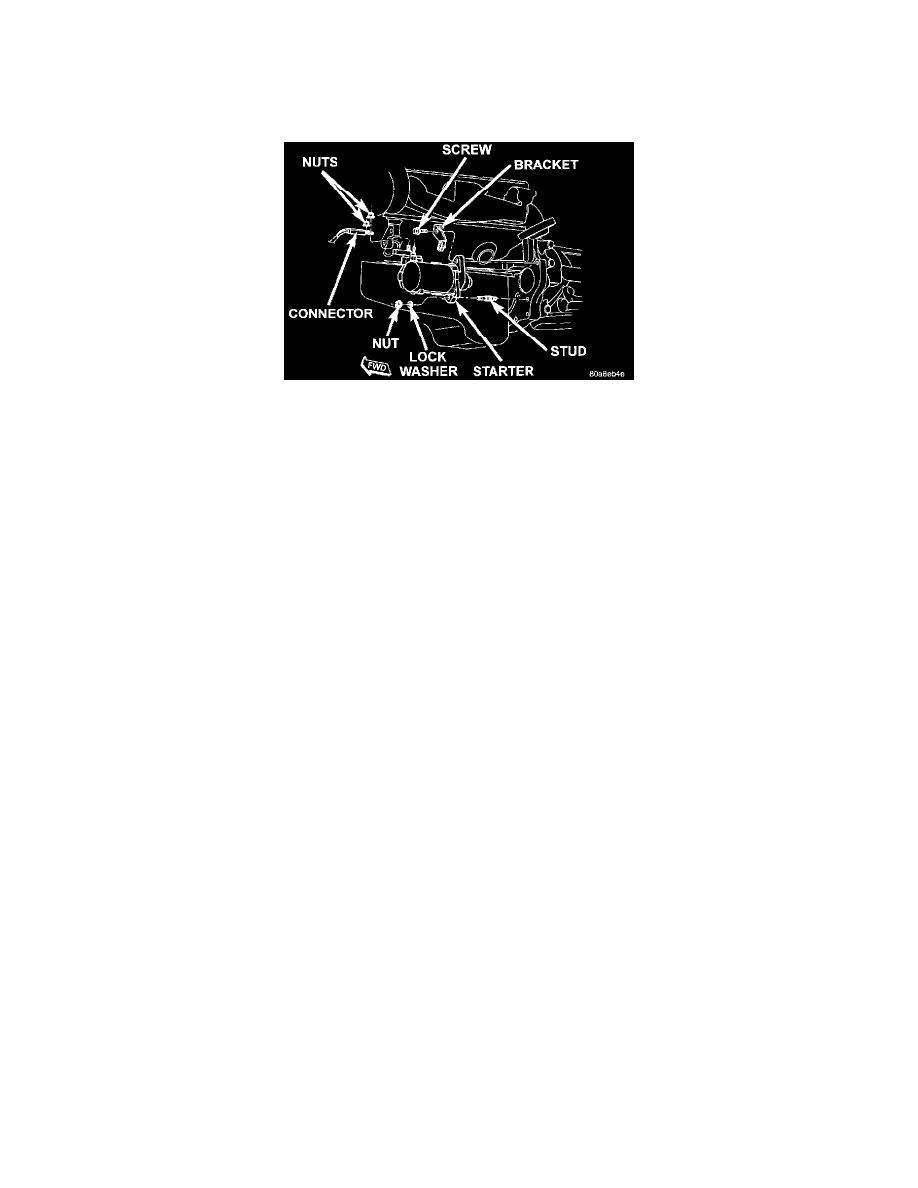
Starter Remove/Install
4. Remove the nut and lock washer from the starter mounting stud.
5. Remove the screw from the upper starter mounting flange hole. Slide the automatic transmission cooler tube bracket forward on the tubes far
enough for clearance.
6. Move the starter towards the front of the vehicle until the starter gear housing nose clears the bellhousing. Then tilt the nose downwards and lower
the starter far enough to access the starter solenoid wire harness connector.
7. Remove the two nuts that secure the battery cable and solenoid feed wire to the terminals on the starter solenoid. Remove the starter solenoid wire
harness connector from the solenoid terminals.
8. Remove the starter motor from the vehicle.
9. Reverse the removal procedures to install. Tighten the starter hardware as follows:
-
Lower mounting nut - 68 N.m (50 ft. lbs.)
-
Upper mounting screw - 68 N.m (50 ft. lbs.)
-
Battery cable terminal nut - 14 N.m (120 in. lbs.)
-
Solenoid wire harness terminal nut - 6 N.m (55 in lbs.).