
Durango 4WD V8-5.9L VIN Z (1998)
NOTE: The windshield fence should be cleaned of most of its old urethane bonding material. A small amount of old urethane, approximately 1-2 mm
in height, should remain on the fence. Do not grind off or completely remove all old urethane from the fence, the paint finish and bonding strength will
be adversely affected. Support spacers located on the cowl at the bottom of the windshield opening (Fig. 2) should be replaced with new parts. Replace
any missing or damaged spacers around the perimeter of the windshield opening.
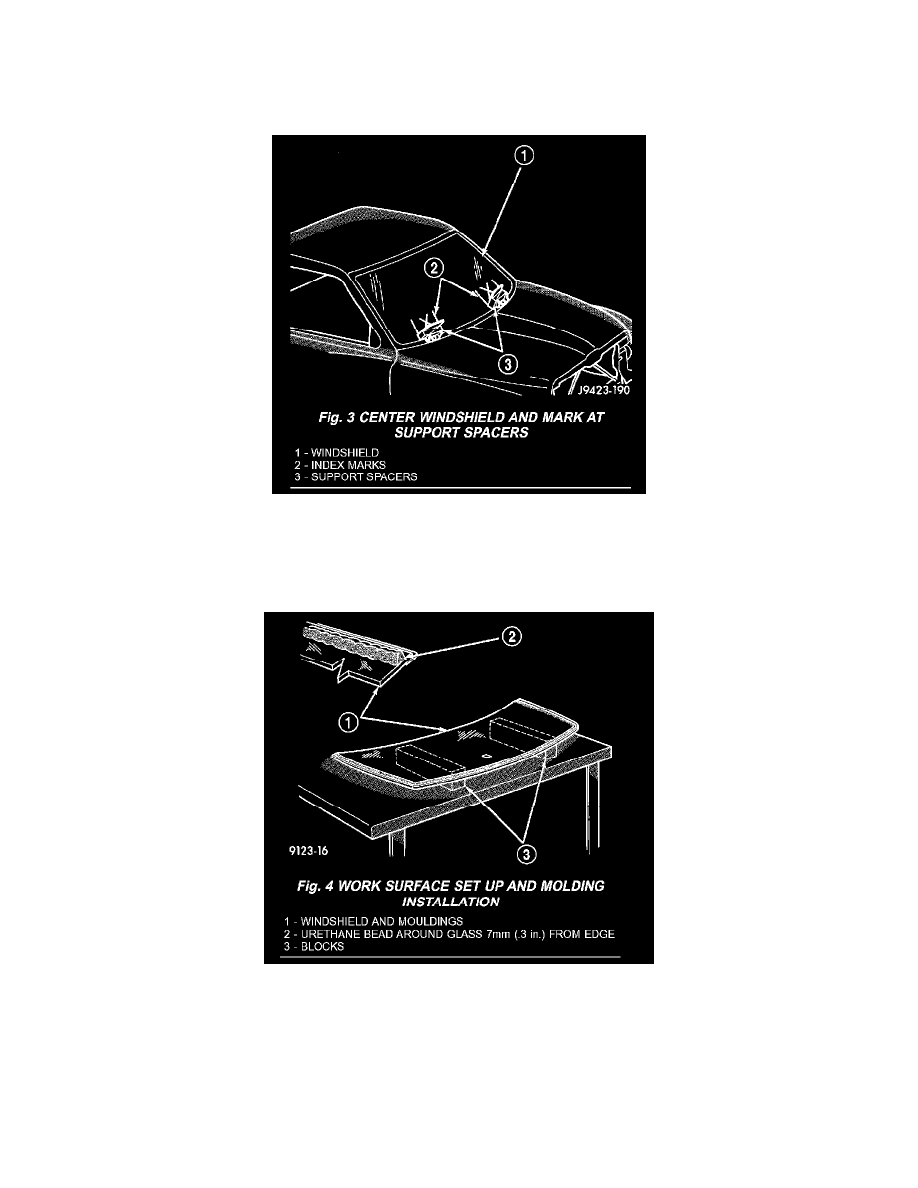
Fig. 3
1. Place replacement windshield into windshield opening and position glass in the center of the opening against the support spacers. Mark the glass at
the support spacers with a grease pencil or pieces of masking tape and ink pen to use as a reference for installation. Remove replacement
windshield from windshield opening (Fig. 3).
Fig. 4
2. Position the windshield inside up on a suitable work surface with two padded, wood 10 cm by 10 cm by 50 cm (4 in. by 4 in. by 20 in.) blocks,
placed parallel 75 cm (2.5 ft.) apart (Fig. 4).
3. Clean inside of windshield with MOPAR(R) Glass Cleaner and lint-free cloth.
4. Apply clear glass primer 25 mm (1 in.) wide around perimeter of windshield and wipe with a new clean and dry lint-free cloth.
5. Apply pinchweld primer 15 mm (.75 in.) wide around the windshield fence. Allow at least three minutes drying time.