
Grand Caravan V6-3.3L VIN E Flex Fuel (2007)
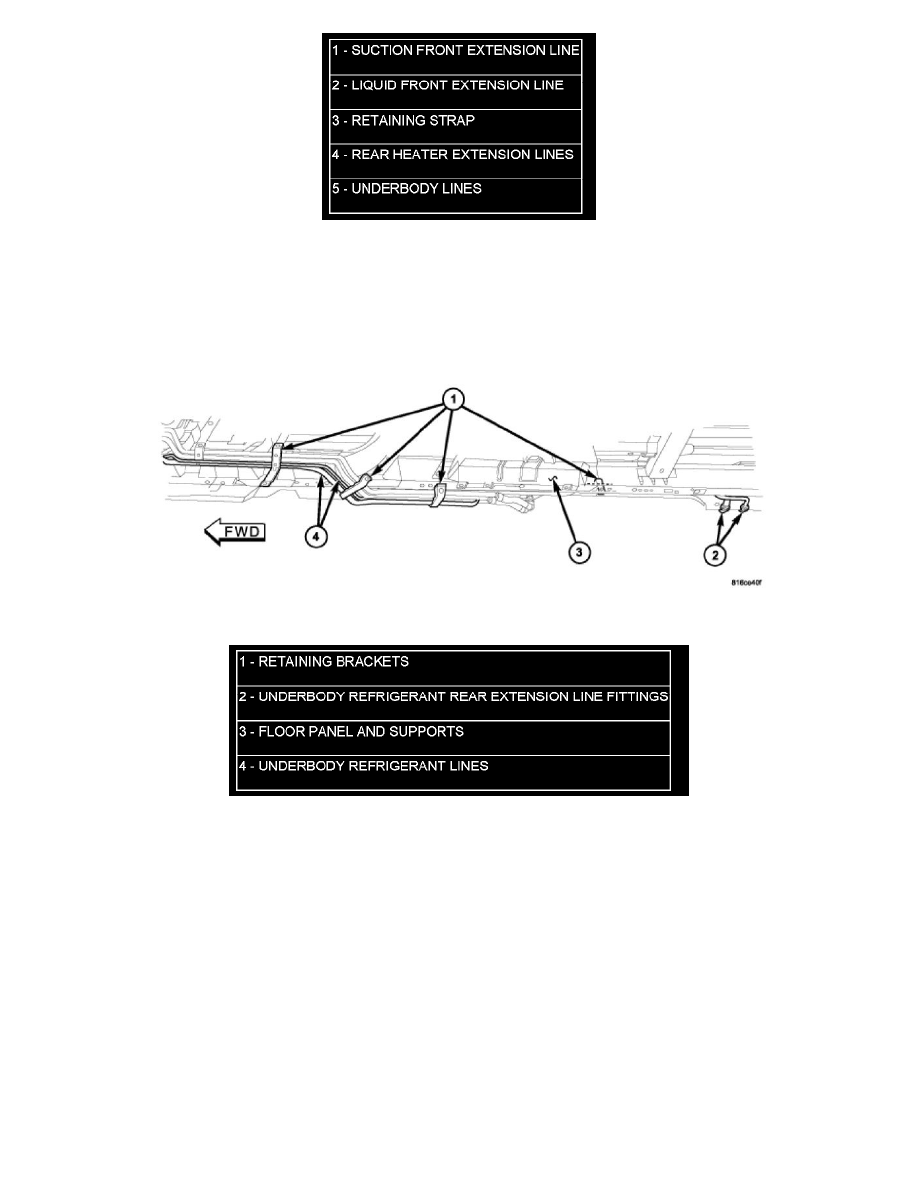
13. Remove the bolts that secure the underbody line retaining brackets to the vehicle underbody (Figure 4).
14. Remove the underbody refrigerant lines from the retaining brackets as necessary.
15. Remove the underbody refrigerant lines from the vehicle.
Figure 4 Underbody Refrigerant Lines
Installation
UNDERBODY REFRIGERANT LINES
1. Position the underbody refrigerant lines into the underbody line retaining brackets.
2. Install the bolts that secure the underbody line retaining brackets to the vehicle underbody. Tighten the bolts securely.
3. Remove the tape or plugs from the underbody refrigerant line fittings and the liquid and suction front extension lines.
4. Lubricate new rubber O-ring seals with clean refrigerant oil and install them onto the underbody refrigerant line fittings.
5. Connect the A/C liquid and suction front extension lines to the underbody refrigerant lines. Tighten the fittings to 23 Nm (17 ft.lbs.).
6. If removed, install the underbody suction rear extension line into the underbody refrigerant rear extension line sealing plate and install the nylon
retaining clip that secures the line to the sealing plate.
7. Remove the tape or plugs from the underbody refrigerant and extension line fittings and rear expansion valve ports.
8. Lubricate new rubber O-ring seals with clean refrigerant oil and install them onto the underbody refrigerant rear extension line fittings. Use only
the specified O-rings as they are made of a special material for the R-134a refrigerant system. Use only refrigerant oil of the type recommended for