Grand Caravan V6-3.3L VIN E Flex Fuel (2007)

Hose/Line HVAC: Service and Repair
A/C Discharge Line - Front
Removal
REMOVAL
WARNING: Refer to the applicable warnings and cautions for this system before performing the following operation. Failure to follow the
warnings and cautions could result in possible personal injury or death.
1. Recover the refrigerant from the refrigerant system.
2. Remove the right headlamp unit.
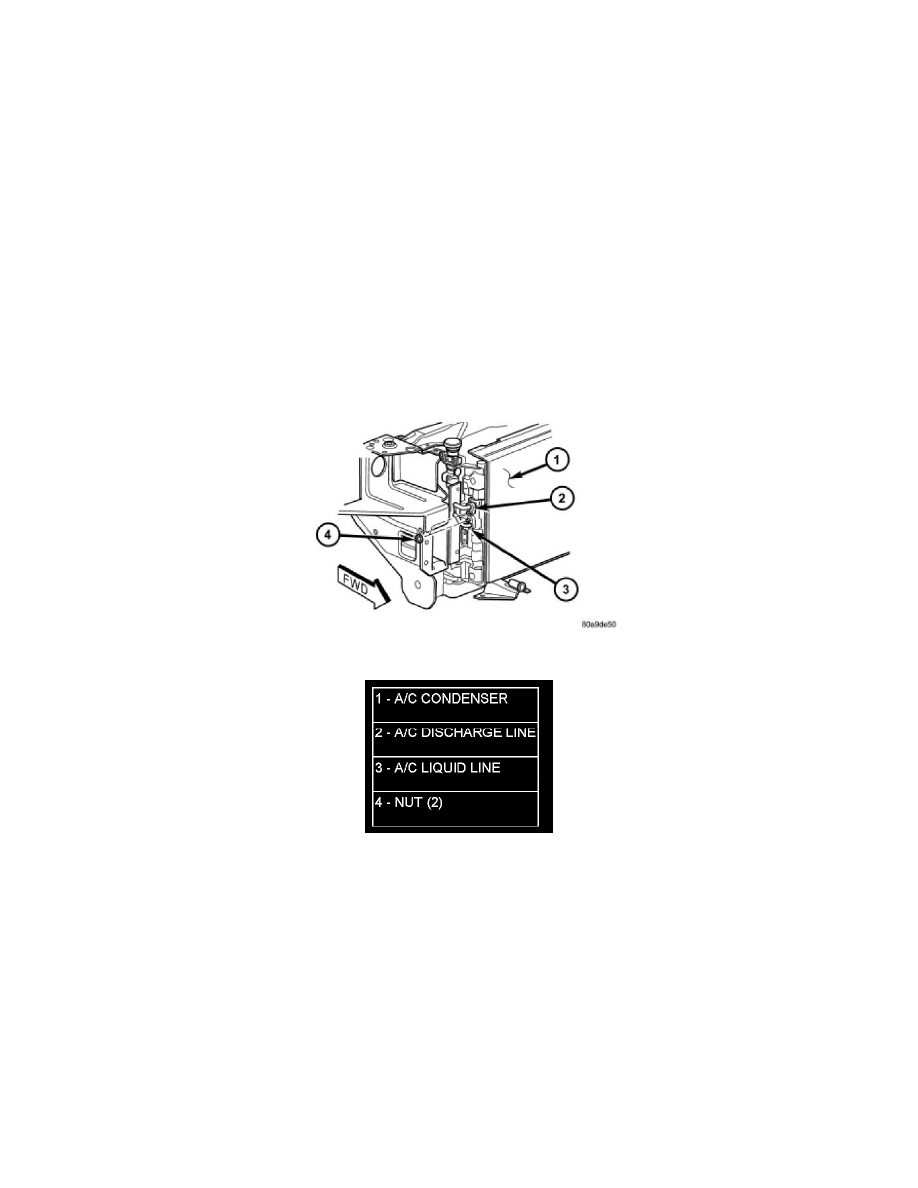
3. Remove the nut that secures the A/C discharge line to the right end of the A/C condenser (Figure 1).
4. Disconnect the A/C discharge line from the A/C condenser and remove and discard the O-ring seal and gasket.
5. Install plugs in, or tape over the opened discharge line fitting and the condenser inlet port.
Figure 1 A/C Discharge Line to A/C Condenser - Typical
6. Raise and support the vehicle.
7. On models equipped with the 2.5L and 2.8L diesel engines, remove the belly pan from underneath the engine compartment.
8. Remove the nut that secures the A/C discharge line to the A/C compressor (Figure 2).
9. Disconnect the A/C discharge line from the A/C compressor and remove and discard the O-ring seal and gasket.
10. Install plugs in, or tape over the opened discharge line fitting and the compressor discharge port.
11. Remove the A/C discharge line from the engine compartment.
