
Grand Caravan V6-3.3L VIN E Flex Fuel (2007)
Steering Wheel: Service and Repair
Installation
INSTALLATION
1. If the remote radio switches need to be installed on the steering wheel, refer to Electrical/Audio/Remote Switches Installation.
CAUTION: Do not force steering wheel onto steering column shaft by driving it on. Pull steering wheel down onto shaft using only the
steering wheel retaining nut.
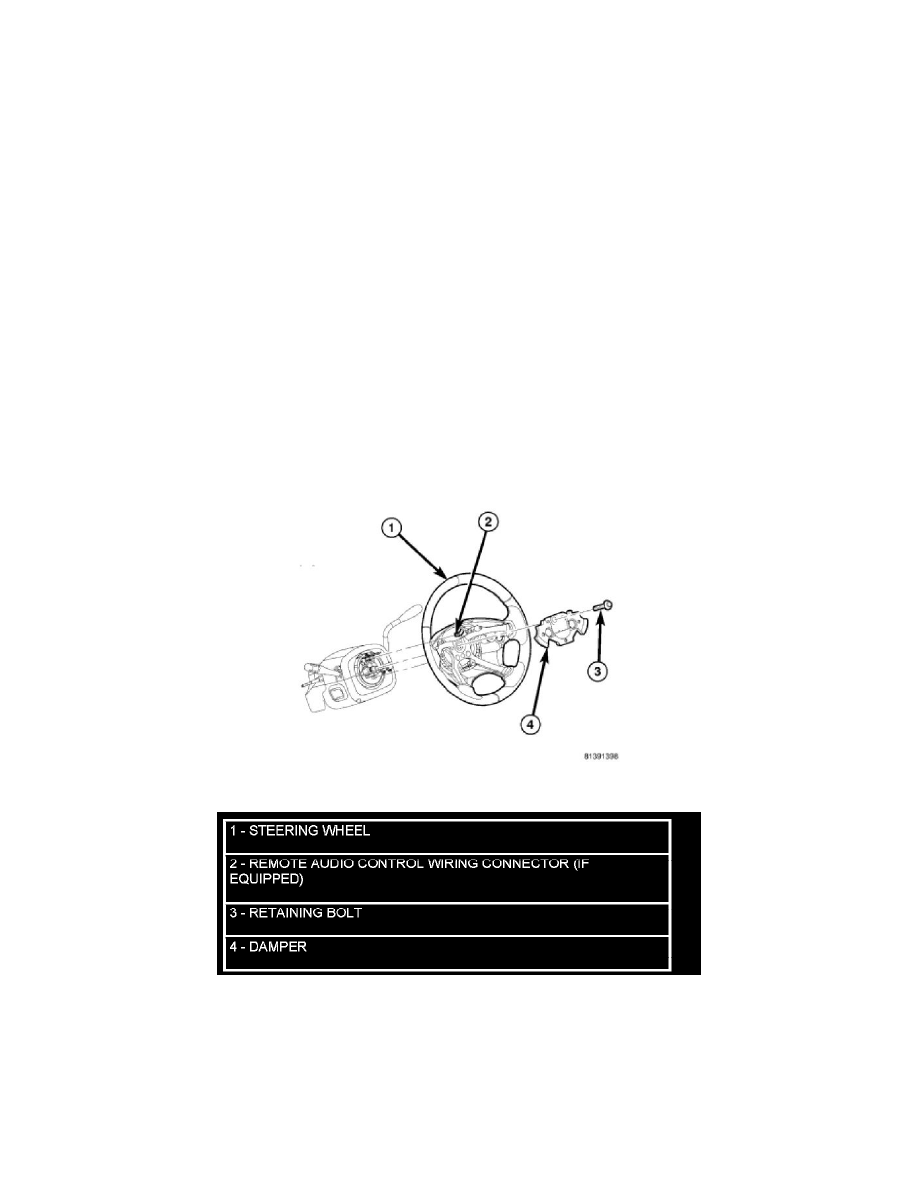
2. Feed and route wiring from clockspring through upper access hole in steering wheel.
3. Align master serrations in steering wheel with omitted spline on steering column shaft (at 12 o'clock position). Slide the steering wheel onto the
steering column shaft by hand (Figure 1). Use care not to pinch any wiring.
NOTE: Before installing the damper on the steering wheel, inspect the damper to ensure the rubber isolator on the damper is not
deteriorated or damaged. If the damper is installed with a damaged isolator, a buzz, squeak or rattle condition may develop.
4. Install the damper on the steering wheel (Figure 1).
5. Install the steering wheel retaining bolt. Tighten the steering wheel retaining bolt to 61 Nm (45 ft. lbs.) torque.
6. If the steering wheel is equipped with remote audio controls, connect the wiring connector to the clockspring (Figure 1).
7. Connect the airbag squib wiring connectors to the airbag and the horn and speed control switch connector to the clockspring (Figure 2).
8. Install the driver airbag in the steering wheel (Figure 3). Install and tighten the airbag attaching screws to 10 Nm (90 in. lbs.) torque.
9. Connect the battery negative (ground) cable to battery post following special Diagnosis And Testing procedure.
10. Check operation of all steering wheel mounted components.
11. Road test vehicle to ensure proper operation of steering.
Figure 1 Steering Wheel Mounting