
Grand Caravan V6-3.3L VIN R (2005)
5. Back off the screw drive and remove the bushing from the Receiver.
ASSEMBLY - SHOCK ABSORBER (UPPER BUSHING)
NOTE: This procedure applies to load-leveling shock absorbers only.
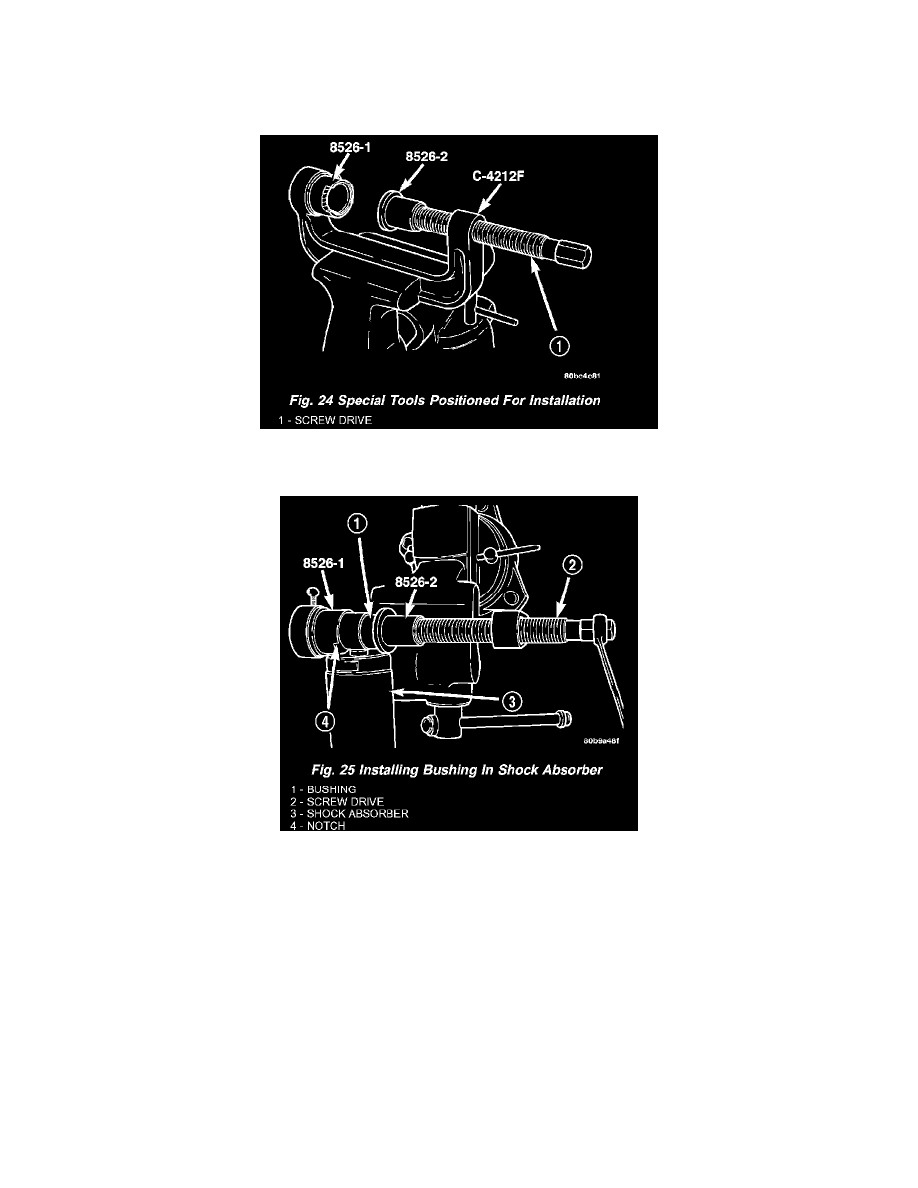
1. Install the Receiver, Special Tool 8526-1, into the cup of the Ball Joint Press, Special Tool C-4212F, and tighten the set screw. Install the Driver,
Special Tool 8526-2, on the tip of the Ball Joint Press screw drive as shown. Position the Driver this way to seat the bushing to its correct depth.
2. Place the shock absorber upper mounting eye in the Receiver so the notch in the Receiver clears the shock absorber body.
3. Position the bushing between the shock absorber eye and the Driver. Tighten the screw drive until the Driver, bushing, and shock absorber eye are
touching and squarely aligned.
4. Press the bushing into the shock absorber eye until the Driver bottoms against the face of the eye.
5. Back off the Ball Joint Press screw drive and remove the shock absorber from the press.
6. Install the shock absorber on the vehicle.
INSTALLATION - SHOCK ABSORBER
1. While holding shock absorber in position against the frame rail, install the shock absorber upper mounting bolt.
2. Install the shock absorber lower mounting bolt securing the lower end of the shock absorber to the axle.
3. Remove the support jack.
4. Lower the vehicle to the ground so the full curb weight of the vehicle is supported by the suspension.
5. Tighten the upper and lower shock absorber mounting bolt to a torque of 88 Nm (65 ft. lbs.).