
Intrepid V6-3.5L VIN K (2003)
Lateral Stabilizer Rod: Service and Repair
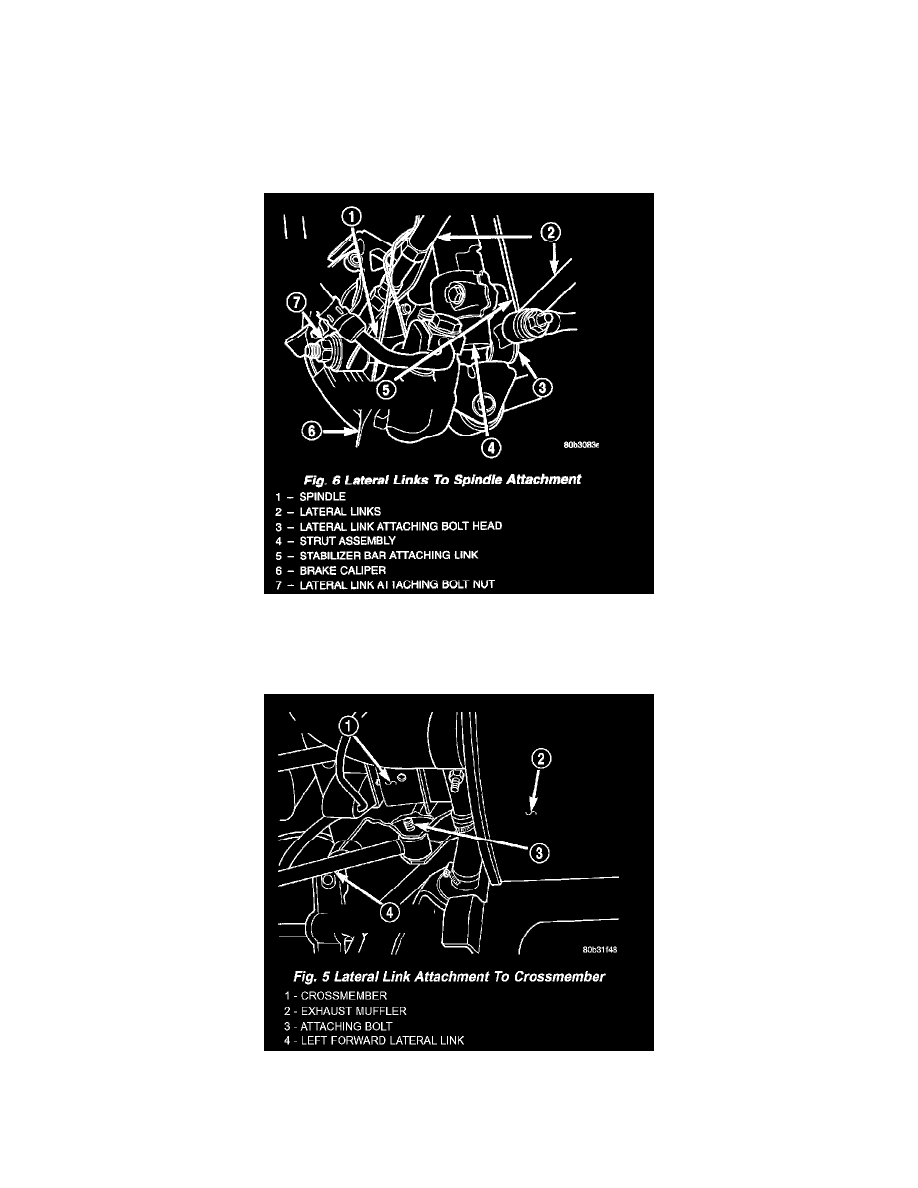
REMOVAL- LATERAL LINKS
The left forward lateral link requires a more involved removal and installation procedure in order to remove the attaching bolt at the crossmember. See
separate procedures below for the proper lateral link service procedure.
LEFT FORWARD LATERAL LINK
1. Raise vehicle on jackstands or centered on a frame contact hoist.
2. Remove left rear wheel and tire assembly from the vehicle.
3. Remove the nut and bolt attaching the left lateral links to the spindle.
4. Remove the nut attaching the left forward lateral link to the rear suspension crossmember. The bolt for the left front lateral link may not be
removed at this time. Remove the nut only. Once the crossmember is lowered, the bolt can be easily removed. Notice the forward link attaching
bolt faces rearward.
CAUTION: The bolts attaching the forward lateral links to the crossmember must be installed with the bolts pointing rearward to prevent damage
to the fuel tank and or fuel tubes. Also, the left rear lateral arm attaching bolt to the crossmember is to be installed pointing forward to prevent
possible damage to the fuel filler tube.