
Journey AWD V6-3.5L (2009)
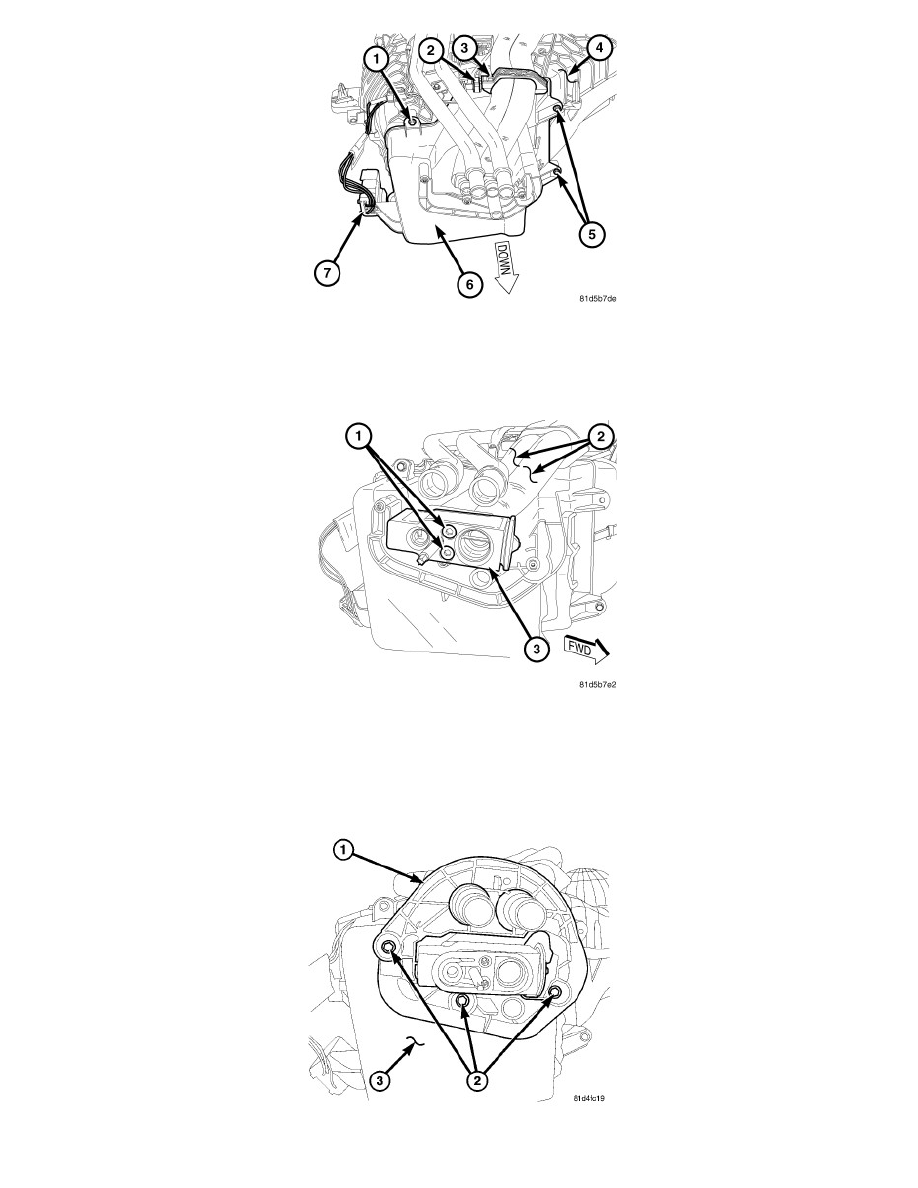
3. Install the lower rear heater-A/C housing (6) onto the rear heater-A/C housing (4). Rotate and tilt the lower housing as necessary for installation.
4. Install the five screws (1 and 5) that secure the lower housing to the rear heater-A/C housing. Tighten the screws to 1.2 Nm (10 in. lbs.).
5. Install the metal retaining clip (2) that secures the lower housing to the rear heater-A/C housing.
6. Close the evaporator tube retaining bracket (3). Make sure the bracket retainers are fully engaged.
7. Install the wire harness connector (7) onto the lower rear heater-A/C housing.
8. Remove the tape or plugs from the rear evaporator tubes and expansion valve ports.
9. Lubricate new rubber O-ring seals with clean refrigerant oil and install them onto the rear evaporator tube fittings. Use only the specified O-rings
as they are made of a special material for the R-134a system. Use only refrigerant oil of the type recommended for the A/C compressor in the
vehicle.
10. Install the rear A/C expansion valve (3) onto the tapping plate located on the end of the rear evaporator tubes (2)
11. Install two bolts (1) that secure the rear A/C expansion valve to the taping plate. Tighten the bolts to 11 Nm (97 in. lbs.).
12. Position the flange (1) to the bottom of the rear heater-A/C housing (3) and install the three retaining screws (2). Tighten the screws to 1.2 Nm (10