
Journey AWD V6-3.5L (2009)
NOTE: Make sure to remove the five bolts that secure the HVAC housing to the instrument panel support prior to removing the instrument
panel from the vehicle.
10. Remove the instrument panel See: Body and Frame/Interior Moulding / Trim/Dashboard / Instrument Panel/Service and Repair/Instrument Panel -
Removal.
11. Remove the rear floor ducts See: Air Duct/Service and Repair/Floor Distribution Duct - Removal.
12. Remove the condensation drain tube.
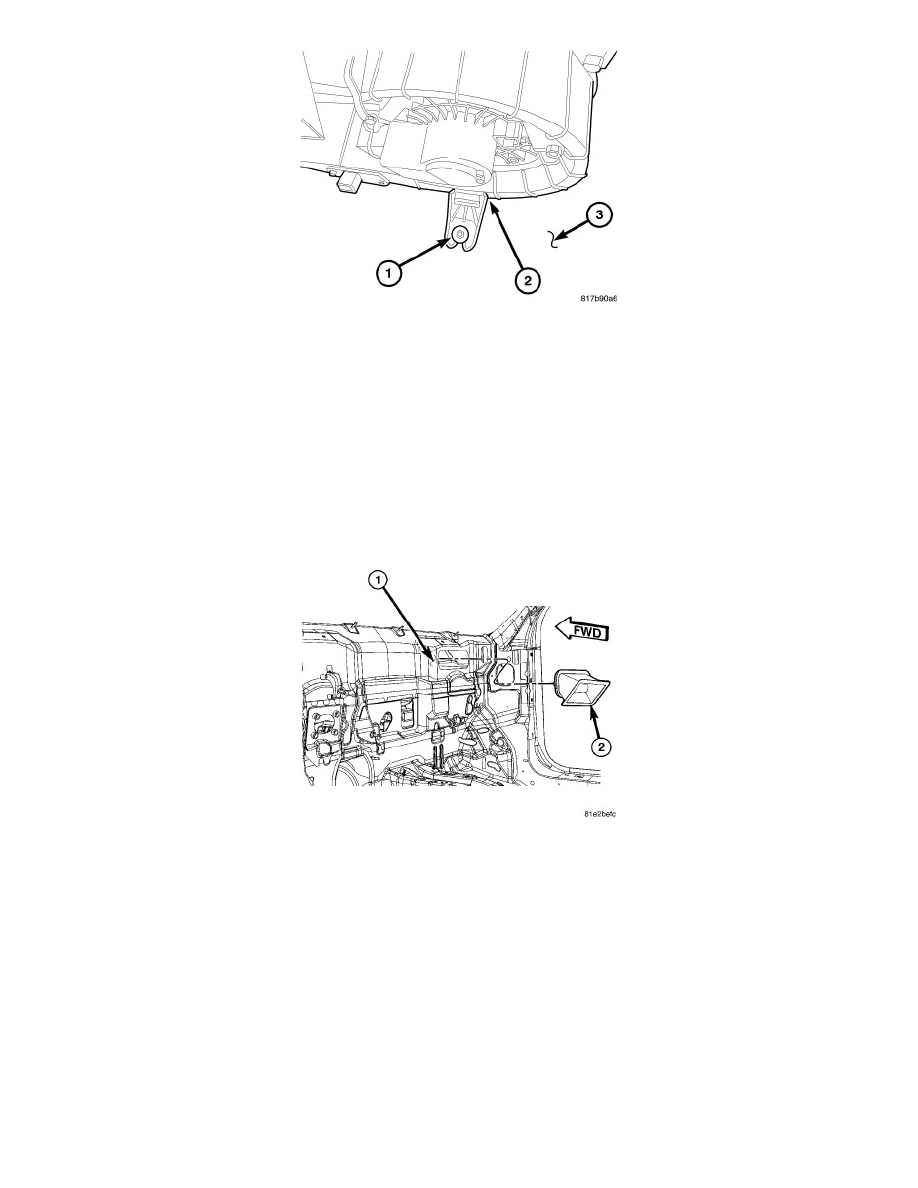
13. Remove the nut (1) that secures the passenger side of the HVAC housing (2) to the dash panel (3).
NOTE: Use care to ensure that the interior is covered in case of loss of residual fluids from the heater and evaporator cores.
14. Pull the HVAC housing rearward and remove the HVAC housing assembly from the passenger compartment.
15. If required, remove the HVAC housing air inlet duct (2) from the passenger compartment side of the dash panel (1).
Front HVAC Housing Installation
HOUSING-HVAC
NOTE: LHD model shown in illustrations.