
Journey AWD V6-3.5L (2009)
6. Release the brake pedal, but do not pull it upward.
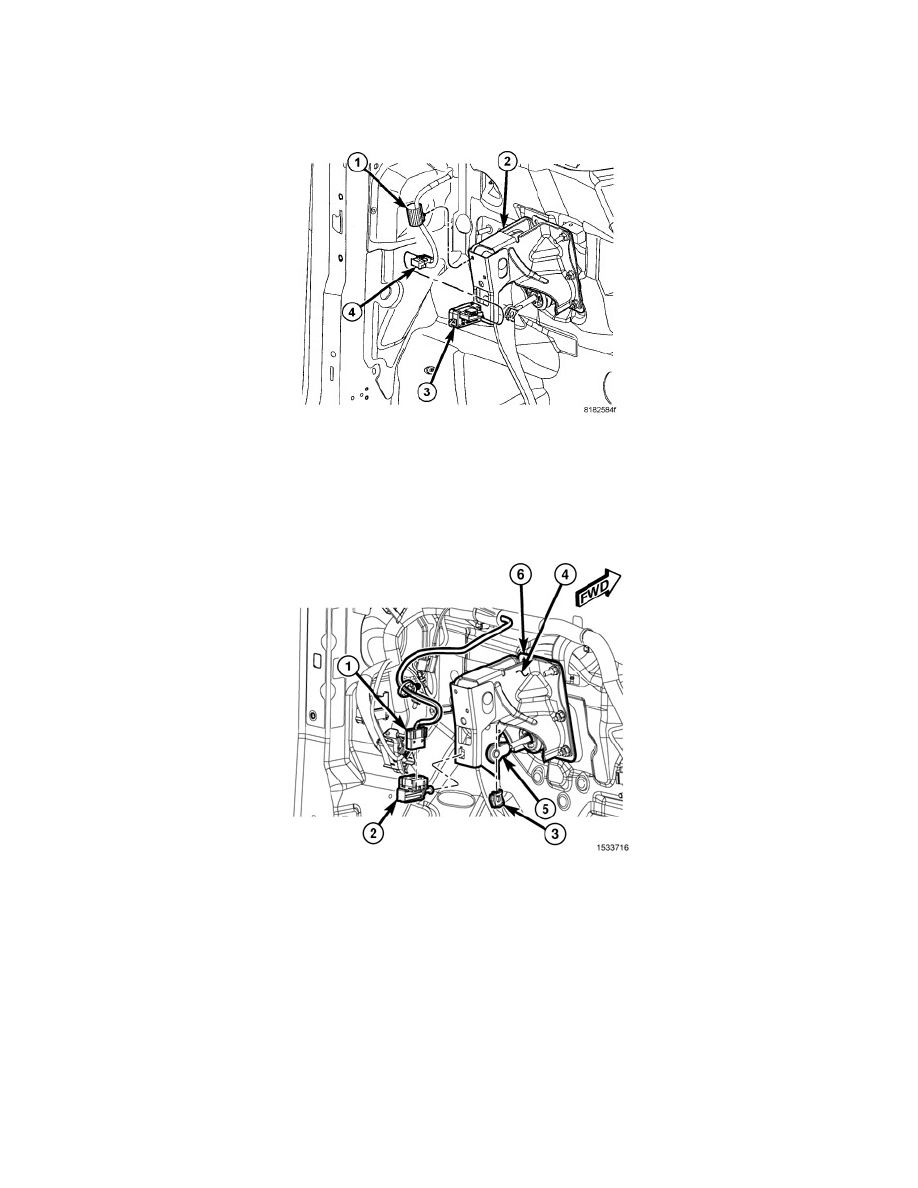
7. Rotate the plunger adjustment release lever (2) clockwise until it locks into place. The lever should be parallel to the brake lamp switch connector
receptacle. This action will set the switch plunger length to a final adjustment position and cannot be undone. If not performed properly the first
time, a new brake lamp switch MUST be installed.
8. Reconnect the wire harness connector (4) to the brake lamp switch (3).
9. If equipped, reinstall the silencer pad below the steering column. See: Body and Frame/Interior Moulding / Trim/Dashboard / Instrument
Panel/Service and Repair/Lower Silencer Panel - Installation.
10. Reconnect the battery negative cable.
LATE PRODUCTION
1. Be certain that the brake lamp switch (2) plunger is pulled all the way out of the switch housing to its fully extended position.
2. Reconnect the wire harness connector (1) to the connector receptacle on the switch.
3. Depress and hold the brake pedal in the depressed position.
4. Align the tabs on the brake lamp switch locking collar with the keyed hole in the brake pedal support bracket (2).
5. Insert the tab on the brake lamp switch locking collar through the keyed hole in the support bracket until the switch housing is firmly seated against
the bracket.
6. Rotate the switch housing clockwise about 30 degrees to engage the tabs on the locking collar with the support bracket.
CAUTION: Brake booster damage may occur if the brake pedal pull exceeds about 9 kilograms (20 pounds).
7. Release the brake pedal. Then pull the pedal lightly upward to its normal at-rest position. The pedal will set the plunger to the correct position as
the pedal pushes the plunger into the switch housing. The switch plunger will make a light audible ratcheting noise as it self-adjusts.
8. If equipped, reinstall the silencer pad below the steering column. See: Body and Frame/Interior Moulding / Trim/Dashboard / Instrument
Panel/Service and Repair/Lower Silencer Panel - Installation.
9. Reconnect the battery negative cable.