
Journey FWD V6-3.5L (2009)
Wiper Motor: Service and Repair
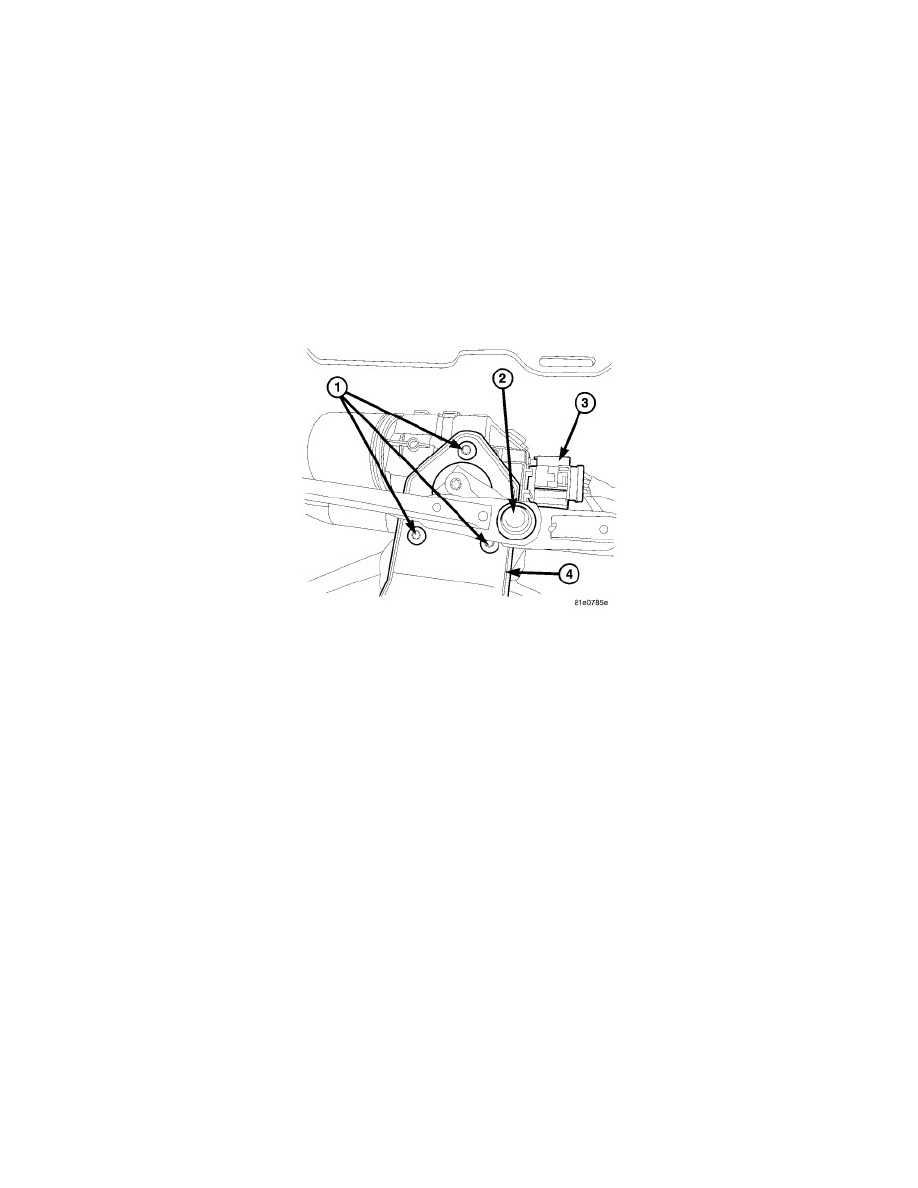
Wiper Motor - Installation
Front
FRONT
CAUTION: Do not apply pressure to, or pry on, the plastic drive link bushings. When removing a drive link from, or installing a drive link
onto the ball stud on the wiper motor crank arm, apply pressure to, or pry on, only the metal portions of the drive link around the
bushing. If the bushing is damaged, the entire front wiper linkage module MUST be replaced.
CAUTION: Do not remove the crank arm nut from the wiper motor output shaft. The crank arm is indexed to the output shaft with the motor
in the park position during the manufacturing process, but there are no provisions made for correctly indexing this connection in
the field. If the crank arm to output shaft indexing is incorrect, the entire front wiper motor and crank arm unit MUST be
replaced.
1. Position the front wiper motor to the center bracket (4) of the wiper linkage module from the underside of the bracket.
2. Install and tighten the three screws (1) that secure the motor to the bracket. Tighten the screws to 9 Nm (80 in. lbs.).
3. Reconnect the headlamp and dash wire harness connector to the wiper motor pigtail wire connector (3). Be certain to route the wire harness take
out under the wiper linkage module.
4. Reconnect the battery negative cable.
5. Turn the ignition switch (also known as the Wireless Ignition Node/WIN) to the ON position.
WARNING: To avoid serious or fatal injury and vehicle damage, be certain there are no objects including hands or fingers in the rotational
path of the wiper motor crank arm. The following step will activate the front wiper motor to ensure it is in the Park position, and
may cause the motor crank arm to complete up to one complete revolution.
6. Turn the front wiper system ON, then back to OFF using the right (wiper) multi-function switch control knob.
7. Wait until the wiper motor stops moving, then turn the ignition switch back to the OFF position.
8. Position the sleeve bushing of the left wiper drive link onto the ball stud on the end of the motor crank arm. Place a short 19 millimeter or 3/4 inch
socket over the bushing as an installation tool. Then use large channel-lock pliers to apply enough pressure to the underside of the crank arm and
the top of the socket to snap the bushing onto the ball stud. Do not apply pressure directly to the plastic bushing.