
Magnum V6-3.5L VIN V (2006)
CAUTION: The camshaft sprockets are keyed and not interchangeable from side to side because of the camshaft position sensor pick-up.
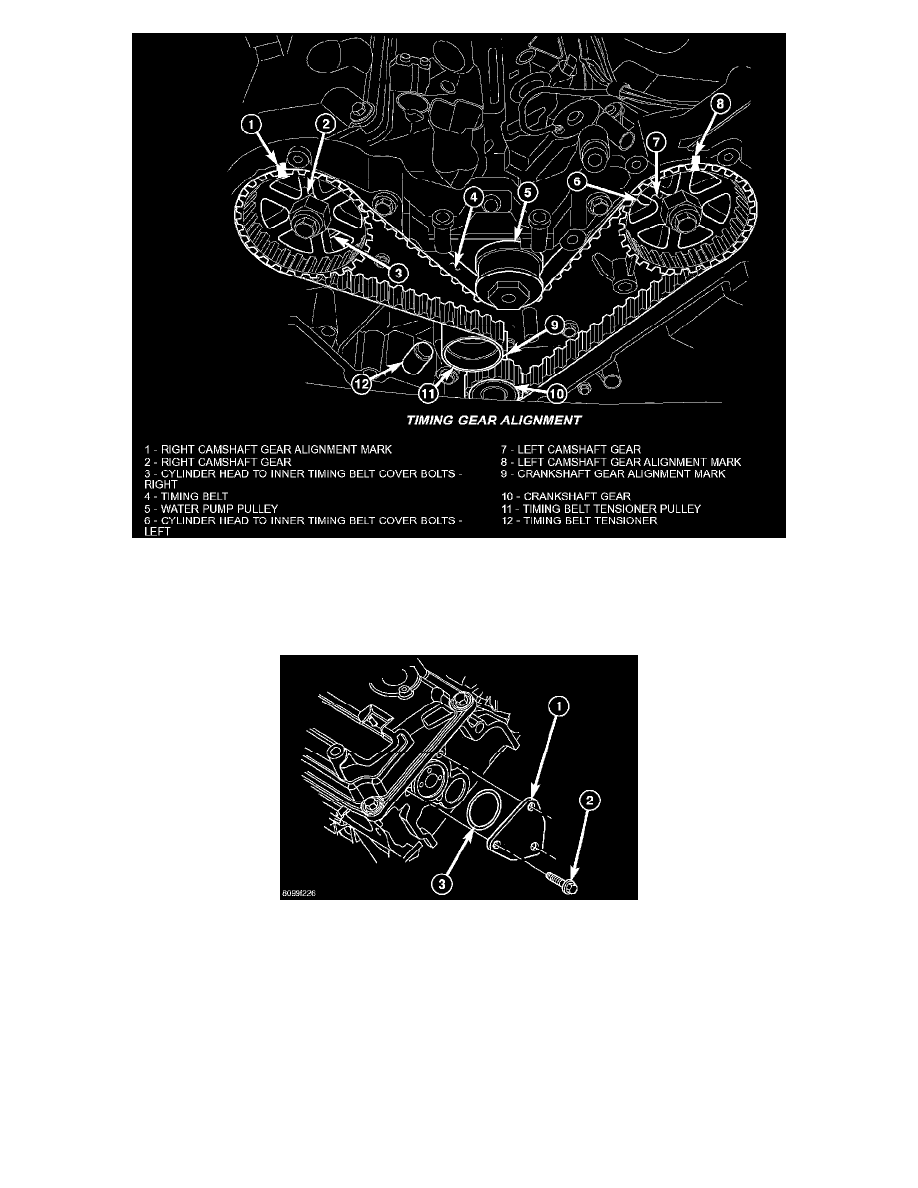
1. Install camshaft sprockets onto the camshafts. Install NEW sprocket attaching bolts into place. The 255 mm (10 inch) bolt is to be installed in the
left camshaft and the 213 mm (8 3/8 inch) bolt is to be installed into the right camshaft. Do not tighten the bolts; tightened at later step. Camshaft
sprocket (2, 7) marks (1, 8) should be aligned with the marks on the cover at both sprockets.
2. Install the camshaft thrust plates (1) and O-ring (3). Tighten bolts (2) to 28 Nm (250 inch lbs.).
3. Install the timing belt starting first at the crankshaft sprocket (10), then to remaining components in a counterclockwise direction.
4. Install the belt around the last sprocket. Maintain tension on the belt as it is positioned around the tensioner pulley (11). Each camshaft sprockets
mark should still be aligned with the rear cover marks.
NOTE: See timing belt tensioner reset procedure.
5. Hold the tensioner pulley against the belt and install the reset (pinned) timing belt tensioner into the housing.
Tighten attaching bolts to 28 Nm (250 inch lbs.).
6. Remove tensioner retaining pin to allow the tensioner to extend to the pulley bracket.
7. Using a dial indicator, position the number 1 piston at TDC.
8. Hold the camshaft sprocket hex with a 36 mm (1 7/16 inch) wrench and tighten the camshaft bolts to the following:
-
Right side = 102 Nm (75 ft. lbs.) +90° turn