RAM 1500 Truck 2WD V8-4.7L VIN N (2002)

Control Arm Bushing: Service and Repair
Removal
REMOVAL - LOWER CONTROL ARM BUSHINGS
1. Remove the lower control arm.
2. Secure the control arm in a vise.
NOTE: Extreme pressure lubrication must be used on the threaded portions of the tool. This will increase the longevity of the tool and insure
proper operation during the removal and installation process.
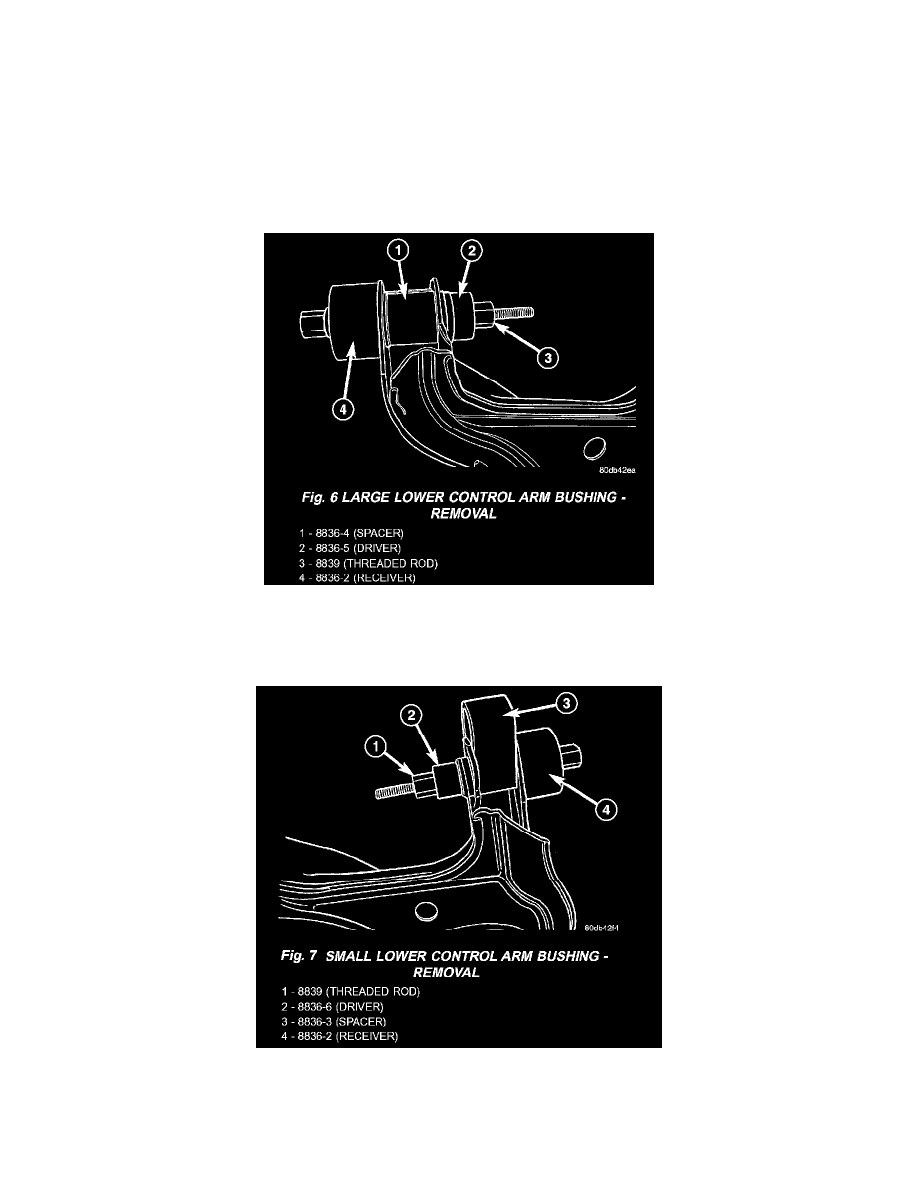
LARGE BUSHING
1. Install bushing remover tools 8836-2 (receiver), 8836-4 (spacer) and 8836-5 (driver) with the threaded rod 8839 and the bearing as shown for
replacement of the large bushing.
SMALL BUSHING
1. Install the bushing tool 8836-6 (driver), 8836-3 (spacer) and 8836-2 (receiver) with the threaded rod 8839 and the bearing as shown for the
replacement of the small bushing
