
RAM 1500 Truck 4WD V8-4.7L (2008)
20. Install plugs in, or tape over the opened ends of the A/C liquid lines and the evaporator tube.
21. Remove the rear section of the A/C liquid line from the engine compartment.
Suction Line
3.7L/4.7L ENGINES
WARNING: Refer to the applicable warnings and cautions for this system before performing the following operation See: Service
Precautions/Warning and See: Service Precautions/Caution. Failure to follow the warnings and cautions could result in possible personal
injury or death.
1. Disconnect and isolate the negative battery cable.
2. Recover the refrigerant from the refrigerant system See: Service and Repair/Refrigerant System Recovery .
3. Remove the air filter housing cover.
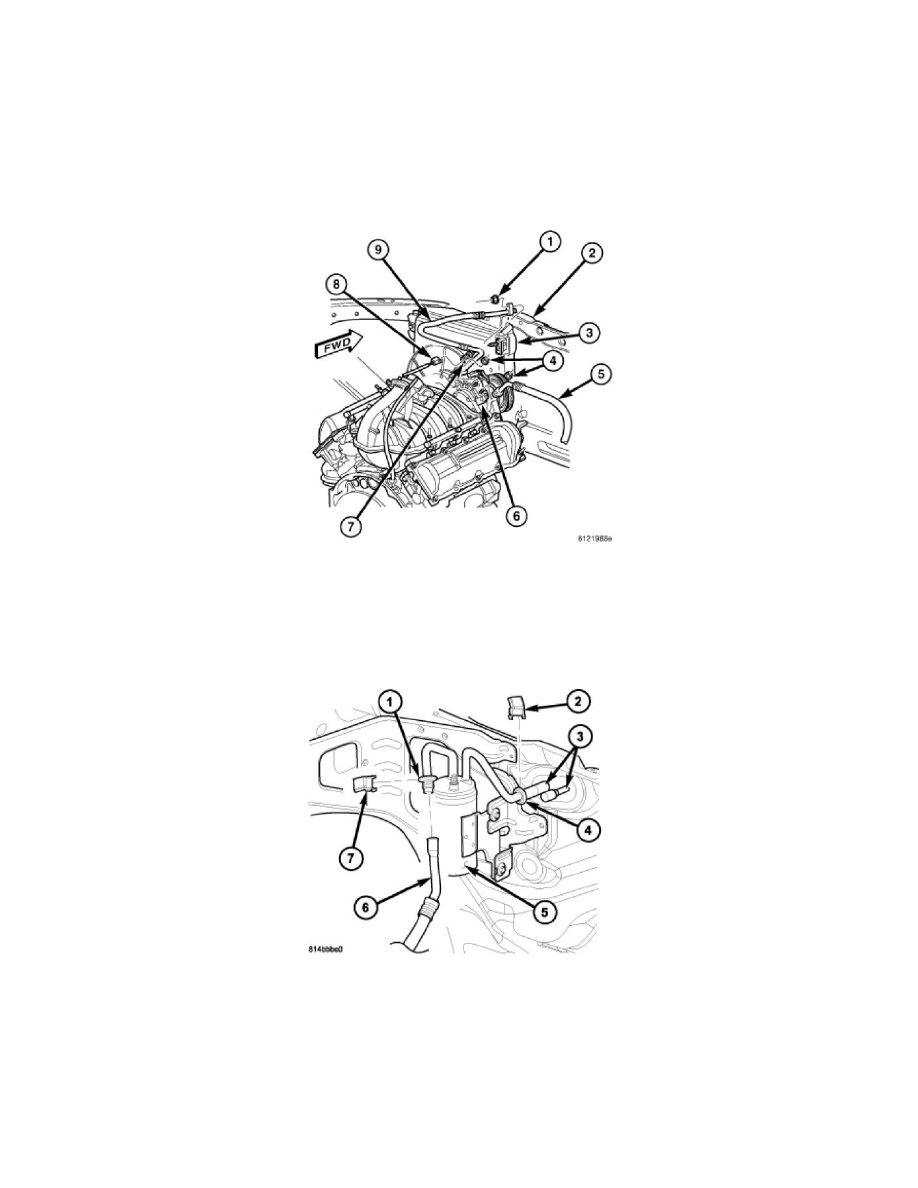
4. Remove the nut (4) that secures the A/C suction line (5) to the A/C compressor (6).
5. Disconnect the A/C suction line from the A/C compressor and remove and discard the O-ring seal and gasket.
6. Install plugs in, or tape over the opened refrigerant line fitting and the compressor port.
7. Remove the secondary retaining clip (7) from the spring-lock coupler (1) that secures the A/C suction line (6) to the accumulator (5).
8. Using the proper A/C line disconnect tool (Special Tool Kit 7193 or equivalent), disconnect the A/C suction line from the A/C accumulator See:
Coupler HVAC/Service and Repair/Removal .
9. Remove the O-ring seals from the accumulator tube fitting and discard the seals.
10. Install plugs in, or tape over the opened suction line fitting and the accumulator tube.
11. Remove the A/C suction line from the engine compartment.