RAM 1500 Truck 4WD V8-5.9L VIN Z (2002)

Crankshaft: Service and Repair
CRANKSHAFT
REMOVAL
NOTE: This procedure can be done in vehicle. However the transmission must be removed first.
1. If crankshaft is to be removed while engine is in vehicle remove the transmission.
2. Remove the oil pan.
3. Remove the oil pump from the rear main bearing cap.
4. Remove the vibration damper.
5. Remove the timing chain cover.
6. Identify rod bearing caps before removal. Remove rod bearing caps with bearings.
CAUTION: Support crankshaft before removing main bearing caps. failure to do so will allow the crankshaft to fall damaging the crankshaft.
7. Using a suitable jack, support the crankshaft.
8. Identify main bearing caps before removal. Remove main bearing caps and bearings one at a time.
9. Lower the crankshaft out of the block.
10. Remove and discard the crankshaft rear oil seals.
11. Remove and discard the front crankshaft oil seal.
INSTALLATION
1. Clean Gasket Maker residue and sealant from the cylinder block and rear cap mating surface. Do this before applying the Mopar Gasket Maker
and the installation of rear cap.
2. Lightly oil the new upper seal lips with engine oil.
3. Install the new upper rear bearing oil seal with the white paint facing towards the rear of the engine.
4. Position the crankshaft into the cylinder block.
5. Lightly oil the new lower seal lips with engine oil.
6. Install the new lower rear bearing oil seal into the bearing cap with the white paint facing towards the rear of the engine.
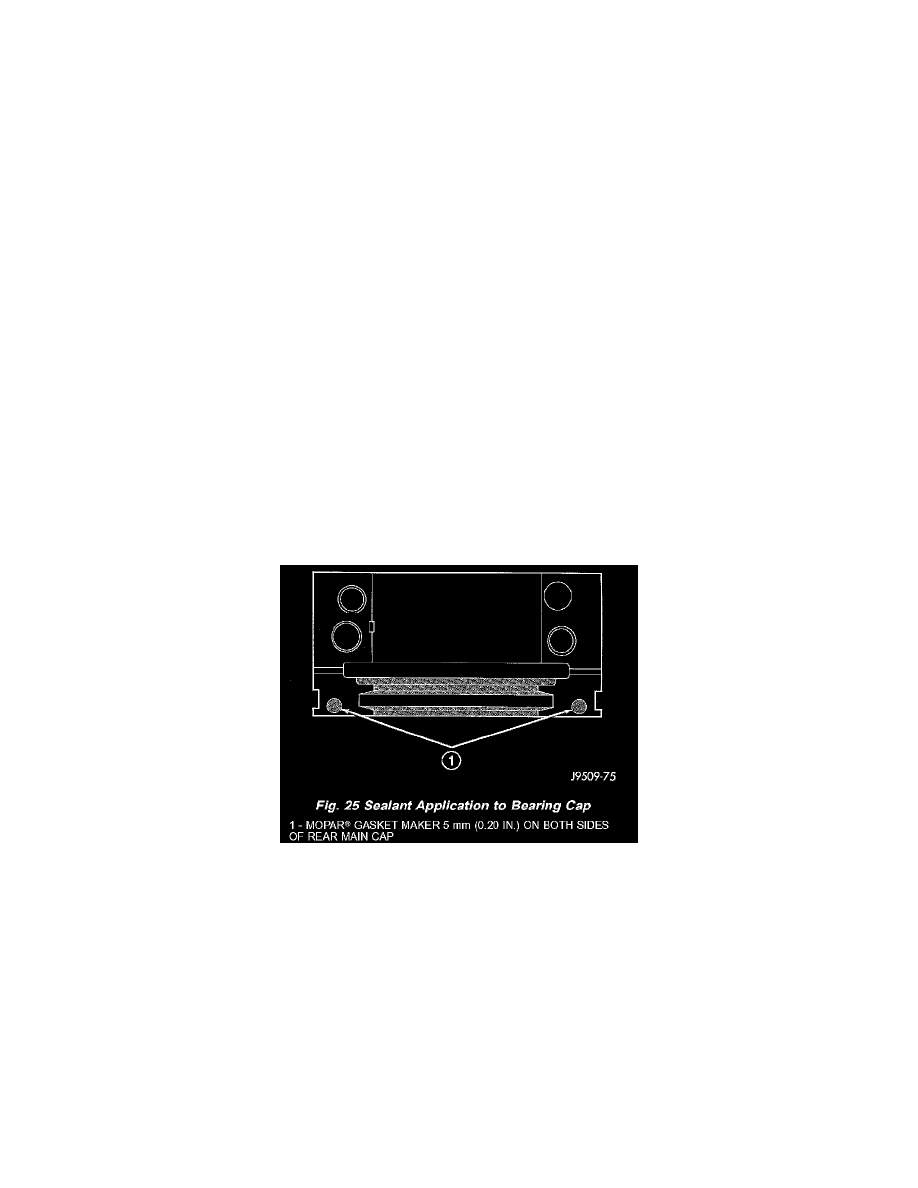
7. Apply 5 mm (0.20 inch) drop of Mopar Gasket Maker, or equivalent, on each side of the rear main bearing cap (Fig. 25). DO NOT over apply
sealant or allow the sealant to contact the rubber seal. Assemble bearing cap to cylinder block immediately after sealant application.
8. To align the bearing cap, use cap slot, alignment dowel and cap bolts. DO NOT remove excess material after assembly. DO NOT strike rear cap
more than 2 times for proper engagement.
9. Clean and oil all cap bolts. Install all main bearing caps. Install all cap bolts and alternately tighten to 115 Nm (85 ft. lbs.) torque.
10. Install oil pump.
11. Install the timing chain cover.
12. Install the vibration damper.
13. Position the connecting rods onto the crankshaft and install the rod bearing caps. Tighten the nuts to 61 Nm (45 ft. lbs.).
