
RAM 1500 Truck 4WD V8-5.9L VIN Z (2002)
Coupler HVAC: Service and Repair
REFRIGERANT LINE COUPLER
REMOVAL
1. Recover the refrigerant from the refrigerant system.
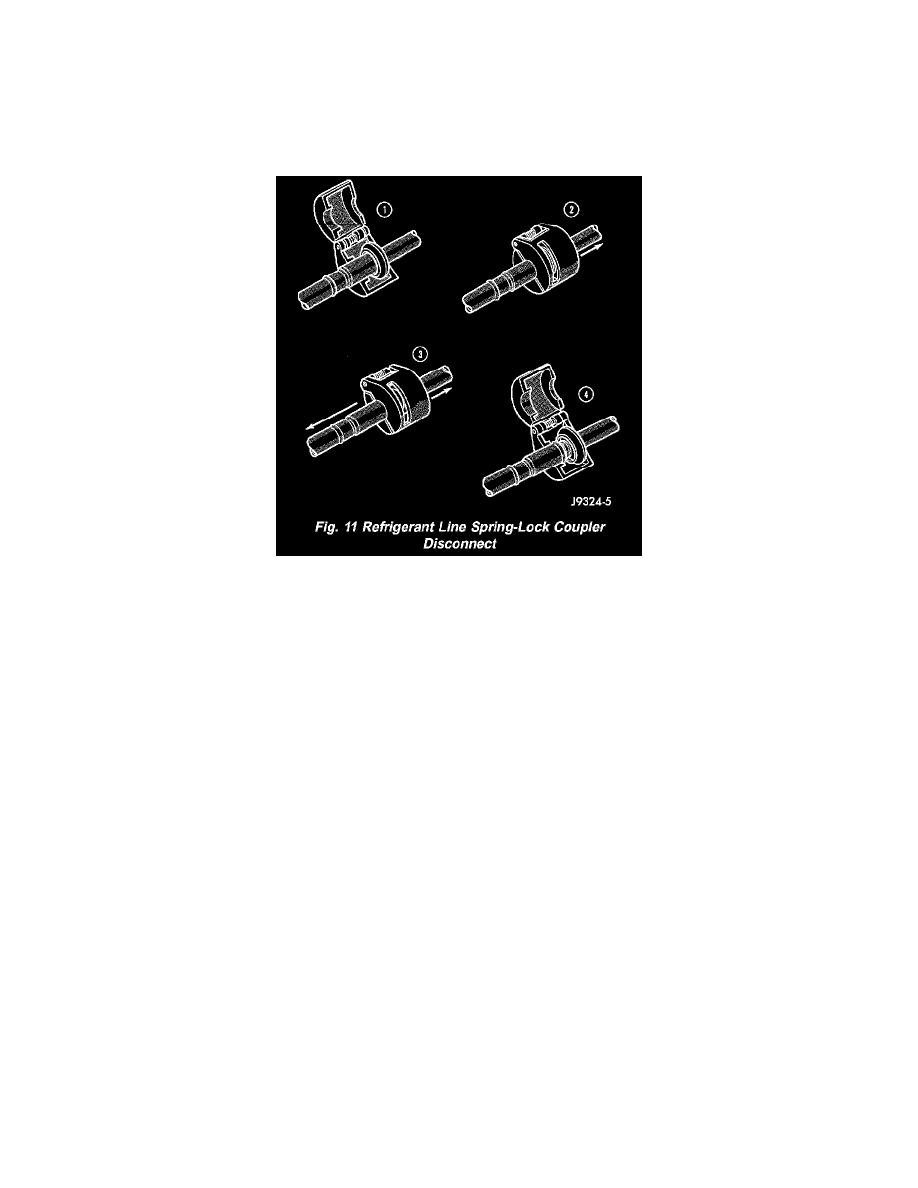
2. Remove the secondary clip from the spring-lock coupler.
Fig. 11 Refrigerant Line Spring-Lock Coupler Disconnect
3. Fit the proper size A/C line disconnect tool (Special Tool Kit 7193 or equivalent) over the spring- lock coupler cage.
4. Close the two halves of the A/C line disconnect tool around the spring-lock coupler.
5. Push the A/C line disconnect tool into the open side of the coupler cage to expand the garter spring. Once the garter spring is expanded and while
still pushing the disconnect tool into the open side of the coupler cage, pull on the refrigerant line attached to the female half of the coupler fitting
until the flange on the female fitting is separated from the garter spring and cage on the male fitting within the disconnect tool.
NOTE: The garter spring may not release if the A/C line disconnect tool is cocked while pushing it into the coupler cage opening.
6. Open and remove the A/C line disconnect tool from the disconnected spring-lock coupler.
7. Complete the separation of the two halves of the coupler fitting. Inspect the O-ring seals and mating areas do damage.
INSTALLATION
1. Check to ensure that the garter spring is located within the cage of the male coupler fitting, and that the garter spring is not damaged.
a. If the garter spring is missing, install a new spring by pushing it into the coupler cage opening.
b. If the garter spring is damaged, remove it from the coupler cage with a small wire hook (DO NOT use a screwdriver) and install a new garter
spring.
2. Clean any dirt or foreign material from both halves of the coupler fitting.
3. Install new O-rings on the male half of the coupler fitting.
CAUTION: Use only the specified O-rings as they are made of a special material for the R-134a system. The use of any other O-rings may allow
the connection to leak intermittently during vehicle operation.
4. Lubricate the male fitting and O-rings, and the inside of the female fitting with clean R-134a refrigerant oil. Use only refrigerant oil of the type
recommended for the compressor in the vehicle.
5. Fit the female half of the coupler fitting over the male half of the fitting.
6. Push together firmly on the two halves of the coupler fitting until the garter spring in the cage on the male half of the fitting snaps over the flanged
end on the female half of the fitting.
7. Ensure that the spring-lock coupler is fully engaged by trying to separate the two coupler halves. This is done by pulling the refrigerant lines on
either side of the coupler away from each other.
8. Reinstall the secondary clip over the springlock coupler cage.