RAM 1500 Truck 4WD V8-5.9L VIN Z (2002)

Shifter Transfer Case: Adjustments
NV241/GEN II - Transfer Case
ADJUSTMENT - SHIFT LEVER
1. Move shift lever into 2H position.
2. Raise vehicle.
3. Loosen shift rod lock bolt at trunnion.
4. Check shift rod fit in trunnion. Be sure rod does not bind in trunnion. Lubricate the shift rod and trunnion if necessary.
5. Verify that transfer case shift lever is in 2H detent position. The 2H detent position on the transfer case shift arm is the second position from full
forward.
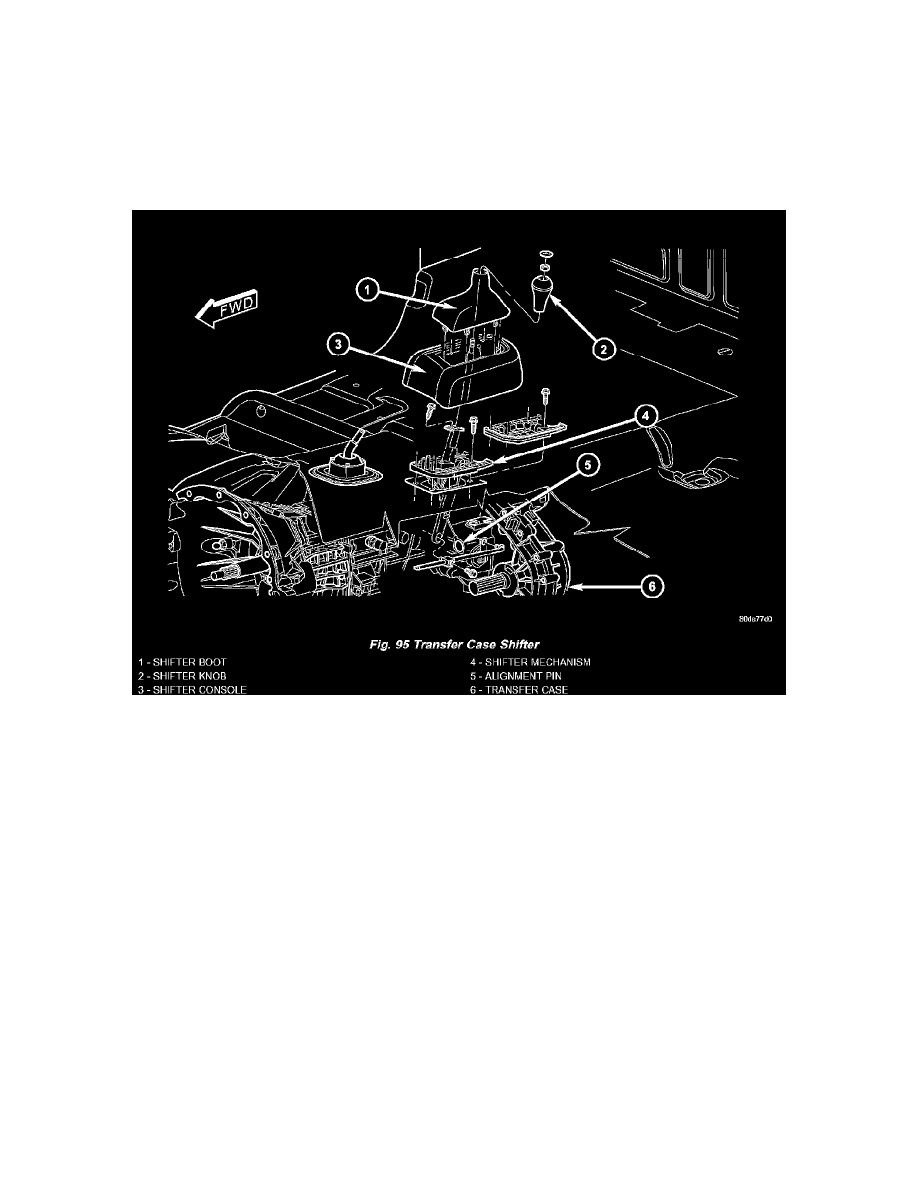
6. Align the adjustment locating hole on the lower shifter lever with the adjustment channel on the shifter bracket assembly (Fig. 95).
7. Insert an appropriately sized pin through into the adjustment channel and through the locating hole to hold the shifter in the correct position.
8. Tighten shift rod lock bolt to 10 Nm (90 inch lbs.) torque.
9. Remove the locating pin from the adjustment channel and locating hole.
10. Check shift linkage operation. Be sure transfer case shifts into and operates properly in all ranges.
