
RAM 1500 Truck 4WD V8-5.9L VIN Z (2002)
Windshield Washer Reservoir: Service and Repair
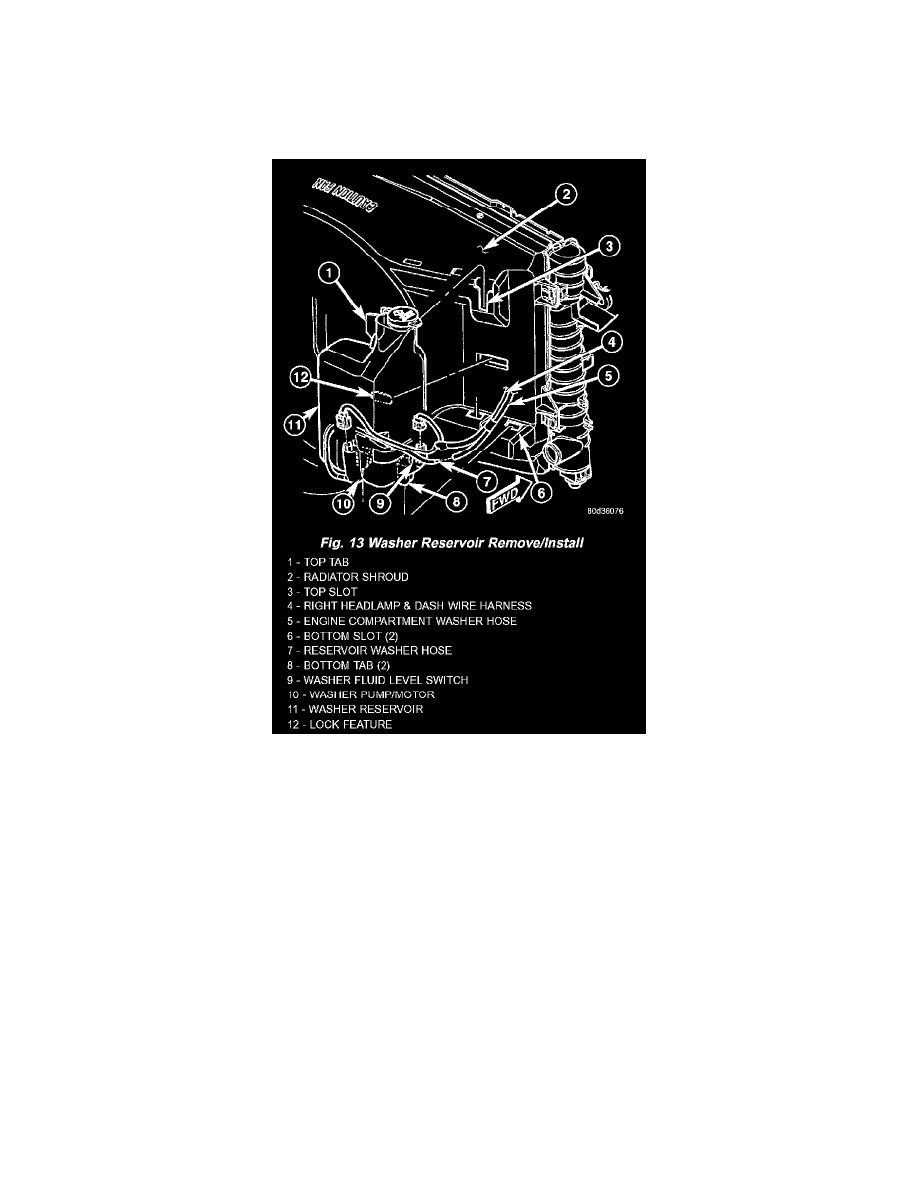
REMOVAL
1. Unlatch and open the hood.
2. Disconnect and isolate the battery negative cable.
3. Remove the fasteners securing the coolant recovery container or the coolant pressure container to the top of the cooling module and move the
container aside. It is not necessary to open or drain the engine cooling system.
Fig. 13 Washer Reservoir Remove/Install
4. Disconnect the reservoir washer hose from the barbed nipple of the in-line fitting at the engine compartment washer hose in the right headlamp and
dash wire harness and allow the washer fluid to drain from the reservoir into a clean container for reuse.
5. Disconnect the right headlamp and dash wire harness connector for the washer fluid level switch from the switch connector receptacle.
6. Disconnect the right headlamp and dash wire harness connector for the washer pump/motor unit from the motor connector receptacle.
7. Grasp the bottom of the washer reservoir firmly with both hands and pull the unit sharply upward to disengage the locking feature on the washer
reservoir from the depression in the radiator shroud.
8. Continue lifting the washer reservoir upward far enough to disengage the three mounting tabs (one at the top and two at the bottom) from the
channellike slot at the top and the two slots at the bottom of the radiator shroud.
9. Remove the washer reservoir from the right side of the engine compartment.
INSTALLATION
1. Position the washer reservoir into the right side of the engine compartment.
2. Align and insert the three mounting tabs (one at the top and two at the bottom) into the two slots at the bottom and the channel-like slot at the top
of the radiator shroud.
3. Place both hands on the top of the washer reservoir and push the unit downward far enough for the locking feature on the washer reservoir to snap
into the depression in the radiator shroud.
4. Reconnect the right headlamp and dash wire harness connector for the washer pump/motor unit to the motor connector receptacle.
5. Reconnect the right headlamp and dash wire harness connector for the washer fluid level switch to the switch connector receptacle.
6. Reconnect the reservoir washer hose to the barbed nipple of the inline fitting at the engine compartment washer hose in the right headlamp and
dash wire harness.
7. Reposition the coolant recovery container or the coolant pressure container to the top of the cooling module and reinstall the fasteners that secure