RAM 1500 Van V6-3.9L VIN X (1997)

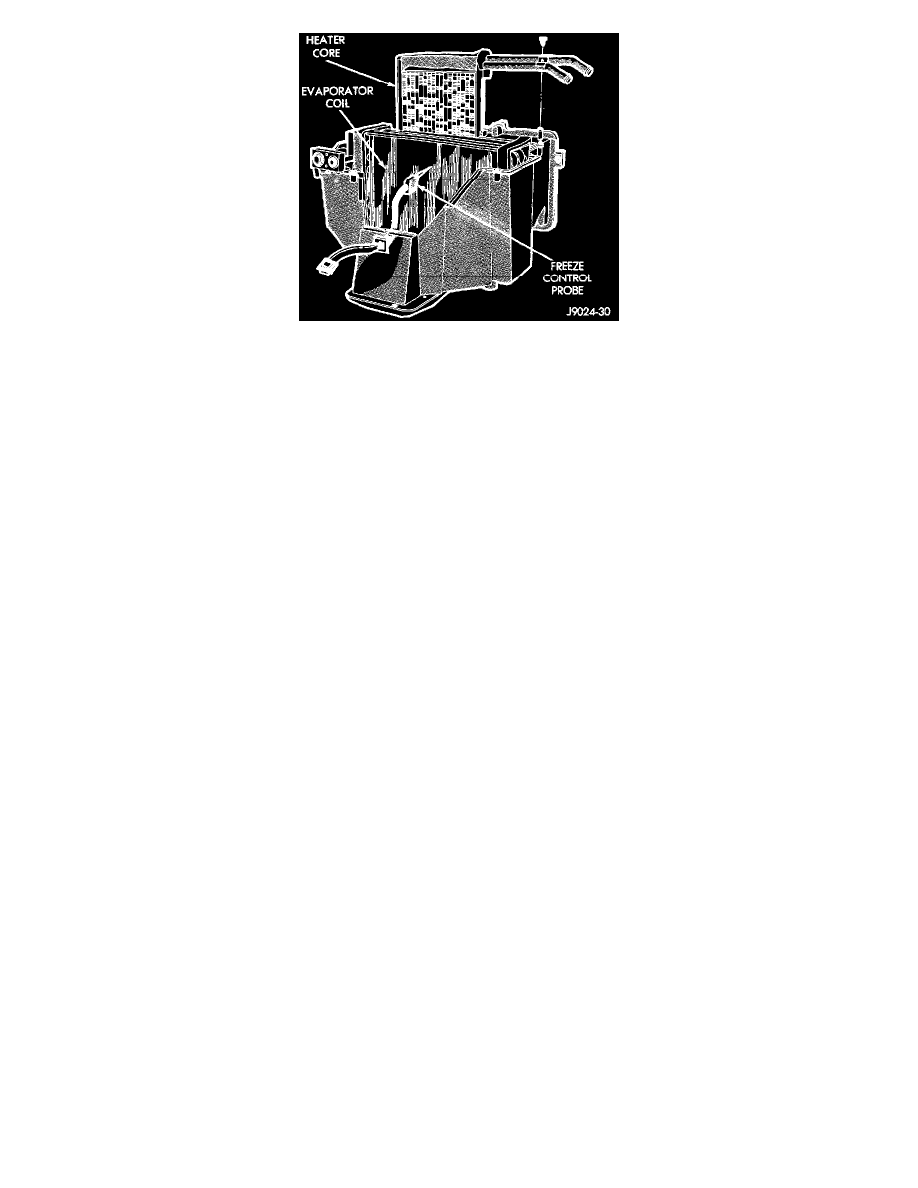
Fig 24 Heater Core Removal/Installation
16. Remove the screw that secures the strap over the heater core tubes and pull the core out of the housing.
17. Carefully remove the fin sensing cycling clutch switch probe from the evaporator coil fins.
18. Remove one screw from under the evaporator coil plumbing attachment plate and pull the evaporator coil from the heater-A/C housing.
INSPECTION
Examine all air seals for possible leaks. Replace damaged or deformed seals. Clean all of the housing mating surfaces and apply fresh sealing
compound before assembling the housing. Examine the evaporator coil and heater core for bent fins or other restrictions to air flow. Repair or
replace any faulty or damaged components as required.
INSTALLATION
1. Place the evaporator coil into the housing. Carefully insert the fin sensing cycling clutch switch probe into the evaporator fins and install the
retaining screw at the plumbing attachment plate.
2. Place the heater core into the housing and install the retaining strap and screw.
3. Install the housing cover with the cover screws.
4. Secure the heater-A/C housing assembly to the blower housing with the retaining screws.
5. Through the glove box opening, and from under the instrument panel, install the screws and nuts that secure the heater-A/C housing assembly to
the dash panel.
6. Install the lower instrument panel skirt, the right spot cooler duct and the glove box bin.
7. Install the grille panel, the cowl grille support panel, the right headlamp assembly, and the right radiator core support assembly.
8. Attach the temperature control cable to the housing cover.
9. Connect the heater hoses to the heater core tubes.
10. Install the screws in the filter-drier bracket.
11. Remove the plugs, or tape from the open refrigerant system plumbing fittings and connect the refrigerant plumbing at the expansion valve.
12. Plug in the fin sensing cycling clutch switch wire harness connector.
13. Fill the engine cooling system.
14. Connect the battery negative cable.
15. Evacuate the refrigerant system.
16. Charge the refrigerant system.
NOTE: If the evaporator coil is replaced, add 60 ml (2 oz.) of refrigerant oil to the refrigerant system.
