
RAM 2500 Truck 2WD L6-5.9L DSL Turbo VIN 6 (1998)
Antenna: Service and Repair
Refer to Body and Frame/Glove Compartment/Glove Box Replacement
REMOVAL
WARNING: ON VEHICLES EQUIPPED WITH AIRBAGS, REFER TO AIR BAGS AND SEAT BELTS/AIR BAGS BEFORE
ATTEMPTING ANY STEERING WHEEL, STEERING COLUMN, OR INSTRUMENT PANEL COMPONENT DIAGNOSIS OR SERVICE.
FAILURE TO TAKE THE PROPER PRECAUTIONS COULD RESULT IN ACCIDENTAL AIRBAG DEPLOYMENT AND POSSIBLE
PERSONAL INJURY.
1. Disconnect and isolate the battery negative cable.
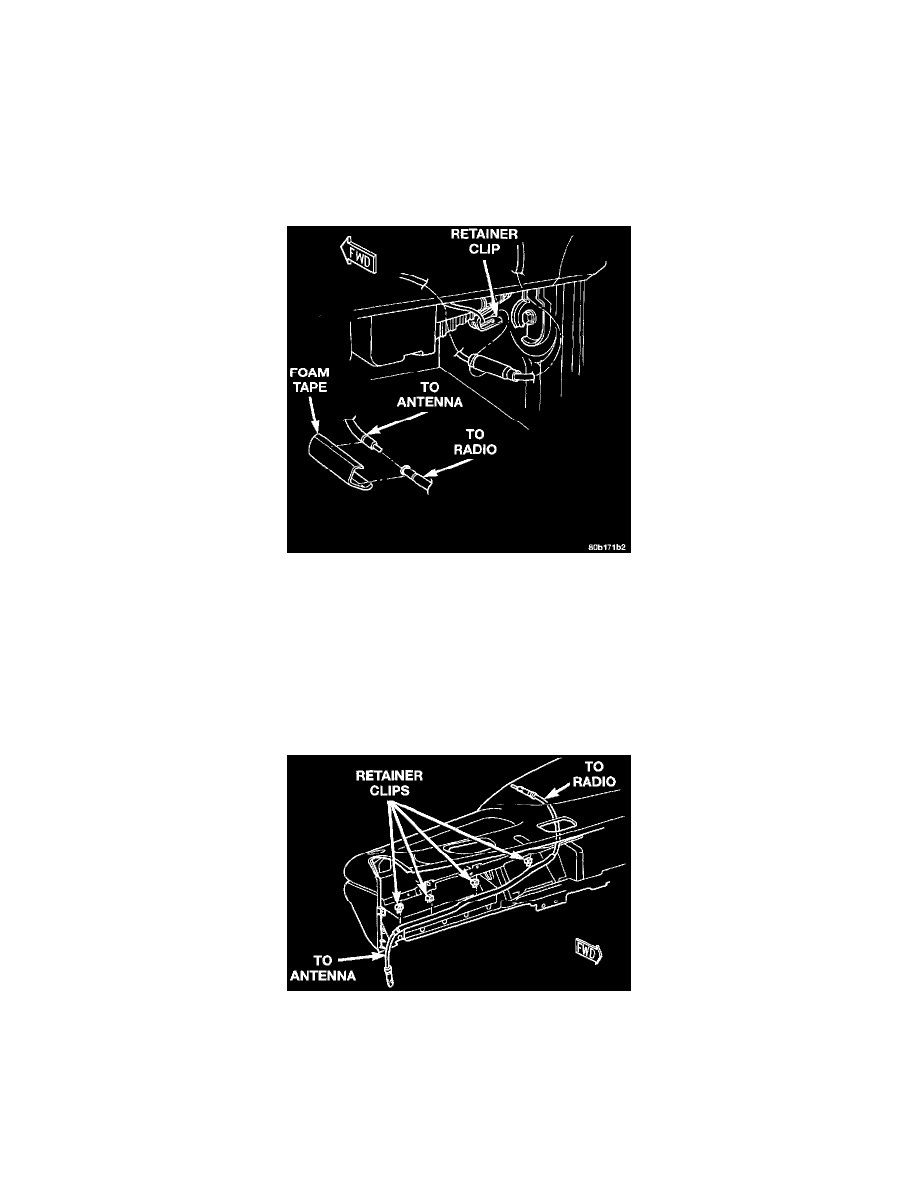
Antenna Coaxial Cable Connector
2. Reach under the passenger side of the instrument panel near the right cowl side inner panel to disengage the coaxial cable connector from the
retainer clip located on the bottom of the heater-A/C housing.
3. Remove the foam tape to access the coaxial cable connector. Unplug the connector by pulling it apart while twisting the metal connector halves.
Do not pull on the cable.
4. Securely tie a suitable length of cord or twine to the connector on the end of the coaxial cable half that is being removed from the vehicle. This
cord will be used to pull or "fish" the cable back into position during reinstallation. To remove the radio half of the antenna coaxial cable, go to
Step 5. To remove the antenna half of the antenna coaxial cable, go to Step 9.
5. Remove the glove box from the instrument panel. Refer to Body and Frame/Glove Compartment/Glove Box Replacement for the procedures.
Antenna Cable Routing
6. Reach through the glove box opening to disengage the radio half of the coaxial cable from the retainer clips on the back of the instrument panel.
7. Remove the radio from the instrument panel. See Radio in the Replacement for the procedures.
8. Remove the radio half of the antenna coaxial cable from the instrument panel.