
RAM 2500 Truck 2WD V8-5.7L (2008)
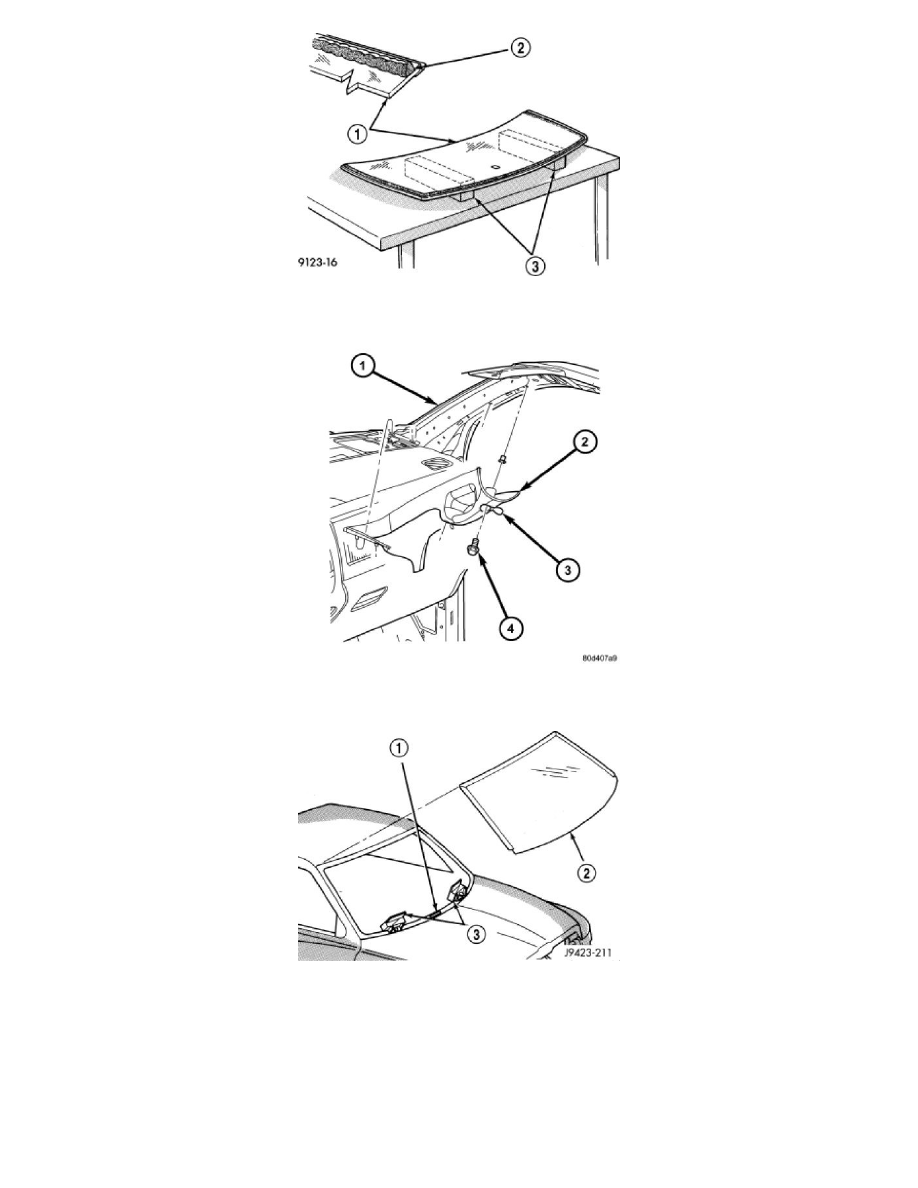
10. Apply a 13 mm (1/2 in.) high and 10 mm (3/8 in.) wide bead of urethane around the perimeter of windshield (2). At the top, apply the bead 7 mm
(1/4 in.) inboard from the glass edge. On the other three sides apply the bead 14 mm (0.55 in.) inboard from the glass edge.
11. Install the a-pillar trim (2) See: Body and Frame/Interior Moulding / Trim/Passenger Assist Handle/Service and Repair/A-Pillar Trim/Grab
Handle/Installation .
12. With the aid of a helper, position the windshield (2) over the windshield opening. Align the reference marks at the bottom of the windshield to the
support spacers (3).
13. Slowly lower windshield glass (2) to the fence opening guiding the lower corners into proper position. Beginning at the bottom and continuing to
the top, push glass (2) onto fence along the A-Pillars. Push windshield (2) inward to the fence at the bottom corners.
14. Push windshield (2) upward, setting the windshield to roof gap to 1.5 mm (0.06 in.) to 3 mm (0.12 in.) and ratchet up the adjustable support
brackets.
15. Using clean water, lightly mist the support spacers (3).
16. Clean excess urethane from exterior with MOPAR(R) Super Clean or equivalent.