
RAM 2500 Truck 4WD L6-5.9L DSL Turbo VIN 7 (2001)
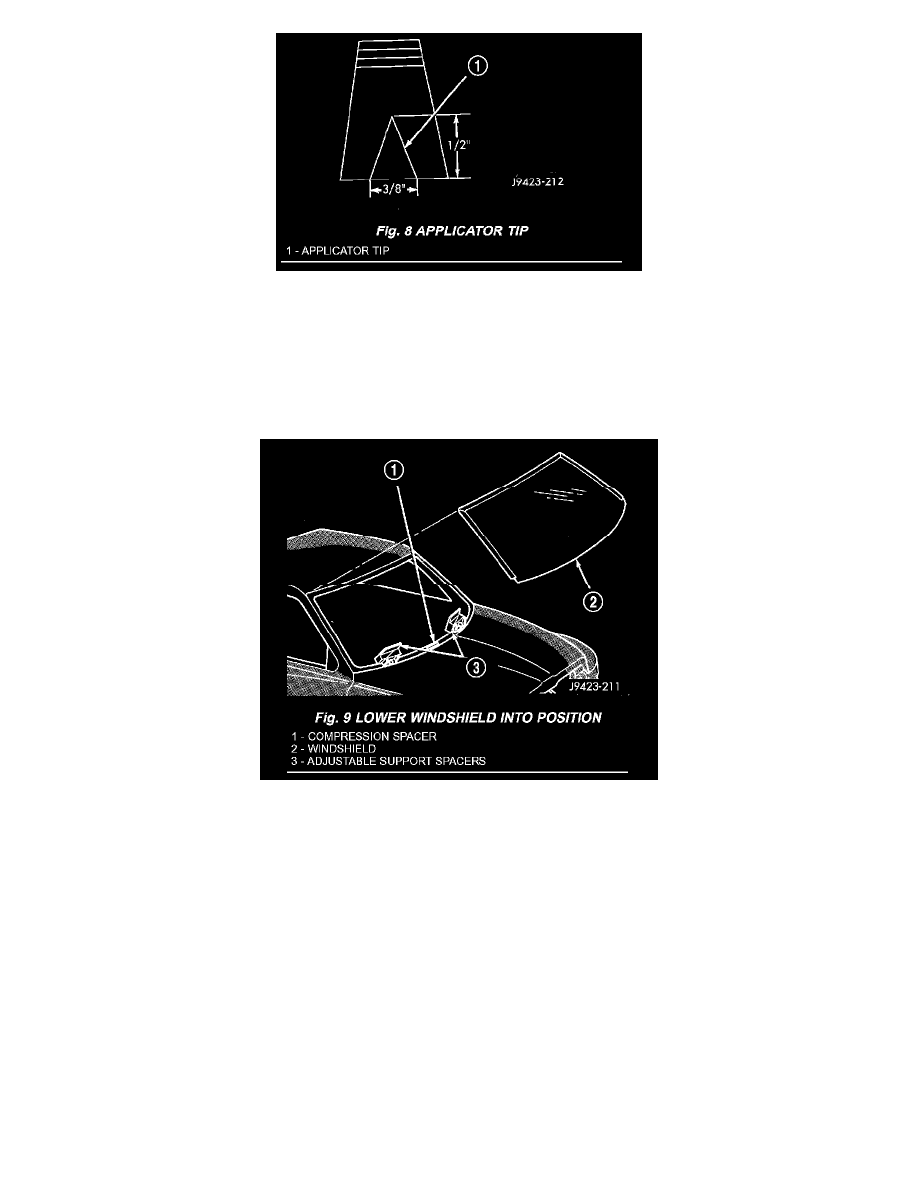
Fig. 8
9. Apply a 13 mm (1/2 in.) high and 10 mm (3/8 in.) wide bead of urethane around the perimeter of windshield. At the top, apply the bead 7 mm
(1/4 in.) inboard from the glass edge. On the other three sides apply the bead 14 mm (0.55 in.) inboard from the glass edge. The urethane bead
should be shaped in a triangular cross-section, this can be achieved by notching the tip of the applicator (Fig. 8).
10. Install the a-pillar trim.
11. With the aid of a helper, position the windshield over the windshield opening. Align the reference marks at the bottom of the windshield to the
support spacers.
Fig. 9
12. Slowly lower windshield glass to the fence opening guiding the lower corners into proper position. Beginning at the bottom and continuing to the
top, push glass onto fence along the A-Pillars. Push windshield inward to the fence at the bottom corners (Fig. 9).
13. Push windshield upward, setting the windshield to roof gap to 1.5 mm (0.06 in.) to 3 mm (0.12 in.) and ratchet up the adjustable support brackets.
14. Using clean water, lightly mist the support spacers.
15. Clean excess urethane from exterior with MOPAR(R) Super Clean or equivalent.
16. Install cowl grill.
17. Install rear view mirror support bracket.
18. Install rear view mirror.
19. Install the a-pillar weatherstrip retainer.
20. After urethane has cured, remove tape strips and water test windshield to verify repair.