
RAM 2500 Van V8-5.2L Prop VIN 2 (2000)
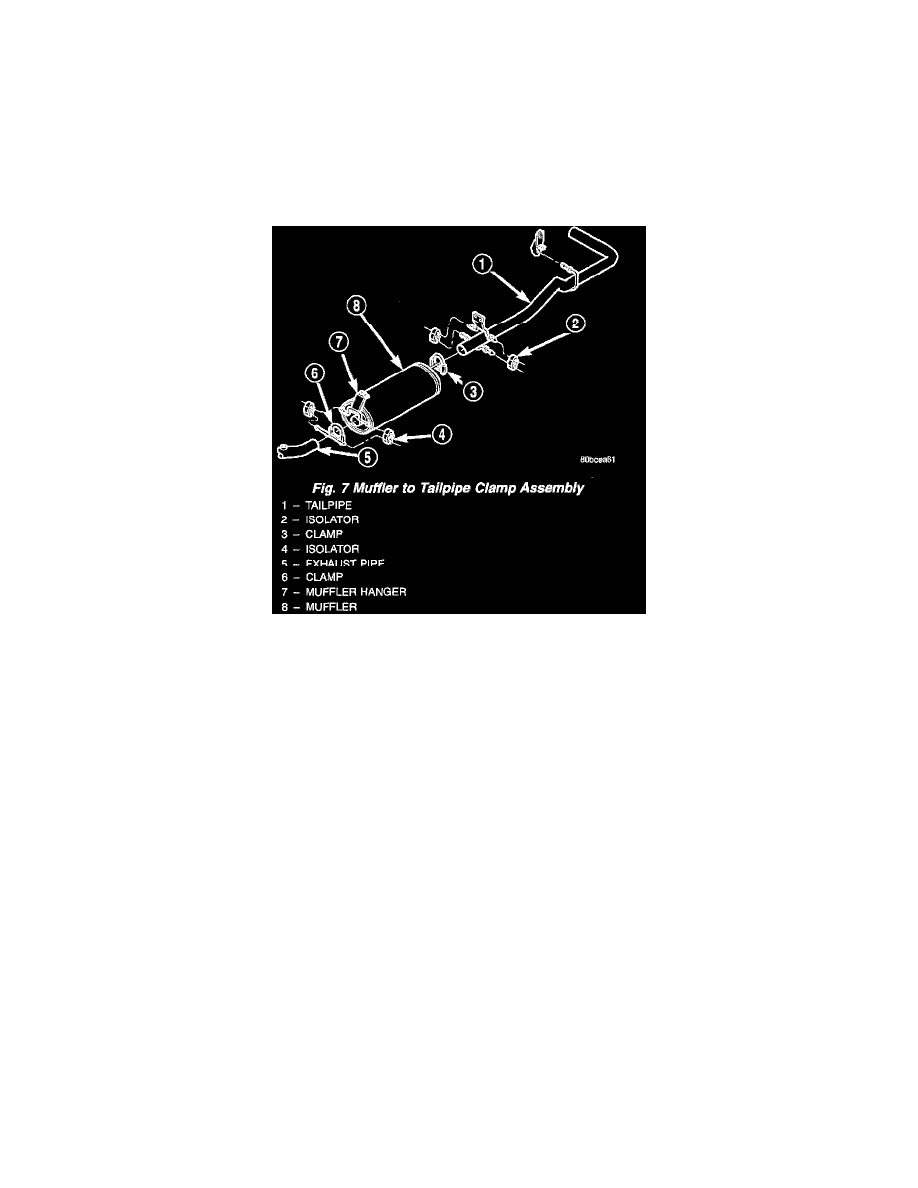
Muffler: Service and Repair
WARNING: IF TORCHES ARE USED WHEN WORKING ON THE EXHAUST SYSTEM, WEAR PROTECTIVE EYE COVERING AND
DO NOT ALLOW THE FLAME NEAR THE FUEL LINES.
CAUTION: When servicing or replacing exhaust system components, be sure to disconnect all oxygen sensor connectors. Allowing the exhaust
system to hang by the harness will damage the wiring and/or sensor.
REMOVAL
(1) Disconnect battery negative cable.
(2) Raise and support the vehicle.
(3) Remove tailpipe front and rear hanger rods from their insulators.
(4) Remove muffler to converter and muffler to tailpipe exhaust clamps.
(5) Heat muffler to tailpipe connection with an oxygen/acetylene torch. Twist tailpipe off of muffler.
(6) Heat muffler to converter connection with an oxygen/acetylene torch. Twist muffler off of converter pipe.
(7) Remove muffler from vehicle.
INSTALLATION
(1) Install the muffler into the catalytic converter flange pipe. Install the clamp and tighten the nuts by hand.
(2) Install the tailpipe into the rear of the muffler. Install the clamp and tighten the nuts by hand.
(3) Connect the tailpipe hanger rods to the insulators.
(4) Verify exhaust system alignment and tighten both muffler clamp nuts to 43 Nm (32 ft. lbs.) torque.
(5) Lower the vehicle.
(6) Connect the battery negative cable.
(7) Start the engine and inspect for exhaust leaks and exhaust system contact with the body panels. Adjust the alignment, if needed.