
RAM 2500 Van V8-5.9L VIN Z (1997)
Air Duct: Service and Repair
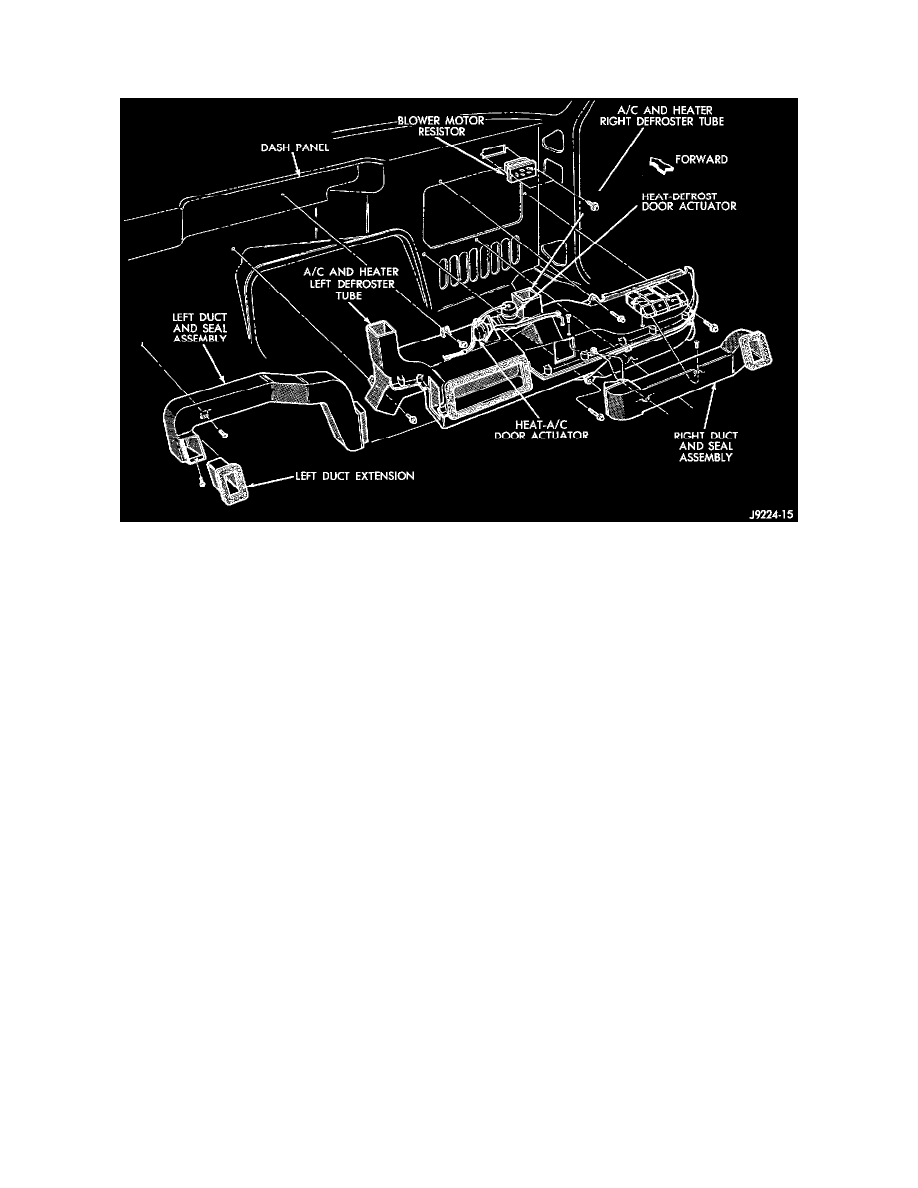
Air Distribution Duct Replacement
Fig 34 Heat-A/C Air Distribution Duct
REMOVAL
1. Disconnect and isolate the battery negative cable.
2. Remove the engine cover and the engine air cleaner.
CAUTION: Cover the throttle body opening to prevent foreign materials from entering the engine during service.
3. Remove the glove box bin.
4. Remove the right and left lower instrument panel skirts.
5. Remove the inside hood release bracket from the instrument panel.
6. Loosen the steering column.
7. Remove the instrument panel hood and bezel assembly.
8. Remove the instrument cluster and the radio.
9. Remove the screws that secure the left panel outlet duct (above the steering column). Move the duct out of the way.
10. Remove the right and left cowl side trim panels and the screws that secure the instrument panel to the cowl sides.
11. Remove the two braces supporting the lower edge of the instrument panel.
12. Remove the screws that secure the right panel outlet duct to the air distribution duct. Lift up on the instrument panel to remove the right panel
outlet duct.
13. Note the color and orientation of the vacuum harness connectors at the vacuum actuators for correct reinstallation. Unplug the vacuum harness
connectors from the actuators. Also, cut the tape where the vacuum harness is secured to the air distribution duct.
14. Remove the screws that secure the air distribution duct to the dash panel.
15. Lift the instrument panel as high as possible, without damage, and remove the air distribution duct. Raise it out of the engine cover extension
trough, then bring it rearward and out of the right side of the vehicle.
16. Remove the air distribution duct floor air cover.
17. Remove the heat-A/C door and heat-defrost door vacuum actuators.
18. Remove the heat-A/C door and crank arm.
19. Remove the heat-defrost door and crank arm.
20. Remove the heat-defrost duct separator plate.
INSTALLATION
1. Install the heat-defrost duct separator plate.
2. Install the heat-defrost door and crank arm.
3. Install the heat-A/C door and crank arm.
4. Install the heat-A/C door and heat-defrost door vacuum actuators.
5. Install the distribution duct floor air cover.