
RAM 3500 Truck 2WD V8-5.9L VIN 5 HDC (2000)
4. Press firmly and evenly on the rear edge of the trip computer lens or the cover plug until the rear mounting boss is fully seated in the receptacle, or
the snap features of the cover plug are fully engaged in the overhead console housing.
5. If the vehicle is so equipped, install the Compass Mini-Trip Computer module onto the overhead console. Refer to Compass Mini-Trip Computer
in the Removal and Installation for the procedures.
6. Install the overhead console onto the headliner. Refer to Overhead Console in the Removal and Installation for the procedures.
7. Reconnect the battery negative cable.
Sunglasses Storage Bin Replacement
REMOVAL
1. Disconnect and isolate the battery negative cable.
2. Remove the overhead console from the headliner. Refer to Overhead Console in the Removal and Installation for the procedures.
3. Remove the four screws that secure the reading and courtesy lamp housing to the back side of the overhead console housing. Move the lamp
housing aside as needed for access to the pivot latches that are integral to the overhead console housing for the sunglasses storage bin pivot pins.
4. Open the sunglasses storage bin.
5. From the back side of the of the overhead console housing, gently pry one of the pivot latches forward while pulling the sunglasses storage bin
pivot arm rearward until the pivot pin is disengaged from the latch. Repeat this step to disengage the second pivot pin from its pivot latch.
6. From the face side of the overhead console housing, remove the sunglasses storage bin from the overhead console.
INSTALLATION
1. From the face side of the overhead console housing, position the sunglasses storage bin pivot arms through the openings in the front of the storage
bin housing in the overhead console.
2. From the back side of the of the overhead console housing, align one of the pivot pins of the sunglasses storage bin with the pivot latch integral to
the overhead console housing. Press the pivot arm forward until the pivot pin is engaged in the latch. Repeat this step to engage the second pivot
pin with its pivot latch.
3. Close the sunglasses storage bin.
4. Position the reading and courtesy lamp housing to the back side of the overhead console housing. Install and tighten the four screws that secure the
lamp housing to the back of the overhead console housing. Tighten the screws to 2.2 Nm (20 in. lbs.).
5. Install the overhead console onto the headliner. Refer to Overhead Console in the Removal and Installation for the procedures.
6. Reconnect the battery negative cable.
Overhead Console Replacement
REMOVAL
1. Disconnect and isolate the battery negative cable.
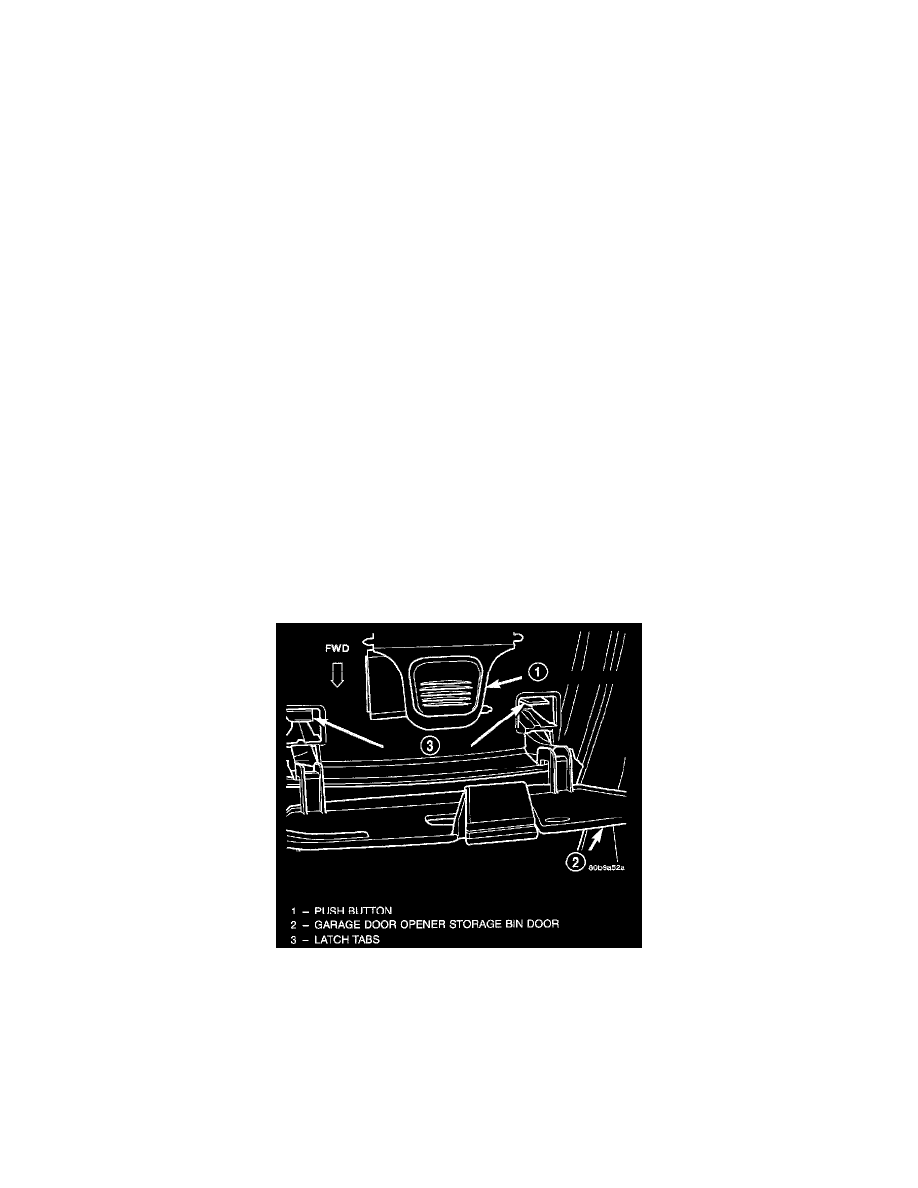
Overhead Console Latch Tabs
2. Open the garage door opener storage bin door and locate the two overhead console latch tabs near the front of the bin.
3. While pulling gently downward on the front of the overhead console, push the latch tabs forward until each latch is disengaged from its receptacle
in the inner roof panel.