
RAM 3500 Truck 4WD L6-6.7L DSL Turbo VIN A (2007)
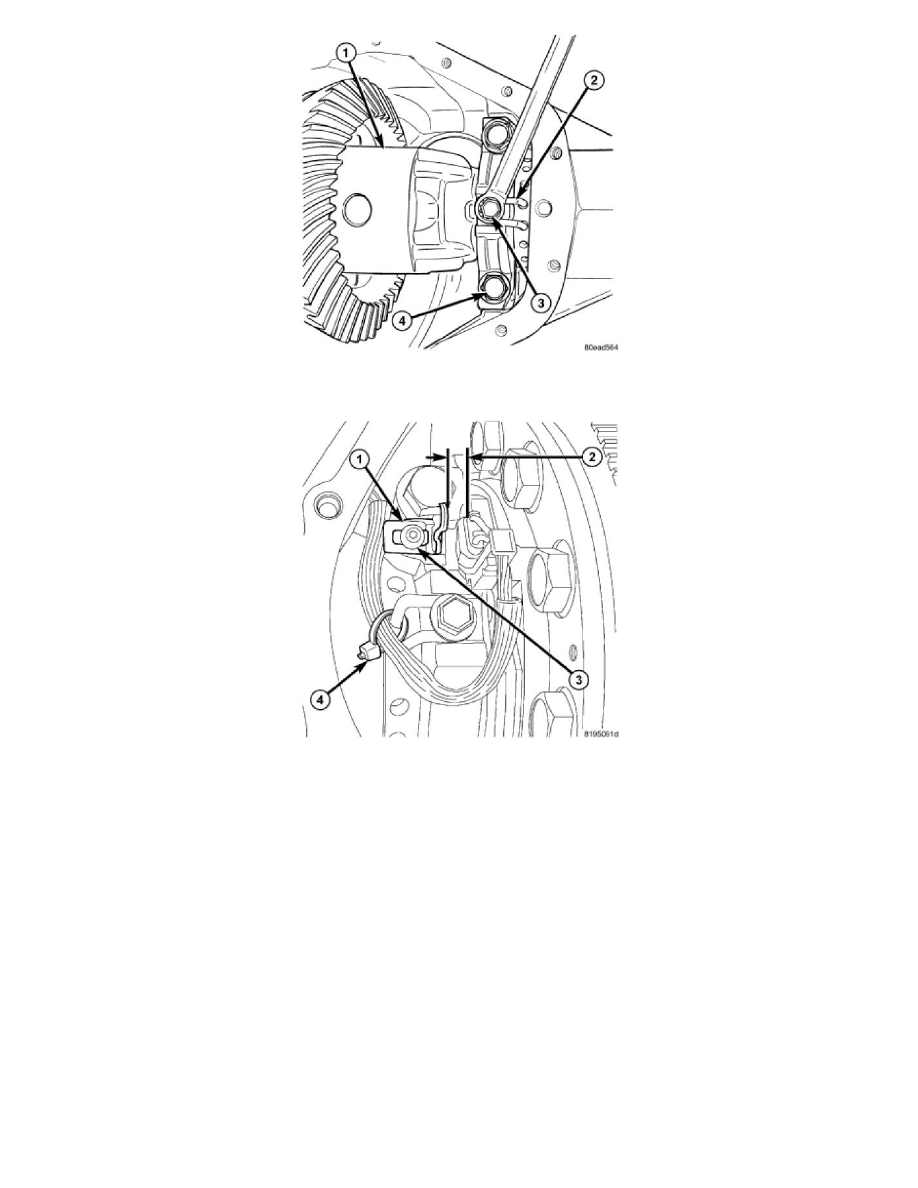
19. Tighten bearing cap bolts (4) to 165 Nm (122 ft. lbs.).
20. Tighten adjuster (2) lock bolts (3) to 25 Nm (18 ft. lbs.).
21. Measure ring gear backlash and check gear tooth contact pattern. Refer to Adjustments for procedure.
22. Install axle shafts.
23. Install sensor target magnet (1) on bearing cap.
24. Energize locker and rotate axle shaft. Verify dog clutch is engaged by rotating one axle while holding the other. If engaged axle will not rotate.
25. De-energize locker and rotate left axle 15 to 40 degrees so dog clutch gears will not engage.
26. Energize locker and set sensor air gap (2) to 5.5 mm ± 0.25 mm (0.21 in. ± 0.01 in.).
NOTE: System will time out within 2 minutes, when the key is in the on position and the engine is not running.
27. Tighten sensor target magnet bolt (3) to 7 Nm (62 in. lbs.).
28. Hold right axle and rotate left axle until dog clutch engages with an audible click nose.
NOTE: This will verify the sensor air gap was adjusted with the dog clutch gears ear to ear.
29. Install sensor wire tie strap (4) in the original location or at white dot on wiring harness to the top leg of adjuster lock and de-energize coil.
30. Install differential housing gasket and cover. Tighten cover bolts to 40 Nm (30 ft. lbs.).
31. Fill differential with lubricant to specifications.
32. Install fill plug and tighten to 32 Nm (24 ft. lbs.).
Removal
REMOVAL