
Rampage L4-135 2.2L (1983)
Heater Core: Service and Repair
W/O Air Conditioning
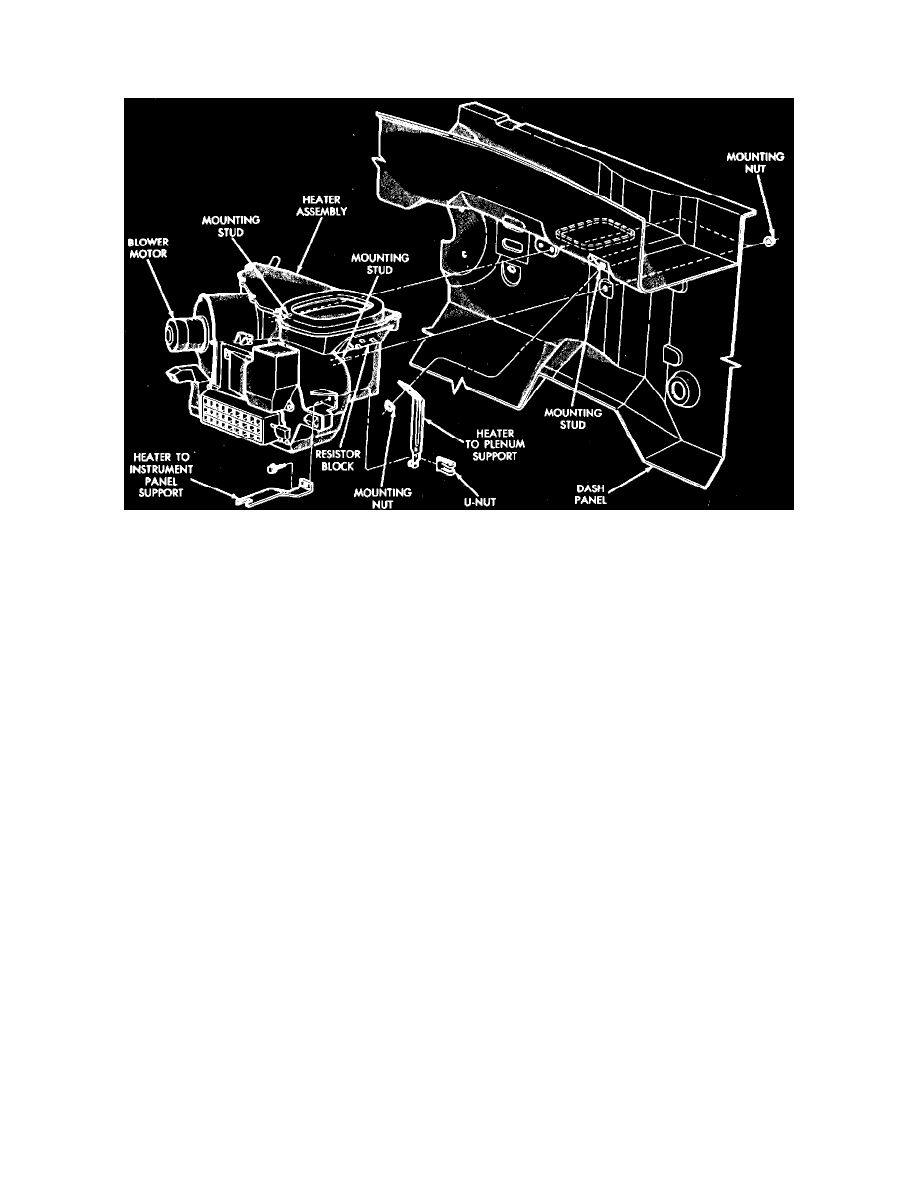
Fig. 7 Heater assembly. Models less A/C
1. Disconnect battery ground cable, then drain cooling system.
2. Disconnect blower motor electrical connector, then remove ashtray.
3. Depress red color coded tab on end of temperature control cable, and pull control cable out of receiver on heater assembly.
4. Remove glove box and door assembly.
5. Disconnect heater hoses and plug heater core tube openings.
6. Remove two heater assembly to dash panel attaching nuts.
7. Disconnect blower resistor electrical connector, then remove heater support brace to instrument panel attaching screws.
8. Remove heater support bracket nut, then disconnect strap from plenum stud and lower heater assembly from under instrument panel.
9. Depress yellow color coded tab on end of mode door control cable out of receiver on heater assembly.
10. Move heater unit towards right side of vehicle, then out from under instrument panel.
11. Remove left heater outlet duct attaching screws, then the heater outlet duct.
12. Remove four blower motor mounting plate attaching screws, then the blower motor assembly.
13. Remove four outside air and defroster door cover attaching screws, then the door cover.
14. Remove defroster door assembly, then lift defroster door control rod out of heater assembly.
15. Remove 8 heater core cover attaching screws, then the core cover.
16. Slide heater core up and out of heater assembly.
17. Reverse procedure to install.