
Sprinter 3500 L5-2.7L DSL Turbo (2004)
Steering Gear: Service and Repair
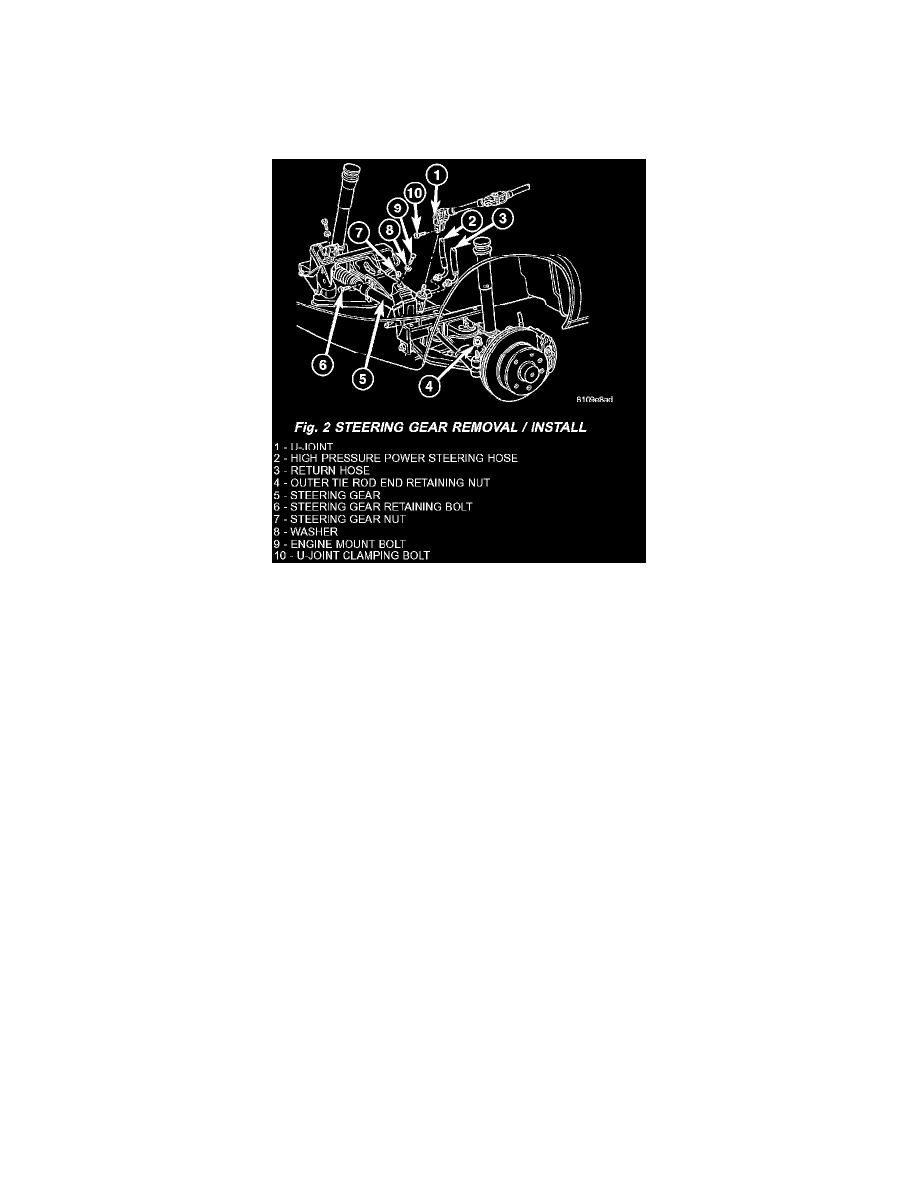
REMOVAL
1. Siphon the power steering fluid out of the reservoir.
2. Raise and support the vehicle.
3. Remove the front wheels.
4. Remove the stabilizer bar from the upper part of the stabilizer link.
5. Remove the outer tie rod end nuts and separate the tie rods from the steering knuckles (Fig. 2) using special tool C-3894-A.
6. Remove the left outer tie rod end from the steering gear.
7. Remove both spring clamp plates.
8. Remove both the high pressure and return hoses from the steering gear.
9. Remove the steering shaft clamping bolt from the steering gear (Fig. 2).
10. Separate the universal joint from the steering gear (Fig. 2).
11. Remove the steering gear bolts from the front axle.
12. Remove the steering gear by sliding it toward the passengers side of the vehicle and then tilt downward on the drivers side and remove from
vehicle.
INSTALLATION
1. Install the gear to the vehicle.
NOTE: Steering gear must be torqued in a three step procedure below.
2. Install the steering gear bolts (Fig. 2). Tighten to an initial torque of 25 Nm (18 ft. lbs.) Then torque to 45 Nm (33 ft. lbs.) and a final additional
90° turn for final torque.
3. Install the universal joint to the steering gear (Fig. 2). Tighten to 24 Nm (18 ft. lbs.).
4. Install both the power steering hoses to the steering gear (Fig. 2). Tighten the high pressure hose to 37 Nm (27 ft. lbs.).
5. Install the spring clamp plates.
6. Install the left outer tie rod end to the steering gear.
7. Install both the outer tie rod ends to the steering knuckle (Fig. 2). Tighten to 130 Nm (96 ft. lbs.).
8. Install the upper stabilizer bar link to the stabilizer bar.
9. Install the front wheels.
10. Fill and bleed the power steering system.
11. Reset toe adjustment.
12. Check steering system for leaks.