
Sprinter 3500 V6-3.0L DSL Turbo (2008)
Brake Light Bulb: Service and Repair
Removal
Bulb - Cab and Chassis
BULB - CAB AND CHASSIS
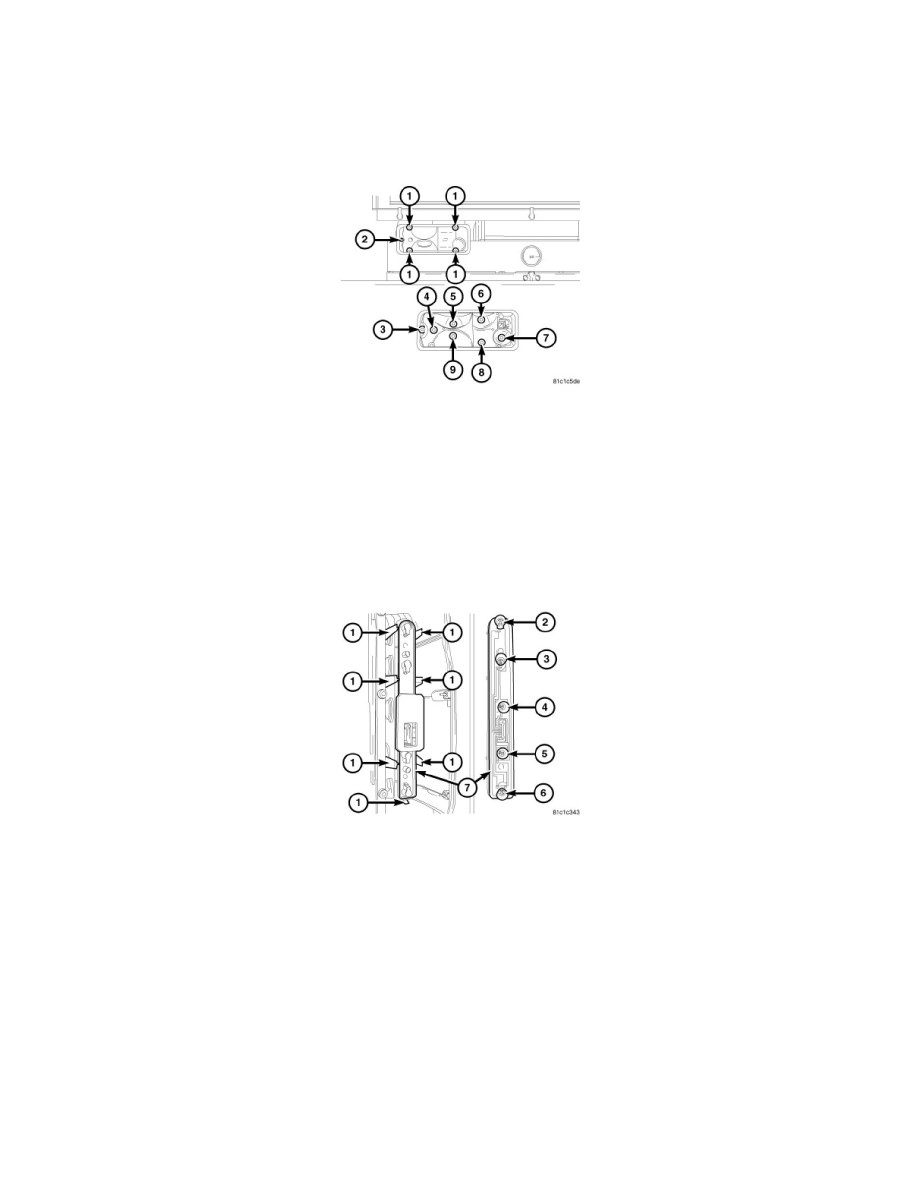
NOTE: The rear lamp unit contains up to seven bulbs: rear side marker (3), turn signal (4), brake lamp (5), park/tail (6), license (8), backup (9)
and, on the driver side only, a rear fog lamp (7). The service procedures for each bulb are the same, only the bulb sizes and types may differ.
1. Disconnect and isolate the battery negative cable.
2. Remove the four screws (1) that secure the lens (2) to the rear lamp unit housing.
3. Remove the lens from the housing.
4. Push the ineffective bulb (3, 4, 5, 6, 7, 8 or 9) slightly toward the socket and rotate it counterclockwise about 30 degrees to unlock it.
5. Pull the base of the bulb straight out of the socket.
Bulb - Van and Wagon
BULB - VAN AND WAGON
NOTE: The rear lamp unit contains up to five bulbs: brake lamp (2), park/tail/rear side marker (3), backup (4), turn signal (5) and, on the
driver side only, a rear fog lamp (6). The service procedures for each bulb are the same, only the bulb sizes and types may differ.
1. Disconnect and isolate the battery negative cable.
2. Remove the rear lamp unit from the vehicle. See: Service and Repair/Removal and Replacement/Rear Lamp Unit - Removal.
3. Release each of the seven latch features (1) that secure the socket plate (7) to the back of the rear lamp unit housing.
4. Remove the socket plate from the lamp housing.
5. Push the ineffective bulb (2, 3, 4, 5 or 6) slightly toward the socket plate and rotate it counterclockwise about 30 degrees to unlock it.
6. Pull the base of the bulb straight out of the socket plate.