
SRT-4 L4-2.4L Turbo VIN S (2004)
6. Remove the two screws holding the master cylinder remote reservoir to the dash panel.
7. Disconnect the master cylinder push rod from the pedal pin. Inspect plastic retainer. If retainer is damaged in any way, it MUST be replaced.
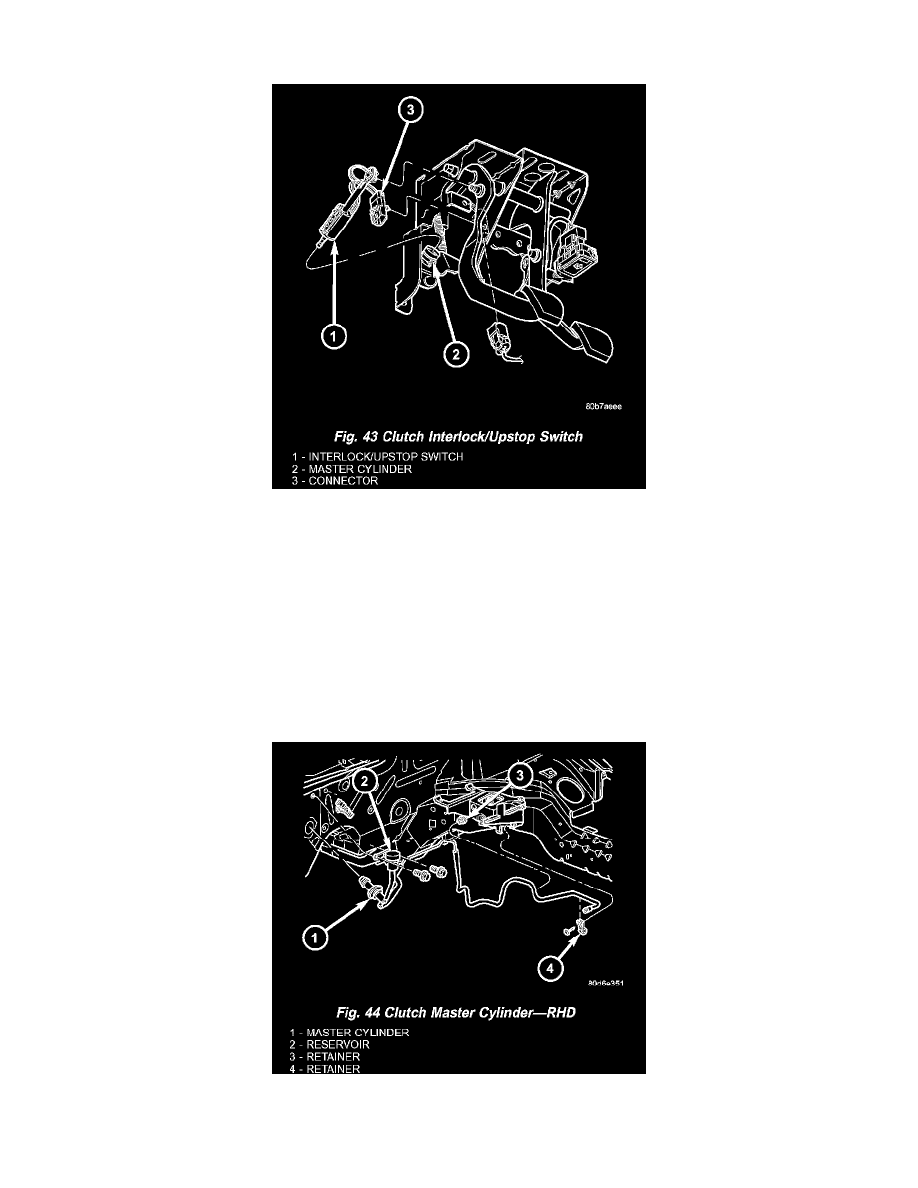
8. Remove the clutch interlock/upstop switch cover plate and switch housing (Fig. 43) from the master cylinder push rod.
9. From the engine compartment, grasp the master cylinder body and rotate approximately 45° in a counter-clockwise direction.
10. Disengage the master cylinder from the pedal bracket assembly.
11. Remove the master cylinder from the vehicle. If difficulty is encountered in removing the master/slave cylinder assembly, cut the hydraulic tube to
divide the system into two pieces and remove.
INSTALLATION
NOTE: These models are equipped with a one-piece master/slave cylinder assembly. If the master cylinder requires replacement, the master AND
slave cylinder must be replaced with a two-piece "quick-connect" system. If the slave cylinder requires replacement, the slave cylinder is serviced
separately.
NOTE: Replacement master cylinder assemblies come pre-filled with fluid. No fluid service or system bleeding should be required.
1. Install the master cylinder into position on the dash panel. (Fig. 44).
2. Seat the master cylinder in the pedal bracket assembly.
3. Rotate the master cylinder approximately 45° in the clockwise direction.