
Stratus Sedan V6-2.7L VIN T FFV (2003)
Control Arm: Service and Repair
LOWER CONTROL ARM
REMOVAL
1. Raise vehicle.
2. Remove tire and wheel assembly.
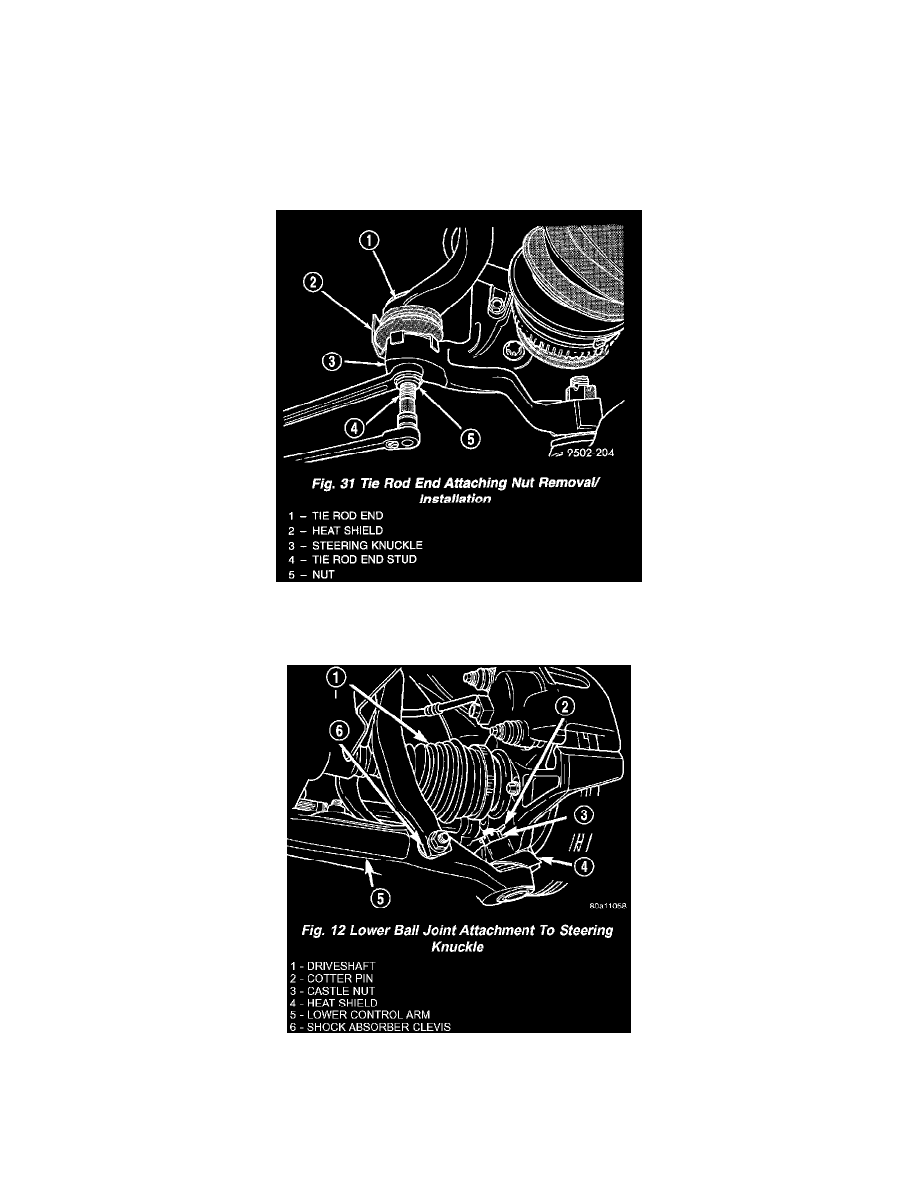
NOTE: Removing the outer tie rod from the steering knuckle allows the steering knuckle to be turned further. This allows better access to the
steering knuckle when striking it to remove the ball joint stud from the steering knuckle.
3. Remove nut attaching the outer tie rod to steering knuckle. Remove nut from tie rod end by holding tie rod stud with a socket while loosening and
removing nut with wrench.
4. Remove outer tie rod from steering knuckle using Remover, Special Tool C-3894-A.
5. Remove cotter pin and castle nut from lower ball joint stud.
CAUTION: No tool is to be inserted between the steering knuckle and the lower ball joint to separate the lower ball joint from the steering
knuckle. The steering knuckle is to be separated from the ball joint only using the procedure as described in step Step 6 below.
CAUTION: When striking the steering knuckle, do not hit the heat shield covering the ball joint grease seal. Bending the heat shield against the