
Viper GTS V10-488 8.0L (1998)
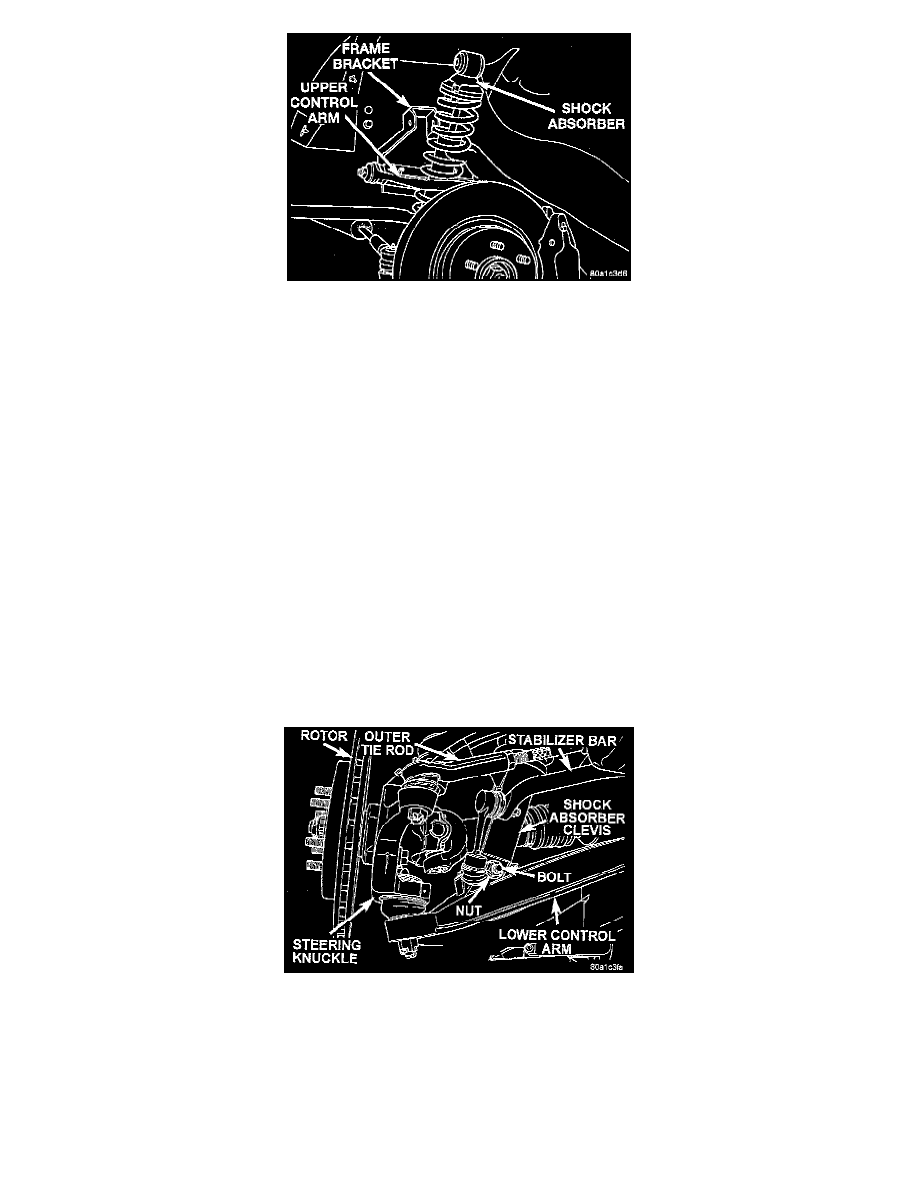
6. Remove shock absorber/coil spring assembly from vehicle, out through center of upper front control arm.
CAUTION: When the shock absorbers are installed on this vehicle, the vehicle must be at design height before either shock absorber mounting bolt is
tightened and torqued to specifications. This is required to maintain the vehicles correct curb height.
INSTALL
1. Install shock absorber/coil spring assembly on vehicle through center of upper control arm.
2. Install the shock absorber in mounting bracket on lower control arm. Install the shock absorber attaching bolt. DO NOT TIGHTEN BOLT AT
THIS TIME
3. Using a pry bar carefully push down on the upper control arm far enough to install the top of the shock absorber in the frame bracket.
4. Install the shock absorber to frame bracket bolt. DO NOT TIGHTEN BOLT AT THIS TIME
5. Install the wheel and tire assembly.
6. Tighten the wheel mounting stud nuts in proper sequence until all nuts are torqued to half specification. Then repeat the tightening sequence to the
full specified torque of 122 Nm (90 ft. lbs.).
7. Lower the vehicle to ground from jack stands or hoist.
8. Position vehicle on an alignment rack.
9. Install the front and rear Vehicle Height Checking Fixtures, Special Tools 6914 on the front and rear wheel flanges.
10. Ballast the vehicle to the correct design height. Refer to Alignment.
11. Torque the shock absorber upper and lower mounting bolts to 135 Nm (100 ft. lbs.).
Rear
REMOVE
1. Raise vehicle on jackstands or centered on a frame contact type hoist.
2. Remove rear wheel and tire.
3. Remove the nut and bolt mounting the shock absorber clevis to the mounting bracket/isolator on the lower control arm.