
Viper SRT-10 V10-8.4L (2008)
Alternator: Service and Repair
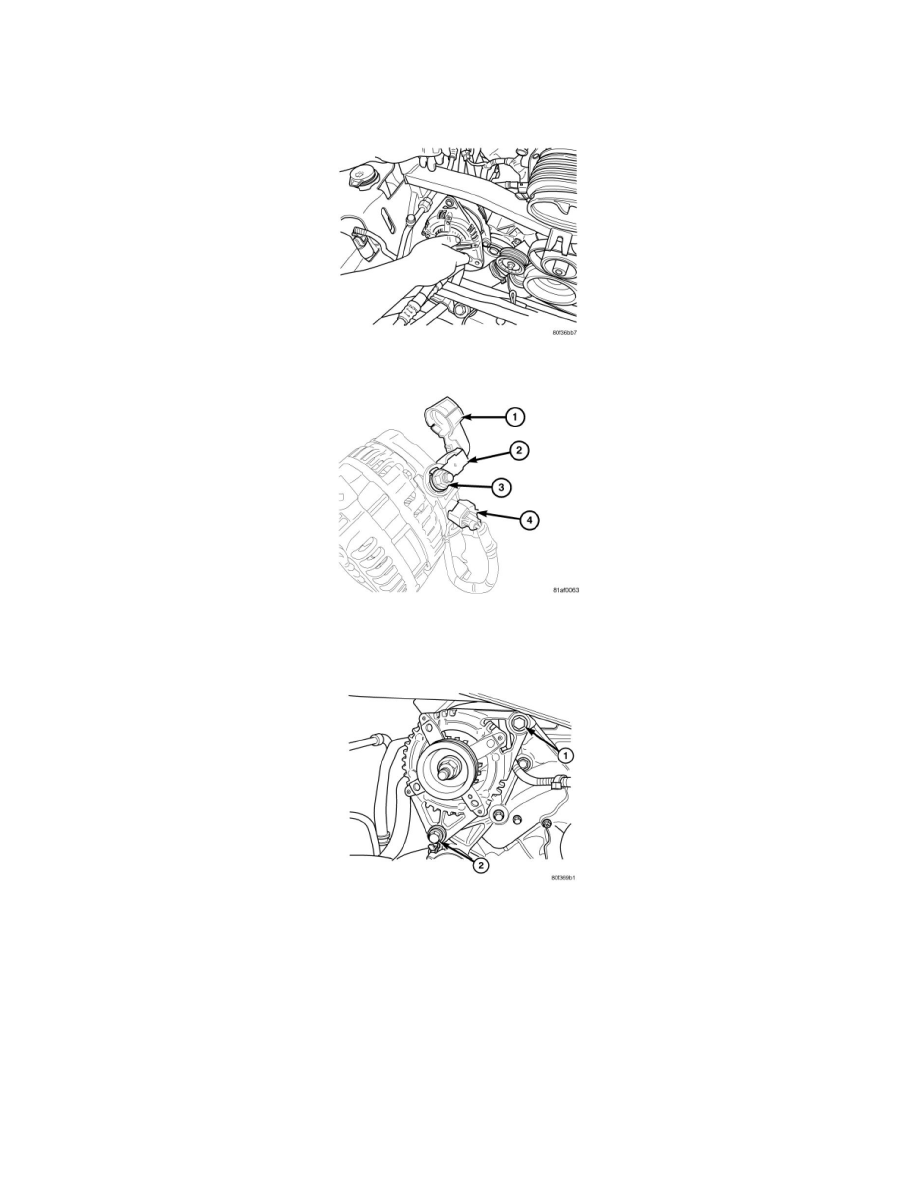
Generator - Installation
INSTALLATION
1. Install generator to vehicle.
2. Connect field wire connector (4) into generator.
3. Install B+ terminal (3) and nut (2) to generator mounting stud. Tighten nut to 14 Nm (124 in. lbs.)
4. Snap plastic protective cover (1) to B+ terminal.
5. Install the lower mounting bolt (2) and nut.
6. Install upper mounting bolt (1) and tighten bolts to 52 Nm (38.5 ft. lbs).
CAUTION: Never force a belt over a pulley rim using a screwdriver. The synthetic fiber of the belt can be damaged.
CAUTION: When installing a serpentine accessory drive belt, the belt MUST be routed correctly. The water pump will be rotating in the
wrong direction if the belt is installed incorrectly, causing the engine to overheat. Refer to belt routing label in engine compartment, or refer to
Belt Schematics in 7, Cooling System.
7. Install generator drive belt, refer to See: Engine, Cooling and Exhaust/Engine/Drive Belts, Mounts, Brackets and Accessories/Drive Belt/Service
and Repair/Removal and Replacement/Accessory Drive Belt - Installation.
8. Install air cleaner assembly, refer to See: Engine, Cooling and Exhaust/Engine/Tune-up and Engine Performance Checks/Air Cleaner
Housing/Service and Repair/Air Cleaner Housing - Installation.
9. Connect the negative battery cable, tighten the nut to 10 Nm (90 in. lbs.).