
Eagle Sedan L6-258 4.2L (1984)
^
Misaligned doors, windows, deck lid.
^
Missing, loose or damaged weatherstripping.
^
Missing or loose grommets in doors, trunk area or dash panel.
^
Gaps in sealed seams or lack of sealer.
^
Hollow spot welds in gutters and welded seams.
Interior Inspection
Remove mats, carpeting and trim from suspected leak areas and look for evidence of water tracking. Tracking will usually indicate leak direction and
help pinpoint the source.
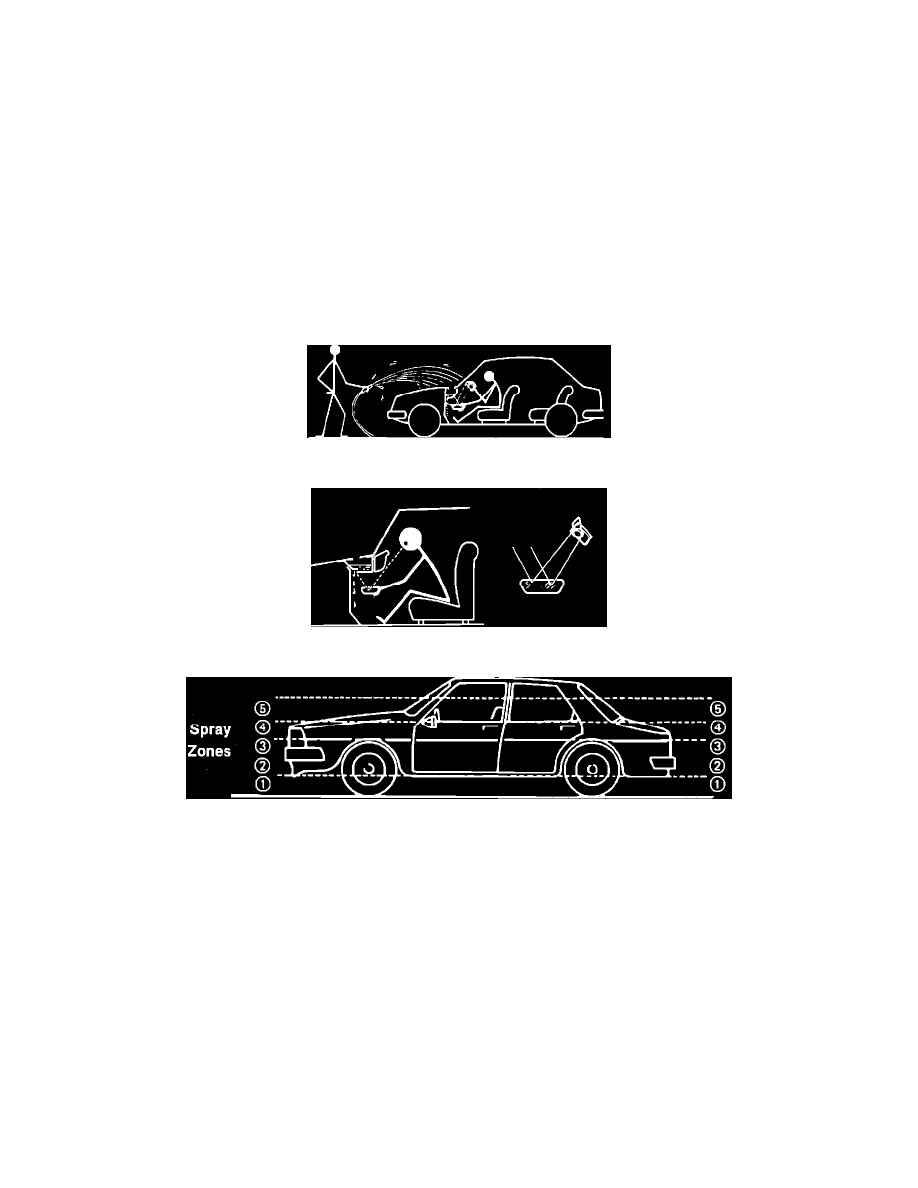
Water Test
FIG. 1 - LEAK SOURCES INSIDE VEHICLE
FIG. 2 - HARD TO SEE AREAS
FIG. 3
The next diagnostic step is the water test which should be performed with two men for best results. One man sprays while the second man checks for leak
sources inside the vehicle (Fig. 1).
Use a water pressure of 27 to 42 psi (2 to 3 bars) and spray the vehicle with a standard garden hose nozzle. A flashlight and mirror should be used to
inspect hard to see areas (Fig. 2). Light reflecting on the mirror will brighten dark areas considerably.
Water Test Methods
The method of spraying the vehicle is important for effective diagnosis. Random spraying may miss the actual leak source. Spray pattern must be
thorough and methodical as shown in Figure 3.
Start at the lowest part of the vehicle and work your way upward through each of the spray zones (Fig. 3).