
Talon FWD L4-1997cc 2.0L DOHC Turbo (1995)
Drive/Propeller Shaft: Service and Repair
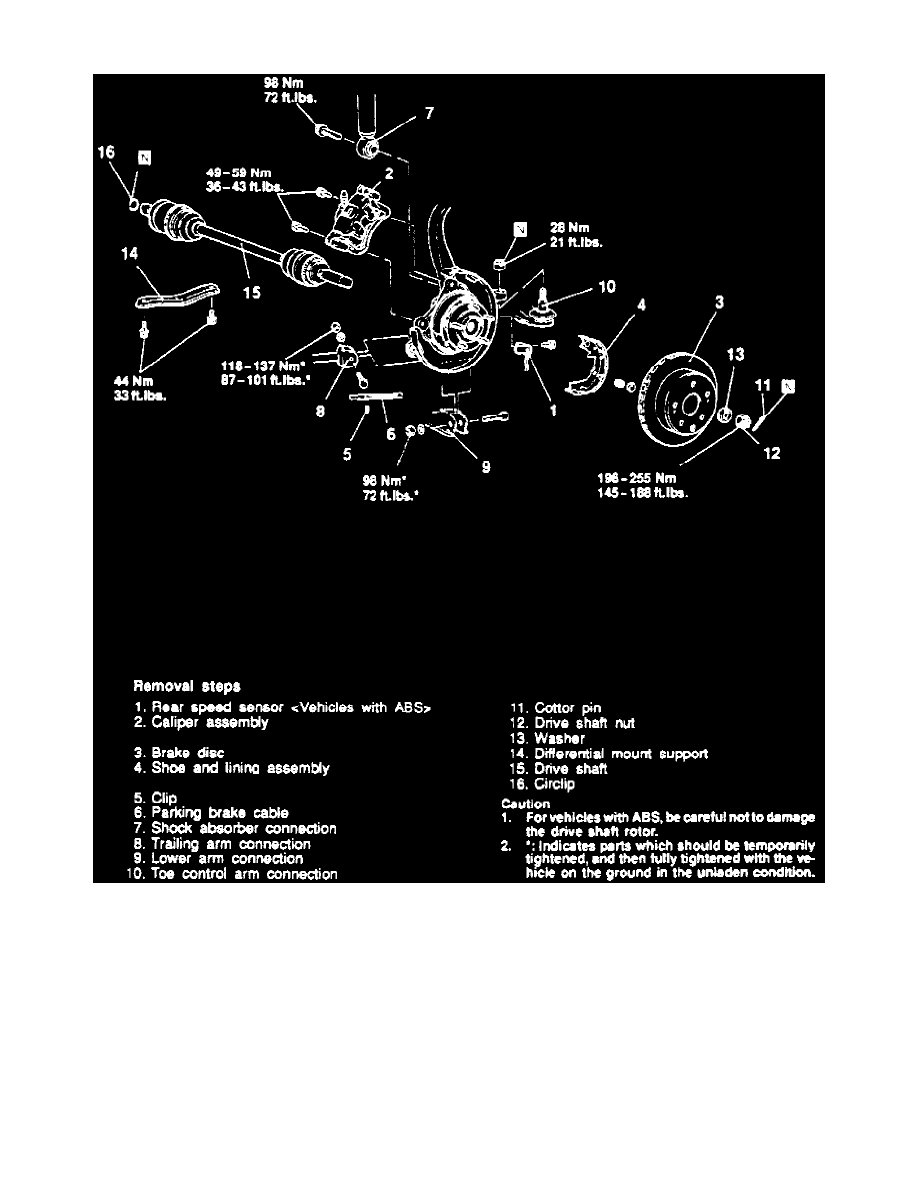
Fig. 3 Driveshaft Replacement
Remove rear driveshaft in numbered sequence, noting the following:
1. Remove driveshaft nut using removal tool No. MB990767, or equivalent.
2. Remove driveshaft by pushing the lower part of the knuckle to the outside of the vehicle, then separate the driveshaft from the differential carrier.
At this time, use a suitable tire lever or similar tool to separate the driveshaft connection.
3. Reverse procedure to install noting the following:
a. Ensure proper driveshaft placement. The righthand driveshaft has an orange boot band, while the lefthand driveshaft has a green boot band.
b. Ensure differential carrier oil seal is not damaged by driveshaft spline.
c. Using special tool No. MB990767, or equivalent, tighten driveshaft nut to specifications. Ensure there is no load on wheel bearings.