
Talon FWD L4-1997cc 2.0L DOHC Turbo VIN F SMFI (1998)
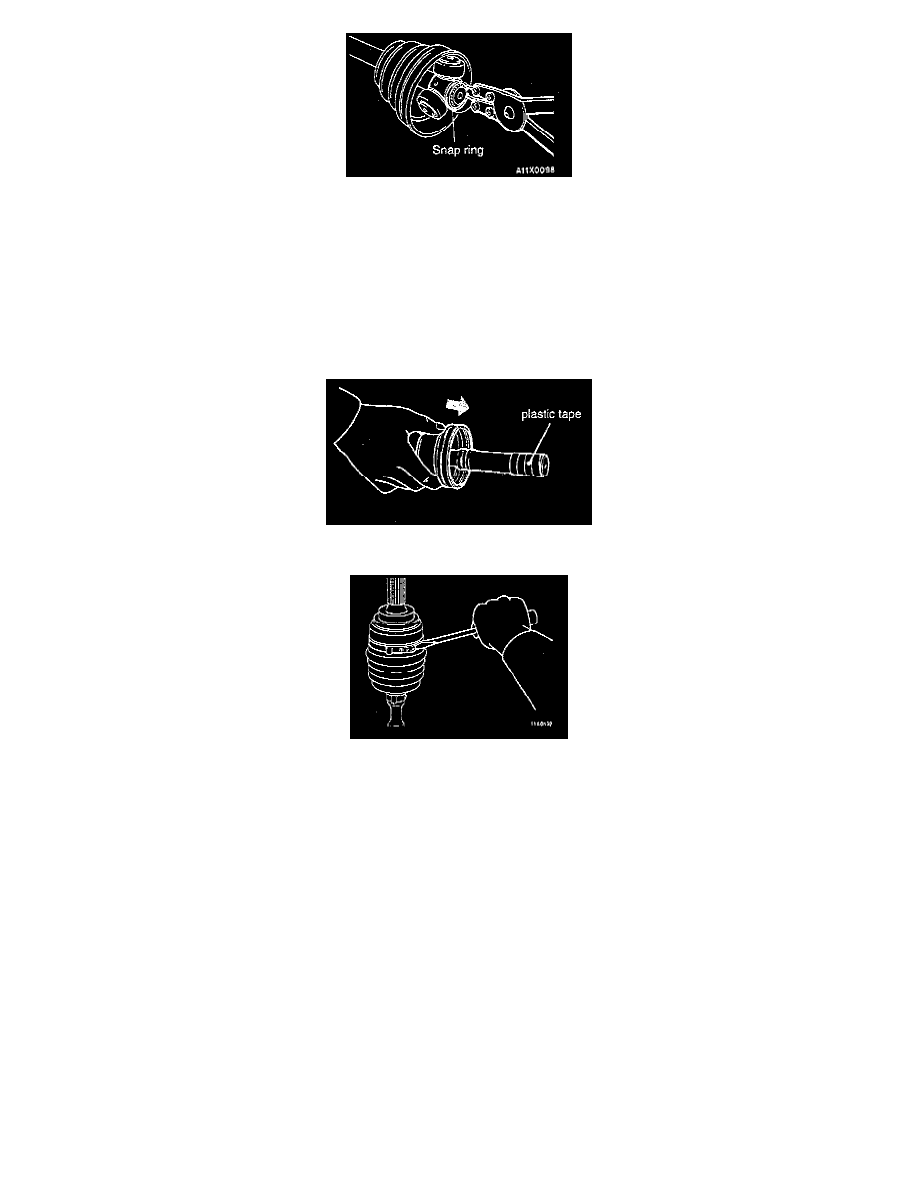
3. Remove the snap ring from the drive shaft with the snap ring pliers.
4. Take out the spider assembly from the drive shaft.
5. Clean the spider assembly.
CAUTION:
1. Do not disassemble the spider assembly.
2. Use care in handling so as not to damage the drive shaft.
6. Wipe the grease off of the spline portion.
7. Remove the T.J. boot.
NOTE: If the boot is reused, wrap plastic tape around the drive shaft spline so that the boot is not damaged when it is removed.
8. Remove small and large band clamp.
INSPECTION
-x Check the drive shaft for damage, bending or corrosion.
-x Check the drive shaft spline part for wear or damage.
-x Check the spider assembly for roller rotation, wear or corrosion.
-x Check the groove inside T.J. case for wear of corrosion.
-x Check the dynamic damper for damage or cracking.
-x Check the boots for deterioration, damage or cracking.
REASSEMBLY
1. Follow disassembly steps in reverse order for assembly, noting the following.